Night photography can be both challenging and rewarding, offering you the chance to capture the magic of the night. In this guide, you’ll explore essential tips and techniques for stunning low-light shots. From selecting the right camera settings to mastering exposure and light painting, you’ll find everything you need to enhance your night photography skills. We’ll dive into capturing stars, cityscapes, and even the Milky Way, ensuring you have all the info to create breathtaking images after the sun goes down. Ready to light up the night with your camera? Let’s get started!
Key Takeaways
-
- Choose the right camera settings.
-
- Use a sturdy tripod.
-
- Understand exposure in low-light.
-
- Try light painting techniques.
-
- Capture stars and the Milky Way.
Choosing the Right Camera Settings for Night Photography
Diving into night photography can feel like stepping into a different world. The rules are different. The light is scarce, and the challenges are many. But with the right camera settings, you can capture stunning images that showcase the beauty of urban landscapes and the majesty of the night sky.
Adjusting ISO for Low-Light Conditions
ISO is your camera’s sensitivity to light. In low-light conditions, like those found at night, you need to increase the ISO to capture enough light. However, cranking up the ISO too high can introduce noise, which can ruin your shot.
Here’s a handy table to guide you:
| ISO Setting | Use Case | Pros | Cons |
|---|---|---|---|
| 100-400 | Well-lit urban areas, twilight | Minimal noise, high detail | Requires longer exposure |
| 800-1600 | Dimly lit streets, early night | Balanced sensitivity and noise | Moderate noise |
| 3200-6400 | Starry skies, very dark environments | Captures faint details | High noise, may need post-processing |
Adjusting your ISO is a balancing act. You want to capture enough light without introducing too much noise. Start with a lower ISO and gradually increase it until you find the sweet spot for your specific scene.
Setting the Correct Shutter Speed
Shutter speed controls how long your camera’s sensor is exposed to light. For night photography, you often need a longer shutter speed to allow more light to hit the sensor. But beware, a long shutter speed can also capture unwanted motion blur.
Heres a quick guide:
| Shutter Speed | Use Case | Pros | Cons |
|---|---|---|---|
| 1/60 – 1/30 sec | Handheld shots, cityscapes | Reduces motion blur | Limited light capture |
| 1/10 – 1 sec | Static subjects, light trails | Captures more light | Requires a tripod |
| 1 sec – 30 sec | Star trails, very dark scenes | Captures faint celestial objects | High risk of motion blur |
For capturing the stars or the Milky Way, you might need to use a shutter speed between 15-30 seconds. This allows your camera to collect enough light to make those distant stars visible. But remember, the longer the exposure, the more likely you are to capture unwanted movement, so always use a sturdy tripod.
Essential Gear for Stunning Night Shots
The Importance of a Sturdy Tripod
When you’re out in the dark, trying to capture the beauty of the night sky or city lights, a sturdy tripod becomes your best friend. Without it, your photos can turn out blurry, especially when using long exposure times.
Imagine you’re setting up your camera to capture the Milky Way. You press the shutter button, and even the tiniest shake can ruin your shot. That’s why a solid tripod is crucial. It keeps your camera steady, allowing you to take those long exposures without any unwanted movement.
Key Features to Look For:
| Feature | Importance |
|---|---|
| Stability | Prevents camera shake, ensuring sharp images. |
| Weight | Lightweight for portability but heavy enough to stay stable in the wind. |
| Height | Adjustable height for flexibility in various shooting conditions. |
| Material | Carbon fiber or aluminum for durability and ease of transport. |
For those interested in exploring more about tripods, you might find this guide on tripods for astrophotography insightful.
Using Remote Shutters and Intervalometers
When you’re shooting in low light, even the slightest touch can cause your camera to shake. That’s where remote shutters and intervalometers come in handy. These tools allow you to trigger your camera without physically touching it, ensuring your images remain sharp.
Why You Need Them:
-
- Remote Shutters: These are perfect for single shots. You can stand back, press the button, and your camera takes the photo without any shake.
-
- Intervalometers: These are great for time-lapse photography or taking multiple shots over a period. You can set the intervalometer to take a photo every few seconds, minutes, or hours.
Top Benefits:
| Benefit | Description |
|---|---|
| Minimizes Camera Shake | Ensures sharp images by avoiding physical contact with the camera. |
| Convenience | Allows for hands-free operation, especially useful in cold weather. |
| Versatility | Ideal for both single shots and time-lapse photography. |
Choosing the Best Lenses for Night Photography
The lens you choose can make a world of difference in your night photography. Some lenses are better suited for low-light conditions, helping you capture more detail and reduce noise.
Factors to Consider:
| Factor | Importance |
|---|---|
| Aperture | A wider aperture (e.g., f/1.4, f/2.8) allows more light to enter, essential for night shots. |
| Focal Length | Wide-angle lenses (e.g., 14mm, 24mm) are great for capturing expansive night skies. |
| Build Quality | Durable lenses withstand harsh conditions, ensuring longevity and reliability. |
For a deeper dive into the best lenses for night photography, you might want to check out this comprehensive list of essential lenses for capturing the night sky.
Camera Settings for Night Photography
Getting the right camera settings is crucial for capturing stunning night shots. The three main settings to focus on are ISO, aperture, and shutter speed.
ISO: This controls your camera’s sensitivity to light. A higher ISO can help you capture more light, but it also introduces noise. It’s a balancing act.
Aperture: A wider aperture (lower f-number) allows more light to hit the sensor, crucial for night photography. However, it also affects the depth of field.
Shutter Speed: This determines how long your camera’s sensor is exposed to light. Longer exposures can capture more light but require a tripod to avoid blur.
Recommended Settings:
| Setting | Typical Range |
|---|---|
| ISO | 800 to 3200 |
| Aperture | f/1.4 to f/4 |
| Shutter Speed | 10 seconds to 30 seconds |
Understanding Exposure in Night Photography
Exposure is all about how much light hits your camera’s sensor. In night photography, getting the exposure right is a bit tricky but essential for capturing detailed images.
Components of Exposure:
-
- ISO: Higher ISO increases sensitivity but also noise.
-
- Aperture: Wider aperture lets in more light but affects depth of field.
-
- Shutter Speed: Longer shutter speeds capture more light but require stability.
Exposure Triangle:
| Component | Effect on Image |
|---|---|
| ISO | Higher ISO increases brightness but also noise. |
| Aperture | Wider aperture (lower f-number) allows more light, affecting depth of field. |
| Shutter Speed | Longer shutter speeds capture more light but require a tripod to avoid blur. |
Light Painting Techniques
Light painting is a fun and creative way to add a new dimension to your night photography. By using a light source like a flashlight or glow stick, you can “paint” light into your photos.
How to Get Started:
-
- Set Up Your Camera: Use a tripod and set your camera to a long exposure (10-30 seconds).
-
- Choose Your Light Source: Flashlights, glow sticks, or even your phone can work.
-
- Start Painting: Move your light source around in the frame while the shutter is open.
Tips for Success:
| Tip | Description |
|---|---|
| Plan Your Shot | Have a clear idea of what you want to create before you start. |
| Use a Tripod | Keeps your camera steady, ensuring sharp images. |
| Experiment | Try different light sources and movements for unique effects. |
Photographing Stars and the Milky Way
Capturing the stars and the Milky Way is one of the most rewarding aspects of night photography. However, it requires specific techniques and settings.
Key Tips:
-
- Find a Dark Location: Light pollution can ruin your shots. Head out to the countryside or a dark sky park.
-
- Use a Wide-Angle Lens: A wide-angle lens (14mm, 24mm) captures more of the night sky.
-
- Set Your Camera: Use a high ISO (1600-3200), a wide aperture (f/2.8), and a long shutter speed (20-30 seconds).
Recommended Gear:
| Gear | Importance |
|---|---|
| Wide-Angle Lens | Captures more of the night sky. |
| Sturdy Tripod | Keeps your camera steady during long exposures. |
| Remote Shutter | Prevents camera shake, ensuring sharp images. |
For those looking to delve deeper into astrophotography, this guide on how to choose the best telescope for astrophotography can be quite enlightening.
Incorporating Urban Landscapes
Night photography isn’t just about capturing the stars. Urban landscapes offer a wealth of opportunities for stunning photos. The key is to use the available light to your advantage.
Tips for Urban Night Photography:
-
- Use Reflections: Water, glass, and other reflective surfaces can add depth and interest to your photos.
-
- Play with Light Trails: Capture the movement of cars, buses, and other vehicles to create dynamic light trails.
-
- Find Unique Angles: Look for interesting perspectives and compositions to make your photos stand out.
Recommended Settings:
| Setting | Typical Range |
|---|---|
| ISO | 400 to 1600 |
| Aperture | f/4 to f/8 |
| Shutter Speed | 1 second to 30 seconds |
Using Filters in Night Photography
Filters can be incredibly useful in night photography, helping you control light and add creative effects to your images.
Types of Filters:
-
- Neutral Density (ND) Filters: Reduce the amount of light entering the lens, allowing for longer exposures without overexposing the image.
-
- Light Pollution Filters: Help reduce the orange glow from streetlights, enhancing the natural colors of the night sky.
Benefits of Using Filters:
| Filter Type | Benefit |
|---|---|
| Neutral Density (ND) | Allows for longer exposures, creating smooth, flowing effects in water and clouds. |
| Light Pollution | Reduces unwanted light, enhancing the natural colors of the night sky. |
For a more detailed look at the best filters for night photography, you might find this guide on the best filters for enhancing your astrophotography shots helpful.
Post-Processing Tips
Post-processing is an essential part of night photography. It allows you to enhance your images, bringing out details and colors that might not be visible straight out of the camera.
Key Techniques:
-
- Adjust Exposure: Fine-tune the exposure to bring out details in the shadows and highlights.
-
- Reduce Noise: Use noise reduction tools to minimize the graininess that can appear in high-ISO images.
-
- Enhance Colors: Boost the saturation and vibrance to make the colors pop.
Recommended Software:
| Software | Features |
|---|---|
| Adobe Lightroom | Comprehensive editing tools, including exposure adjustment and noise reduction. |
| Adobe Photoshop | Advanced editing capabilities for more detailed adjustments. |
| Affinity Photo | Affordable alternative with powerful editing features. |
Must-Have Accessories
Having the right accessories can make a big difference in your night photography experience. Here are some essentials you should consider.
Essential Accessories:
-
- Headlamp: A headlamp with a red light mode is essential for navigating in the dark without ruining your night vision.
-
- Extra Batteries: Long exposures can drain your batteries quickly, so always have spares on hand.
-
- Portable Power Bank: Keeps your camera and other devices charged during long shoots.
Recommended Accessories:
| Accessory | Importance |
|---|---|
| Headlamp | Essential for navigating in the dark. |
| Extra Batteries | Ensures you don’t run out of power during long shoots. |
| Portable Power Bank | Keeps your camera and other devices charged. |
For a more comprehensive list of must-have accessories, you might find this guide on must-have accessories for every astrophotographer useful.
Budget-Friendly Gear
You don’t need to break the bank to get started with night photography. There are plenty of budget-friendly options that can help you capture stunning images without spending a fortune.
Budget-Friendly Gear:
-
- Entry-Level Cameras: There are many affordable cameras that perform well in low-light conditions.
-
- Affordable Lenses: You don’t need the most expensive lenses to get great results. Look for lenses with a wide aperture.
-
- Inexpensive Tripods: There are many budget-friendly tripods that offer good stability and features.
Recommended Budget-Friendly Gear:
| Gear | Importance |
|---|---|
| Entry-Level Cameras | Affordable options that perform well in low-light conditions. |
| Affordable Lenses | Wide-aperture lenses that won’t break the bank. |
| Inexpensive Tripods | Budget-friendly tripods that offer good stability. |
For more tips on budget-friendly gear, you might find this guide on budget-friendly astrophotography gear for beginners helpful.
Portable Power Solutions
When you’re out in the field, having a reliable power source is crucial. Portable power solutions can keep your camera and other devices running throughout the night.
Portable Power Solutions:
-
- Power Banks: These are great for charging your camera and other devices on the go.
-
- Solar Chargers: Ideal for longer trips where you might not have access to electricity.
-
- Battery Grips: These attach to your camera and provide extra battery life.
Recommended Portable Power Solutions:
| Solution | Importance |
|---|---|
| Power Banks | Keeps your camera and other devices charged on the go. |
| Solar Chargers | Ideal for longer trips without access to electricity. |
| Battery Grips | Provides extra battery life for your camera. |
For more information on portable power solutions, you might find this guide on portable power solutions for nighttime astrophotography insightful.
Comparing DSLRs and Mirrorless Cameras
When it comes to night photography, the choice between DSLRs and mirrorless cameras can be a tough one. Both have their pros and cons, and the right choice depends on your specific needs.
DSLRs vs. Mirrorless Cameras:
| Feature | DSLR | Mirrorless |
|---|---|---|
| Size and Weight | Generally larger and heavier. | More compact and lightweight. |
| Battery Life | Typically longer battery life. | Often shorter battery life. |
| Viewfinder | Optical viewfinder provides a clear, real-time view. | Electronic viewfinder offers real-time exposure adjustments. |
| Lens Availability | Wide range of lenses available. | Growing selection of lenses, but still fewer options than DSLRs. |
For a more detailed comparison, you might find this guide on comparing DSLRs and mirrorless cameras for astrophotography helpful.
Guide to Astrophotography Mounts and Tracking Systems
Mounts and tracking systems are essential for capturing long-exposure shots of the night sky. They help keep your camera aligned with the stars, allowing for longer exposures without star trails.
Types of Mounts and Tracking Systems:
-
- Alt-Azimuth Mounts: Simple to use but not ideal for long exposures.
-
- Equatorial Mounts: More complex but perfect for long-exposure astrophotography.
-
- Star Trackers: Portable and easy to use, great for beginners.
Recommended Mounts and Tracking Systems:
| System | Importance |
|---|---|
| Alt-Azimuth Mounts | Simple to use, ideal for beginners. |
| Equatorial Mounts | Perfect for long-exposure astrophotography. |
| Star Trackers | Portable and easy to use, great for beginners. |
For more information on mounts and tracking systems, you might find this guide on astrophotography mounts and tracking systems insightful.
Mastering Exposure in Night Photography
Understanding the Exposure Triangle
When you dive into night photography, understanding the Exposure Triangle becomes crucial. This triangle consists of three elements: Aperture, Shutter Speed, and ISO. These settings work together to control the amount of light that hits your camera’s sensor.
Aperture
The aperture, or f-stop, controls the size of the lens opening. A wider aperture (lower f-number) allows more light to enter, which is essential in low-light conditions. For night photography, an aperture between f/2.8 and f/4 is ideal.
Shutter Speed
Shutter speed determines how long the camera’s sensor is exposed to light. For night photography, you’ll often use longer shutter speeds to capture more light. This can range from a few seconds to several minutes, depending on the scene.
ISO
ISO controls the camera’s sensitivity to light. A higher ISO can help you capture brighter images in low light but be cautious—higher ISO settings can introduce noise. For night photography, an ISO range of 800 to 3200 is generally effective.
Here’s a quick reference table for the Exposure Triangle settings in night photography:
| Setting | Ideal Range |
|---|---|
| Aperture | f/2.8 – f/4 |
| Shutter Speed | 10s – 30s |
| ISO | 800 – 3200 |
Techniques for Long Exposure Shots
Long exposure shots can transform ordinary night scenes into mesmerizing images. Here are some techniques to help you master this art:
Use a Tripod
A sturdy tripod is essential for long exposure shots. It keeps your camera stable and prevents any blur caused by camera shake. If you’re looking for recommendations, check out this guide on tripods for astrophotography.
Remote Shutter Release
Using a remote shutter release or the camera’s self-timer function can help you avoid any movement when pressing the shutter button. This is especially important for long exposures.
Bulb Mode
For exposures longer than 30 seconds, you’ll need to use Bulb Mode. This setting allows you to keep the shutter open for as long as you hold down the shutter button. It’s perfect for capturing the Milky Way or other celestial objects.
Light Painting
Light painting involves using a light source to “paint” parts of your scene during a long exposure. This can add interesting elements to your photos and highlight specific areas. Experiment with different light sources like flashlights, LED strips, or even sparklers.
Avoiding Overexposure and Underexposure
Balancing exposure in night photography can be tricky. Here are some tips to help you avoid overexposure and underexposure:
Histogram
Use your camera’s histogram to check exposure levels. A well-balanced histogram will have data spread across the middle, without too much clustering on either end.
Bracketing
Bracketing involves taking multiple shots at different exposure settings. This technique ensures you capture a range of exposures, which you can later merge in post-processing.
Post-Processing
Post-processing can help you fine-tune exposure. Software like Adobe Lightroom or Photoshop allows you to adjust highlights, shadows, and overall exposure to achieve the perfect balance.
ND Filters
Neutral Density (ND) filters can help you manage exposure by reducing the amount of light entering the lens. This is particularly useful when shooting in urban environments with bright streetlights or illuminated buildings. For more on filters, check out this comprehensive guide.
Additional Tips for Night Photography
Selecting the Right Camera and Lens
Choosing the right camera and lens can significantly impact your night photography. DSLRs and mirrorless cameras are both excellent options, but each has its pros and cons. For a detailed comparison, refer to this article. Additionally, having a lens with a wide aperture is crucial. For a list of recommended lenses, visit this resource.
Tripod Stability
A stable tripod is non-negotiable for night photography. Ensure your tripod can handle your camera’s weight and withstand windy conditions. For a deeper dive into tripod stability and precision, explore this guide.
Power Solutions
Night photography sessions can be lengthy, and you don’t want to run out of power. Portable power solutions like external battery packs or power banks are lifesavers. Check out this article for more information on keeping your gear powered.
Must-Have Accessories
Having the right accessories can make a world of difference. Items like a headlamp, extra batteries, and lens cleaning kits are essential. For a comprehensive list of must-have accessories, visit this page.
Light Painting Techniques for Creative Night Photography
Capturing the night sky or urban landscapes under the cloak of darkness can be an exhilarating experience. But have you ever thought about adding a touch of your creativity to these mesmerizing scenes? Enter light painting—a technique that allows you to bring your night photos to life with vibrant streaks of light and unique patterns. Lets dive into the essentials of light painting and how you can combine it with your night photography.
Tools You Need for Light Painting
Before you start painting with light, youll need some essential tools. Heres a handy table to summarize what youll require:
| Tool | Description |
|---|---|
| Camera | A DSLR or mirrorless camera with manual settings. |
| Tripod | A sturdy tripod to keep your camera steady during long exposures. |
| Light Sources | Flashlights, LED sticks, glow sticks, or even your smartphones flashlight. |
| Remote Shutter | Helps to avoid camera shake when taking long exposures. |
| Dark Clothing | To minimize your presence in the photo while moving around with the light. |
Step-by-Step Guide to Light Painting
Ready to add some flair to your night photography? Follow these steps to get started with light painting:
-
- Set Up Your Camera: Place your camera on a tripod and switch to manual mode. Set your ISO to a low value, around 100-400, to reduce noise. Choose a slow shutter speed, typically between 10 to 30 seconds, depending on how much time you need to paint with light.
-
- Frame Your Shot: Compose your shot in the dark. Use a flashlight to illuminate your subject and focus manually. Once youre happy with the composition, turn off the flashlight.
-
- Start the Exposure: Use a remote shutter or the cameras timer to start the exposure. This helps in avoiding any camera shake.
-
- Paint with Light: Move around with your light source, creating patterns, shapes, or illuminating specific parts of the scene. The key is to keep moving so you dont appear in the shot.
-
- Review and Adjust: Check the photo on your cameras LCD screen. If the light painting isnt bright enough or the patterns arent clear, adjust the exposure time or try different movements with your light source.
-
- Experiment: Light painting is all about creativity. Experiment with different light sources, colors, and movements to create unique effects.
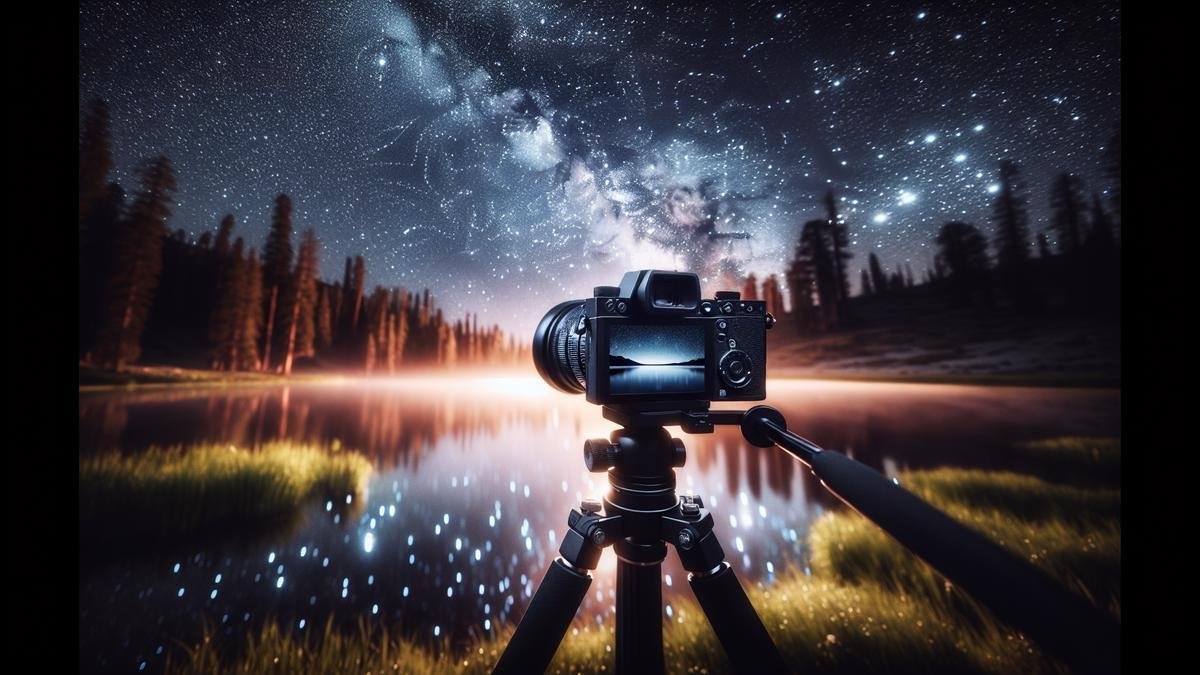
Capturing the Night Sky: Stars and the Milky Way
Venturing out into the night with your camera in hand, ready to capture the vast expanse of the sky, is both exhilarating and challenging. The night sky, with its twinkling stars and the ethereal Milky Way, offers a canvas like no other. But to capture its beauty, you need a blend of knowledge, patience, and the right gear.
Best Times and Locations for Star Photography
When it comes to photographing stars, timing and location are everything. The best time to capture the night sky is during the new moon phase. Why? Because the absence of the moon means less light pollution, allowing the stars to shine brighter. Additionally, the hours after midnight, when the sky is at its darkest, are prime for star photography.
Ideal Locations
Finding the perfect spot is crucial. Urban areas are usually inundated with artificial light, which can drown out the stars. Instead, head to remote locations, away from city lights. National parks, mountainous regions, and deserts are often ideal. Here’s a handy table to help you choose your next stargazing spot:
| Location Type | Light Pollution Level | Accessibility | Best Time to Visit |
|---|---|---|---|
| National Parks | Low | Moderate | Year-round |
| Deserts | Very Low | Difficult | Winter |
| Mountainous Regions | Low to Moderate | Varies | Summer |
| Coastal Areas | Moderate | Easy | Spring |
Camera Settings for Shooting the Milky Way
Capturing the Milky Way requires more than just pointing your camera at the sky and clicking. You need to fine-tune your settings to get the best shot. Heres a breakdown of the essential settings:
Aperture and ISO
-
- Aperture: Use a wide aperture (f/2.8 or lower) to allow as much light as possible to hit your camera’s sensor.
-
- ISO: Set your ISO between 1600 and 3200. This range strikes a balance between light sensitivity and noise.
Shutter Speed and Focus
-
- Shutter Speed: A good rule of thumb is the 500 Rule: divide 500 by the focal length of your lens to get the maximum shutter speed before stars start to trail. For instance, with a 20mm lens, use a shutter speed of 25 seconds (500/20 = 25).
-
- Focus: Manually focus your lens to infinity. Use live view and zoom in on a bright star to fine-tune the focus.
Post-Processing Tips for Starry Night Photos
After capturing your shots, the magic really begins in the post-processing phase. Here, you can enhance the details and bring out the best in your night sky images.
Basic Adjustments
-
- White Balance: Adjust the white balance to get a natural look. A cooler temperature often works well for night sky photos.
-
- Exposure: Increase the exposure slightly to brighten the stars, but be careful not to overexpose and lose detail.
Advanced Techniques
-
- Noise Reduction: Use noise reduction tools to clean up the image, especially if you shot at a high ISO.
-
- Contrast and Clarity: Boost the contrast and clarity to make the stars pop. Be subtle to avoid an unnatural look.
Urban Night Photography: Cityscapes and Lights
Finding the Perfect Urban Locations
When you’re on the hunt for the perfect urban spot to capture cityscapes and lights, you need to think like a detective. The city is your playground, filled with hidden gems waiting to be discovered. Start by exploring well-known landmarks, but dont stop there. Venture into lesser-known areas where you might uncover fascinating perspectives.
Key Considerations for Location Scouting:
| Factor | Description |
|---|---|
| Safety | Always prioritize your safety. Well-lit areas are generally safer. |
| Accessibility | Ensure you can easily access the location, especially with heavy equipment. |
| Light Pollution | Some areas have less light pollution, offering clearer shots of the sky. |
| Unique Angles | Look for places that offer unique perspectives of the city. |
Think about iconic skyscrapers, bridges, and busy intersections. These spots often provide dynamic compositions. For example, capturing the light trails of cars zooming past a bridge can create a striking image.
Techniques for Capturing City Lights
Capturing city lights is like painting with light. You need to blend various techniques to create a masterpiece. Here are some essential tips to get you started:
Camera Settings:
-
- ISO: Keep your ISO low (around 100-400) to reduce noise.
-
- Aperture: Use a small aperture (f/8 to f/16) for a greater depth of field.
-
- Shutter Speed: Experiment with long exposures (10-30 seconds) to capture light trails and movement.
Equipment Essentials:
-
- Tripod: A sturdy tripod is crucial for long exposures. Check out some top tripod recommendations.
-
- Remote Shutter Release: This helps avoid camera shake during long exposures.
-
- Wide-Angle Lens: A wide-angle lens can capture more of the scene. Discover more about essential lenses.
Light Painting:
Light painting is a fun technique where you use a handheld light source to “paint” parts of your scene during a long exposure. It adds a creative touch to your photos, making them stand out.
Frequently Asked Questions
What camera settings are best for night photography?
Youll want a high ISO, low aperture (f/2.8 or wider), and a slow shutter speed. Experiment until you find the sweet spot.
Do I need a tripod for night shots?
Yes! A tripod keeps your camera steady, preventing blurs from long exposures. It’s a must-have for night photography.
How can I capture the stars in my photos?
Use a wide-angle lens, high ISO, and a 20-30 second exposure. The wider the lens, the more stars you’ll catch.
What is light painting, and how do I do it?
Light painting involves moving a light source during a long exposure. Try using a flashlight or glow stick to create stunning effects.
How do I focus in the dark?
Switch to manual focus, then use live view and zoom in on a bright object (like a star) to get sharp focus. Alternatively, use the infinity focus setting.

