Looking to dive into the dazzling world of astrophotography without breaking the bank? You’ve come to the right place! Whether you’re a stargazing newbie or just want to capture the night sky in stunning detail, our guide on Budget-Friendly Astrophotography Gear for Beginners has you covered. From affordable cameras to must-have lenses and sturdy tripods, we’ll help you find the best equipment without emptying your wallet. Plus, you’ll learn handy tips and tricks for capturing those breathtaking celestial shots. Get ready to explore the cosmos on a budget!
Key Takeaway
- Affordable gear options available
- Start with a basic DSLR or mirrorless camera
- Use a sturdy tripod
- Try using a remote shutter release
- Practice makes perfect

Essential Camera Options
So, youre diving into the mesmerizing world of astrophotography. Awesome! First things first, you need a camera thats up to the task. Don’t worry, you dont have to break the bank to get started. Lets explore some budget-friendly options.
Best DSLR Cameras for Beginners
When you’re just starting out, you want a camera that’s easy to use but still packs a punch. Here are some top picks:
| Camera | Key Features | Price Range |
|---|---|---|
| Canon EOS Rebel T7 | 24.1 MP, ISO 100-6400, Built-in WiFi | $400-$500 |
| Nikon D3500 | 24.2 MP, ISO 100-25600, Guide Mode | $450-$550 |
| Pentax K-70 | 24.2 MP, ISO 100-102400, Weather-Sealed | $600-$700 |
Canon EOS Rebel T7 is a solid choice. Its user-friendly and has built-in WiFi, making it easy to share your stunning star shots. The Nikon D3500 is another excellent option. It has a Guide Mode thats perfect for beginners. For those who might be shooting in less-than-ideal weather, the Pentax K-70 is weather-sealed, which is a huge plus.
Affordable Mirrorless Cameras
Mirrorless cameras are all the rage these days. Theyre lighter, more compact, and often have better autofocus. Here are a few that wont empty your wallet:
| Camera | Key Features | Price Range |
|---|---|---|
| Sony Alpha a6000 | 24.3 MP, ISO 100-25600, Fast Autofocus | $500-$600 |
| Canon EOS M50 | 24.1 MP, ISO 100-25600, 4K Video | $600-$700 |
| Fujifilm X-T200 | 24.2 MP, ISO 200-12800, Vari-angle Touchscreen | $700-$800 |
The Sony Alpha a6000 is a crowd favorite. Its got fast autofocus and a solid build. The Canon EOS M50 is another great pick, especially if you want to dabble in video. It shoots in 4K! Lastly, the Fujifilm X-T200 has a vari-angle touchscreen, which makes framing your shots a breeze.
Choosing the Right Camera
Now, how do you choose the right camera for you? Here are some things to consider:
- Budget: How much are you willing to spend?
- Features: What features are must-haves for you?
- Ease of Use: Are you comfortable with the cameras interface?
- Portability: Do you need a lightweight camera for travel?
Heres a quick comparison to help you decide:
| Camera Type | Pros | Cons |
|---|---|---|
| DSLR | Longer battery life, More lens options | Bulkier, Heavier |
| Mirrorless | Lighter, Faster autofocus | Shorter battery life, Fewer lens options |
Budget Lenses for Astrophotography
Wide-Angle Lenses on a Budget
When you’re just starting with astrophotography, you don’t need to break the bank. You can capture the night sky’s beauty with a budget-friendly wide-angle lens. These lenses are perfect for capturing vast expanses of the sky, like the Milky Way or star trails.
Here are some affordable wide-angle lenses you might consider:
| Lens | Focal Length | Aperture | Price Range |
|---|---|---|---|
| Rokinon 14mm f/2.8 | 14mm | f/2.8 | $250-$350 |
| Canon EF-S 10-18mm f/4.5-5.6 IS STM | 10-18mm | f/4.5-5.6 | $200-$300 |
| Nikon AF-P DX NIKKOR 10-20mm f/4.5-5.6G VR | 10-20mm | f/4.5-5.6 | $250-$350 |
These lenses won’t cost you an arm and a leg, but they’ll still let you capture stunning wide shots of the night sky.
Why go wide-angle?
- Broader View: Capture more of the sky in a single shot.
- Less Star Movement: Stars appear sharper due to the shorter focal length.
- Versatility: Great for landscapes and other daytime photography too.
Telephoto Lenses for Starry Skies
If you’re more interested in zooming in on specific celestial objects, like the moon or distant planets, a telephoto lens is what you need. You might think these lenses are out of reach, but there are budget options that deliver excellent results.
Here are some affordable telephoto lenses for your astrophotography needs:
| Lens | Focal Length | Aperture | Price Range |
|---|---|---|---|
| Canon EF 75-300mm f/4-5.6 III | 75-300mm | f/4-5.6 | $150-$250 |
| Nikon AF-S DX NIKKOR 55-200mm f/4-5.6G ED VR II | 55-200mm | f/4-5.6 | $150-$250 |
| Tamron 70-300mm f/4-5.6 Di LD Macro | 70-300mm | f/4-5.6 | $150-$200 |
Why choose telephoto?
- Close-Up Shots: Perfect for detailed images of the moon and planets.
- Versatility: Also great for wildlife and sports photography.
- Affordable: You don’t need to spend a fortune to get quality results.
Lens Features to Look For
When choosing a lens for astrophotography, there are a few key features to keep in mind. These features will help you get the best possible shots of the night sky without spending a fortune.
Important Lens Features:
- Aperture: Look for lenses with a wide aperture (f/2.8 or lower). This allows more light to hit the sensor, which is crucial for night photography.
- Focal Length: For wide-angle shots, go for short focal lengths (10-20mm). For telephoto shots, look for longer focal lengths (200-300mm).
- Lens Coating: Anti-reflective coatings reduce lens flare and ghosting, which can ruin night shots.
- Build Quality: While you don’t need a lens built like a tank, some durability is important. Look for lenses with metal mounts and decent weather sealing.
- Manual Focus: Autofocus isn’t always reliable in low light. A lens with a good manual focus ring can be a lifesaver.

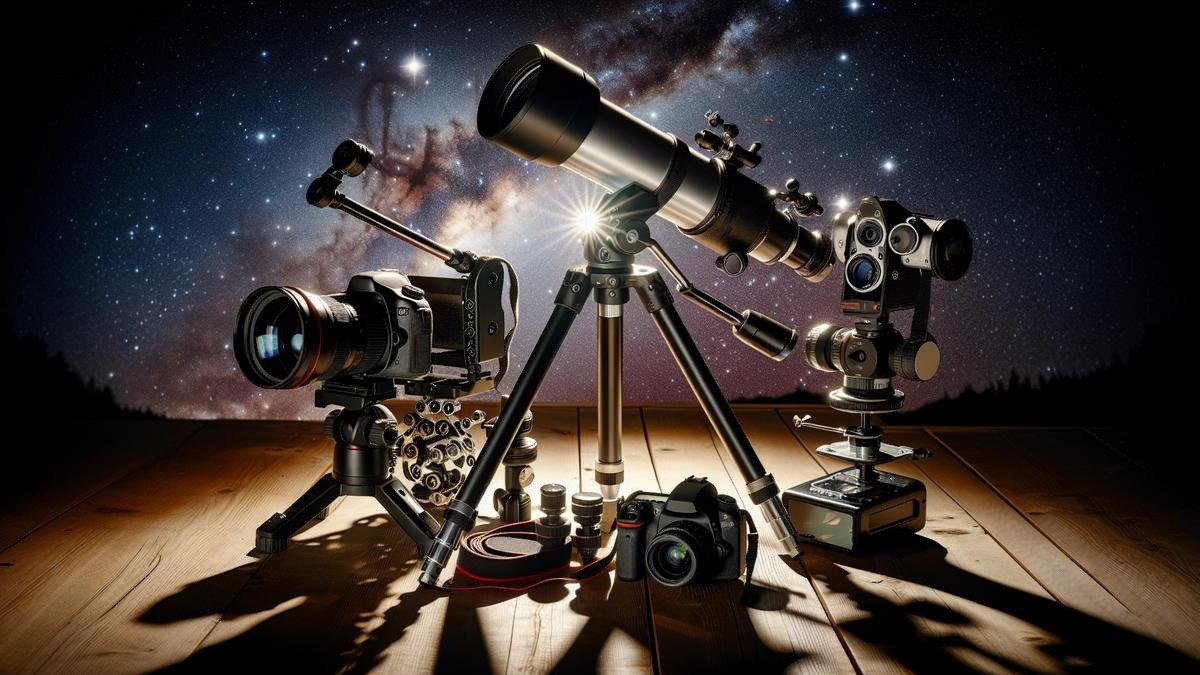
Tripods and Mounts
Sturdy Tripods Under $100
Alright, lets dive straight into the gear thatll keep your camera steady without emptying your wallet. You dont need to spend a fortune to get a reliable tripod. Here are some great options under $100 that wont let you down:
| Tripod | Weight Capacity | Height Range | Price |
|---|---|---|---|
| AmazonBasics 60-Inch | 6.6 lbs | 25-60 inches | ~$25 |
| Neewer Carbon Fiber | 26.5 lbs | 24-66 inches | ~$90 |
| K&F Concept 62-Inch | 22 lbs | 20-62 inches | ~$80 |
AmazonBasics 60-Inch
This tripod is a fantastic starting point. Its lightweight and easy to carry around. Plus, it has a quick-release plate for fast setup. However, its not the sturdiest, so its best for lighter cameras.
Neewer Carbon Fiber
If youre looking for something more durable, the Neewer Carbon Fiber tripod is a solid choice. Its a bit pricier but offers excellent stability and height adjustment. Its perfect for those who want to invest a bit more without breaking the bank.
K&F Concept 62-Inch
The K&F Concept tripod strikes a good balance between affordability and quality. Its sturdy, has a decent height range, and can handle heavier cameras. Its a versatile option for beginners.
Budget-Friendly Mounts
Now, lets talk mounts. A good mount is like the cherry on top of your astrophotography setup. You want something that keeps your camera fixed and steady. Here are some budget-friendly options:
| Mount | Type | Compatibility | Price |
|---|---|---|---|
| Orion EQ-1 | Equatorial | DSLR, Mirrorless | ~$80 |
| Celestron Alt-Az | Altazimuth | DSLR, Mirrorless | ~$70 |
| Sky-Watcher Star Adventurer | Equatorial | DSLR, Mirrorless | ~$100 |
Orion EQ-1
The Orion EQ-1 is a basic equatorial mount thats perfect for beginners. Its easy to set up and helps you track celestial objects with precision. Its a great starting point for those new to astrophotography.
Celestron Alt-Az
If you prefer an altazimuth mount, the Celestron Alt-Az is a great choice. Its simple to use and lightweight, making it easy to transport. Its ideal for quick setups and casual stargazing.
Sky-Watcher Star Adventurer
For those looking to splurge a bit, the Sky-Watcher Star Adventurer offers more advanced features. Its a compact equatorial mount thats perfect for long-exposure photography. Its a bit more expensive but worth it for the added stability and tracking capabilities.
Stability Tips for Clear Shots
So, youve got your tripod and mount, but how do you make sure your shots are crystal clear? Here are some handy tips:
- Use a Remote Shutter Release: This helps reduce camera shake when you press the shutter button.
- Weight Your Tripod Down: Hang a bag or some weights from the center column to add extra stability.
- Avoid Windy Conditions: Wind can cause vibrations. Try to shoot on calm nights or find a sheltered spot.
- Use a Timer: Set a 2-5 second timer to minimize shake from pressing the shutter.
- Level Your Tripod: Make sure your tripod is on a flat, stable surface to avoid tilting.
Accessories to Enhance Your Shots
Filters for Better Night Photos
When you’re diving into astrophotography, filters can be your best friend. They help you capture the true beauty of the night sky by reducing light pollution and enhancing the contrast of celestial objects. Here are a few types of filters you might want to consider:
| Filter Type | Purpose |
|---|---|
| Light Pollution Filters | Cuts down on city lights, making stars pop. |
| Neutral Density Filters | Controls the amount of light entering your lens. |
| UV Filters | Protects your lens and enhances clarity. |
Using these filters can make a world of difference in your shots. They help you see the stars and planets more clearly, even if you’re shooting from a city with lots of lights. Plus, they can make your photos look more professional without needing expensive gear.
Remote Shutters for Steady Shots
A remote shutter is another handy tool in your astrophotography kit. It helps you take long-exposure shots without touching your camera, which can cause blur. Heres a quick rundown of why you need one:
- Reduces Camera Shake: Keeps your camera steady during long exposures.
- Convenience: Lets you trigger the shutter from a distance.
- Multiple Shots: Some remotes can take multiple photos in quick succession.
Here are some popular remote shutter options:
| Brand | Features | Price Range |
|---|---|---|
| Canon Remote | Basic, easy to use | $15-$25 |
| Nikon ML-L3 | Compact, wireless | $20-$30 |
| Vello FreeWave | Long range, multiple modes | $30-$50 |
Remote shutters are a game-changer for capturing clear, crisp images of the night sky. They are especially useful for beginners who might not have the steadiest hands yet.
Must-Have Accessories
To get the most out of your astrophotography experience, there are a few more must-have accessories you should consider. These tools can help you take better photos and make your shooting sessions more enjoyable.
- Tripod: A sturdy tripod is essential for keeping your camera steady. Look for one that’s easy to set up and adjust.
- Extra Batteries: Long exposure shots can drain your battery quickly. Always have a few extras on hand.
- Memory Cards: Youll be taking lots of photos, so make sure you have plenty of storage.
- Lens Cleaning Kit: Keeping your lens clean is crucial for clear shots. A simple kit with a blower, brush, and cloth will do the trick.
Here’s a quick table to summarize these accessories:
| Accessory | Purpose |
|---|---|
| Tripod | Keeps camera steady |
| Extra Batteries | Ensures you don’t run out of power |
| Memory Cards | Provides ample storage |
| Lens Cleaning Kit | Maintains lens clarity |

Software and Apps for Editing
When youre diving into astrophotography, editing your photos is just as important as capturing them. You dont need to spend a fortune to get started. There are plenty of free and mobile options that can help you bring out the best in your night sky shots.
Free Editing Software Options
Free doesnt mean you have to compromise on quality. Here are some top-notch, cost-free tools that can help you polish your astrophotography images:
| Software | Features | Pros | Cons |
|---|---|---|---|
| GIMP | Layers, masks, and advanced filters | Powerful, versatile | Steep learning curve |
| Darktable | Non-destructive editing, tethered shooting | Great for RAW files | Complex interface |
| RawTherapee | Detailed color correction, noise reduction | Highly customizable | Can be slow |
| Siril | Specialized for astrophotography, stacking | Excellent for deep sky images | Limited general photo editing tools |
These tools offer a wide range of features that can help you enhance your photos. GIMP is like a free version of Photoshop, with layers and masks. Darktable and RawTherapee are excellent for RAW file processing. Siril is specifically designed for astrophotography, making it great for deep sky images.
Best Mobile Apps for Astrophotography
Sometimes, you might want to edit your photos on the go. Here are some mobile apps that can help you tweak your starry shots:
| App | Features | Pros | Cons |
|---|---|---|---|
| Snapseed | Selective adjustments, healing tool | Easy to use, powerful | Limited advanced features |
| Adobe Lightroom Mobile | RAW editing, presets | Syncs with desktop version | Subscription for full features |
| Pixlr | Filters, overlays, and effects | User-friendly | Ads in free version |
| VSCO | Presets, manual adjustments | Great for quick edits | Subscription for full features |
These apps are handy for quick edits. Snapseed is very user-friendly and offers powerful tools. Adobe Lightroom Mobile lets you edit RAW files and syncs with the desktop version. Pixlr and VSCO offer great filters and manual adjustments.
Editing Tips for Beginners
Editing your astrophotography images can seem overwhelming at first. Here are some tips to help you get started:
- Start with RAW files: They contain more data and give you more flexibility in editing.
- Adjust the exposure: Bring out the stars by increasing the exposure, but be careful not to overdo it.
- Reduce noise: Use noise reduction tools to clean up your image, especially in the darker areas.
- Enhance colors: Adjust the color balance to make the stars pop and the sky look more natural.
- Sharpen the image: Use sharpening tools to bring out the details in your photo.
Budget-Friendly Astrophotography Gear for Beginners
Getting into astrophotography doesnt have to break the bank. Heres a list of budget-friendly gear that can help you start capturing stunning night sky images:
Camera
A DSLR or Mirrorless Camera is ideal for astrophotography. You dont need the latest model; even an older camera with manual settings can work wonders. Look for models that allow you to adjust the ISO, aperture, and shutter speed.
Lenses
A wide-angle lens is perfect for capturing the vastness of the night sky. Here are some affordable options:
| Lens | Features | Pros | Cons |
|---|---|---|---|
| Rokinon 14mm f/2.8 | Wide-angle, manual focus | Affordable, great for night sky | Manual focus only |
| Canon EF-S 24mm f/2.8 STM | Compact, lightweight | Sharp images, budget-friendly | Limited to Canon cameras |
| Nikon AF-S DX NIKKOR 35mm f/1.8G | Fast aperture, versatile | Great for low light | Limited to Nikon cameras |
Tripod
A sturdy tripod is essential to keep your camera steady during long exposures. Here are some budget-friendly options:
| Tripod | Features | Pros | Cons |
|---|---|---|---|
| AmazonBasics 60-Inch Lightweight Tripod | Adjustable height, lightweight | Affordable, easy to use | Not very durable |
| JOBY GorillaPod 3K | Flexible legs, compact | Versatile, portable | Limited height |
| Neewer Carbon Fiber 66-Inch Tripod | Lightweight, sturdy | Great stability | Slightly pricier |
Intervalometer
An intervalometer allows you to take multiple long-exposure shots without touching your camera. This is perfect for capturing star trails or time-lapse sequences.
Star Tracker
A star tracker is a game-changer for astrophotography. It moves your camera to follow the stars, allowing for longer exposures without star trails. Here are some affordable options:
| Star Tracker | Features | Pros | Cons |
|---|---|---|---|
| iOptron SkyTracker Pro | Compact, easy to use | Accurate tracking | Short battery life |
| Sky-Watcher Star Adventurer | Versatile, multiple speeds | Great for deep sky | Slightly complex setup |
| Vixen Optics Polarie | Portable, simple setup | Lightweight, easy to use | Limited payload capacity |
Tips for Shooting the Night Sky
Finding the Best Locations
When you’re diving into astrophotography, location is everything. You want to find a spot that’s far from city lights. Light pollution can really mess up your shots. So, how do you find these perfect places? Here’s a quick guide:
- Dark Sky Reserves: These are areas protected from artificial light. You can find a list online.
- National Parks: Many national parks are great for stargazing. They often have low light pollution.
- Rural Areas: Sometimes, just driving an hour out of the city can make a world of difference.
Here’s a simple table to help you decide:
| Location Type | Light Pollution Level | Accessibility | Best Time to Visit |
|---|---|---|---|
| Dark Sky Reserve | Very Low | Moderate | All Year Round |
| National Park | Low | Easy | Spring to Fall |
| Rural Area | Moderate | Easy | New Moon Nights |
Setting Up Your Gear
So, you’ve found your spot. Now, let’s talk gear. You don’t need to break the bank to get started with astrophotography. Here’s a list of budget-friendly gear to get you going:
- Camera: A DSLR or mirrorless camera with manual settings.
- Lens: A wide-angle lens with a fast aperture (f/2.8 or lower is ideal).
- Tripod: A sturdy tripod to keep your camera steady.
- Remote Shutter Release: To avoid camera shake when you press the shutter.
Here’s a quick gear checklist:
| Item | Recommended Specs | Budget Option |
|---|---|---|
| Camera | DSLR or Mirrorless | Used Models |
| Lens | Wide-Angle, f/2.8 or lower | Kit Lens |
| Tripod | Sturdy, Lightweight | Basic Models |
| Remote Shutter Release | Wired or Wireless | Budget Brands |
Techniques for Clear Photos
Now that your gear is all set, let’s talk about getting those crystal-clear shots. Here are some essential techniques:
- Manual Focus: Autofocus doesn’t work well in the dark. Switch to manual focus.
- ISO Settings: Start with an ISO of 1600 or 3200. Adjust as needed.
- Aperture: Use the widest aperture your lens allows (like f/2.8).
- Shutter Speed: Start with a 20-second exposure. Adjust based on your results.
- Post-Processing: Use software like Lightroom to enhance your photos.
Here’s a quick settings guide:
| Setting | Recommended Starting Point |
|---|---|
| Focus | Manual |
| ISO | 1600-3200 |
| Aperture | f/2.8 |
| Shutter Speed | 20 seconds |
Frequently Asked Questions
What is the best budget-friendly astrophotography gear for beginners?
The best gear includes a DSLR camera, a sturdy tripod, and a remote shutter. Look for second-hand options to save money.
Do I need a telescope for budget-friendly astrophotography?
No, you don’t. A good DSLR with a wide-angle lens is perfect for capturing breathtaking night skies on a budget.
Can smartphones be used for budget-friendly astrophotography?
Yes, they can! Attach your smartphone to a tripod and use apps designed for night photography to get stunning shots.
What’s the minimum budget to start astrophotography?
You can start with as little as $200-$300. Look for entry-level cameras, tripods, and other budget-friendly astrophotography gear for beginners.
How important is a tripod in budget-friendly astrophotography?
Very important. A sturdy tripod helps keep your camera steady for long exposures, which is crucial for clear night sky photos.