Using Adaptive Optics for Clearer Astrophotography opens a whole new universe of beauty and detail in your starry captures. Ever wondered how to snap those perfect celestial photos with crisp, stunning clarity? You’re in the right place. This guide will walk you through what adaptive optics is, how it works, and why it’s a game-changer for removing blurry, distorted images. Plus, youll get tips on setting it up for your telescope, troubleshooting common issues, and staying ahead with the latest tech advancements. Ready to transform your astrophotography game? Lets dive in!
Key Takeaways
- Sharper images of the night sky.
- Reduces the blur caused by Earth’s atmosphere.
- Makes faint stars more visible.
- Better resolution in your photos.
- Easier to see details in planets and galaxies.

The Basics of Adaptive Optics
What is Adaptive Optics?
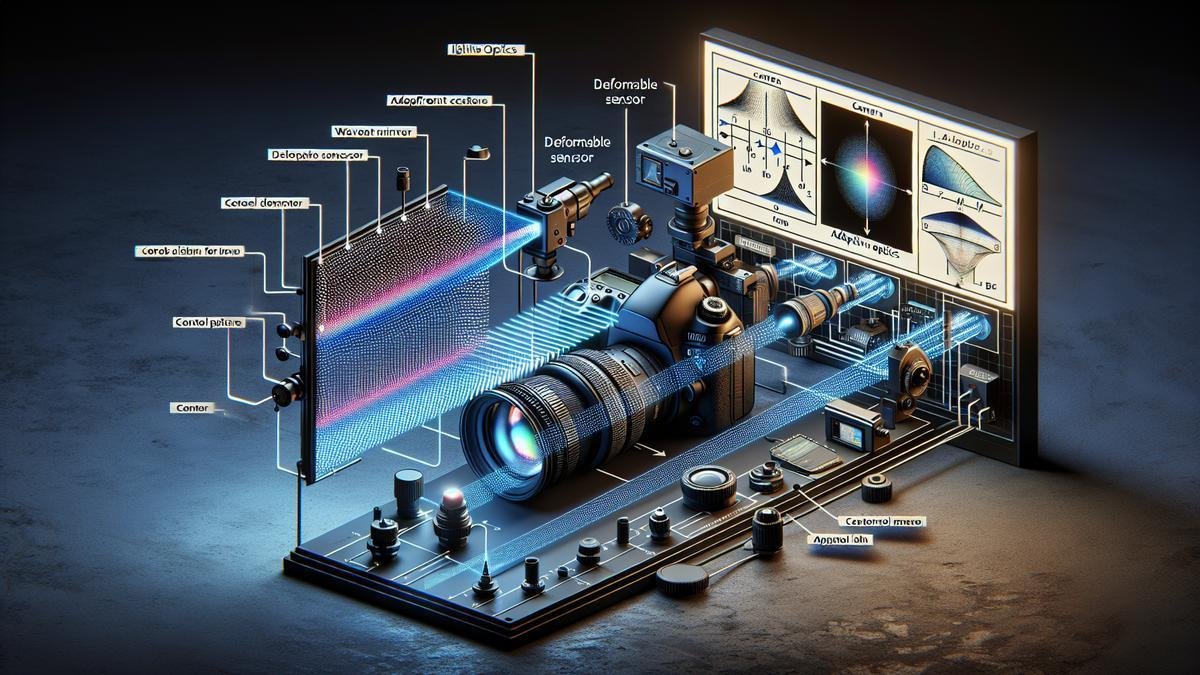
Adaptive optics (AO) might sound like a term straight out of a sci-fi novel, but it’s actually a game-changer for astrophotographers like you. In simple terms, adaptive optics is a technology that helps correct the distortions caused by Earth’s atmosphere when you take pictures of celestial objects. Imagine looking at a star through a turbulent atmosphere as if you were peering at it from the bottom of a swimming pool. The star appears to twinkle and blur. AO steps in to calm those turbulent waters, giving you clearer, sharper images.
How Does Adaptive Optics Work?
Now, let’s dive into the mechanics. How does this wizardry actually work? Adaptive optics systems are designed to detect and correct the distortions in real time. Here’s a breakdown:
- Wavefront Sensors: These sensors measure the distortions in the incoming light waves from celestial objects.
- Deformable Mirrors: These mirrors can change shape to counteract the distortions detected by the wavefront sensors.
- Control Systems: The brains of the operation, these systems process the data from the wavefront sensors and adjust the deformable mirrors accordingly.
By continuously adjusting the mirrors to correct for atmospheric disturbances, AO systems can significantly enhance the quality of your astrophotography images.
Benefits of Using Adaptive Optics for Clearer Astrophotography
Astrophotography is a mesmerizing pursuit. Capturing the night sky in all its glory requires patience, skill, and the right tools. One of the game-changing technologies in this field is adaptive optics. This technology can significantly enhance the clarity and quality of your astrophotography images.
Enhanced Image Clarity
Adaptive optics work by compensating for the distortions caused by the Earth’s atmosphere. Imagine trying to photograph a beautiful landscape through a wavy, glass window. The image would appear blurry and distorted. This is similar to what happens when you photograph celestial objects from Earth. The atmosphere bends and distorts the light from stars and planets, making them appear less sharp.
Adaptive optics systems use a combination of sensors and deformable mirrors to correct these distortions in real-time. The result is a much clearer image, free from the blurring effects of the atmosphere. Whether you’re capturing the intricate details of a distant galaxy or the subtle nuances of a nebula, adaptive optics can make a world of difference.
Reduced Atmospheric Distortion
The Earth’s atmosphere is constantly in motion, with varying temperatures and densities causing light to bend and shift. This phenomenon, known as atmospheric distortion, can significantly impact the quality of your astrophotography. Adaptive optics systems are designed to counteract this distortion, allowing you to capture images with unprecedented clarity.
By continuously adjusting the shape of a mirror in your telescope, adaptive optics can correct for these distortions in real-time. This means that even on nights when the atmosphere is particularly turbulent, you can still achieve sharp, detailed images of celestial objects.
Sharper Star Details
One of the most noticeable benefits of using adaptive optics is the increased sharpness of star details. When photographing stars, even the slightest atmospheric distortion can cause them to appear blurry and indistinct. Adaptive optics can correct for these distortions, allowing you to capture stars with pinpoint accuracy.
This increased sharpness is particularly beneficial when photographing star clusters or other densely packed celestial objects. With adaptive optics, you can resolve individual stars within a cluster, revealing details that would be impossible to capture with a standard telescope.
Key Features of Adaptive Optics Systems
To fully appreciate the benefits of adaptive optics, it’s important to understand the key features of these systems. Here’s a breakdown of the main components and how they work together to improve your astrophotography:
| Component | Function |
|---|---|
| Wavefront Sensor | Measures distortions in the incoming light. |
| Deformable Mirror | Adjusts its shape to correct for these distortions. |
| Control System | Coordinates the adjustments in real-time. |
Choosing the Right Equipment
When it comes to incorporating adaptive optics into your astrophotography setup, there are a few key considerations to keep in mind. First and foremost, you’ll need a telescope that is compatible with adaptive optics systems. Many high-end telescopes come with built-in adaptive optics, but there are also standalone systems that can be added to existing setups.
Additionally, you’ll need a high-quality camera to capture the corrected images. For those looking to upgrade their gear, this guide on top cameras for astrophotography provides a comprehensive overview of the best options available.
Integrating Adaptive Optics with Other Tools
Adaptive optics are just one piece of the puzzle when it comes to capturing stunning astrophotography images. To get the most out of your setup, it’s important to consider other essential tools and accessories. For example, choosing the right lenses can have a significant impact on the quality of your images.
Similarly, a stable tripod is crucial for minimizing vibrations and ensuring sharp, detailed photos. This guide on tripods for astrophotography offers valuable insights into selecting the best tripod for your needs.
Maximizing the Potential of Adaptive Optics
To truly unlock the full potential of adaptive optics, it’s important to understand how to use them effectively. Here are some tips to help you get started:
- Calibrate Your System: Proper calibration is essential for achieving the best results. Make sure to follow the manufacturer’s instructions carefully.
- Monitor Atmospheric Conditions: Adaptive optics can compensate for atmospheric distortions, but it’s still important to choose nights with relatively stable conditions for the best results.
- Experiment with Different Settings: Don’t be afraid to experiment with different settings and configurations to find what works best for your specific setup.

Setting Up Adaptive Optics for Your Telescope
So, youre diving into the mesmerizing universe of astrophotography. Youve probably noticed that capturing those awe-inspiring celestial images can be quite a challenge. One way to significantly enhance the clarity and quality of your shots is by using adaptive optics. This technology helps correct the distortions caused by the Earth’s atmosphere, giving you sharper and more detailed images. Let’s break down how you can set up adaptive optics for your telescope.
Choosing the Right Equipment
Before you even think about installation, selecting the right adaptive optics system is crucial. There are several factors to consider:
- Compatibility: Ensure that the adaptive optics system is compatible with your telescope and camera. Not all systems work with every type of telescope.
- Budget: These systems can be pricey, so it’s essential to find one that fits within your budget while still meeting your needs.
- Ease of Use: Some systems are more user-friendly than others. If youre new to this, you might want to opt for a system with a straightforward setup process.
- Performance: Look for systems that offer high correction speeds and can handle a wide range of atmospheric conditions.
Heres a quick comparison table to help you choose:
| Feature | Entry-Level Systems | Mid-Range Systems | High-End Systems |
|---|---|---|---|
| Price | $500 – $1,000 | $1,000 – $3,000 | $3,000+ |
| Compatibility | Limited | Moderate | Wide |
| Ease of Use | High | Moderate | Low |
| Performance | Basic | Good | Excellent |
Installation Tips
Now that youve chosen your adaptive optics system, it’s time to install it. Here are some tips to make the process smoother:
- Read the Manual: It sounds obvious, but many people skip this step. The manual will provide specific instructions tailored to your system.
- Prepare Your Workspace: Make sure you have a clean, well-lit area to work in. This will help you avoid losing small parts and make the process more enjoyable.
- Use Proper Tools: Having the right tools on hand will make the installation much easier. Common tools you might need include screwdrivers, Allen wrenches, and possibly a small flashlight.
- Align Components: Proper alignment is crucial for the system to work effectively. Take your time to ensure that all components are perfectly aligned.
Calibration Steps
Once youve installed your adaptive optics system, its time to calibrate it. Calibration is a critical step to ensure that your system functions correctly.
Step 1: Initialize the System
Turn on your adaptive optics system and let it initialize. This process usually involves the system running a series of self-checks to ensure everything is functioning correctly.
Step 2: Select a Bright Star
Choose a bright star to use for the calibration process. This star will serve as a reference point for the system to make adjustments.
Step 3: Adjust Focus
Use your telescopes focusing mechanism to bring the star into sharp focus. This step is crucial for accurate calibration.
Step 4: Run Calibration Software
Most adaptive optics systems come with software that guides you through the calibration process. Follow the on-screen instructions carefully. The software will usually prompt you to make several adjustments to optimize the systems performance.
Step 5: Fine-Tune Adjustments
After the initial calibration, you may need to make some fine-tune adjustments. This step ensures that the system is working at its maximum potential.
Comparing Adaptive Optics to Traditional Methods
Astrophotography, capturing the wonders of the night sky, is a passion that requires both skill and the right equipment. You’ve probably heard about adaptive optics and wondered how it stacks up against traditional methods. Let’s dive into the nitty-gritty and see how these two approaches compare.
Differences in Image Quality
When youre out under the stars, the last thing you want is blurry images. Traditional methods have their own charm, but adaptive optics can be a game-changer. Here’s a comparison to help you understand:
| Aspect | Traditional Methods | Adaptive Optics |
|---|---|---|
| Clarity | Often affected by atmospheric turbulence | Adjusts in real-time for sharper images |
| Detail | Limited by seeing conditions | Reveals finer details |
| Consistency | Varies night-to-night | More reliable, consistent results |
| Simplicity | Easier to set up | Requires more complex equipment and setup |
Traditional methods rely heavily on the stability of the atmosphere. On a clear, calm night, you might get some great shots. But adaptive optics? Its like having a magic wand that corrects distortions caused by the atmosphere. Your images will be sharper, with more detail, almost like peeling back the layers of the universe.
Cost and Accessibility
Now, let’s talk dollars and cents. Traditional methods are generally more accessible. You can get started with a decent camera and a sturdy tripod. But adaptive optics? Its a different ball game.
| Factor | Traditional Methods | Adaptive Optics |
|---|---|---|
| Initial Investment | Lower | Higher |
| Maintenance | Minimal | Moderate to high |
| Learning Curve | Easier for beginners | Steeper, requires more expertise |
| Availability | Widely available | Less common, specialized |
With traditional methods, you can find budget-friendly gear that gets you started without breaking the bank. On the other hand, adaptive optics systems are an investment. They require a more significant initial outlay and ongoing maintenance. However, the payoff is in the quality of your images. If you’re serious about astrophotography and willing to invest, adaptive optics can elevate your work to new heights.

Troubleshooting Common Issues with Adaptive Optics
Navigating the complexities of astrophotography can be a bit like chasing shadows. Youre out there, under the vast night sky, capturing the celestial wonders, and suddenly, something goes wrong. Adaptive optics, while a game-changer, can present its own set of challenges. Lets dive into some common issues and how to tackle them.
Dealing with Calibration Errors
Calibration errors can feel like a thorn in your side. They pop up when you least expect it and can throw off your entire session. But dont worry, you can deal with them effectively.
Common Calibration Errors and Fixes
| Error Type | Symptoms | Fix |
|---|---|---|
| Misalignment | Stars appear stretched or doubled | Realign your optical system. Ensure all elements are centered. |
| Incorrect Reference Star | Guide star not centered | Choose a brighter, more stable reference star. |
| Software Glitches | System crashes or freezes | Update your software and firmware regularly. |
Steps to Correct Calibration
- Check Your Gear: Ensure everything is set up correctly. Misalignment can cause calibration errors.
- Select the Right Star: Use a bright, stable star for calibration.
- Update Software: Keep your software up-to-date to avoid glitches.
If youre still struggling, consider looking into essential lenses for capturing the night sky. The right lens can make a world of difference.
Fixing Blurry Images
Blurry images can be a nightmare. Youve spent hours setting up, only to find your shots are less than stellar. Heres how to sharpen things up.
Common Causes of Blurry Images
| Cause | Symptoms | Fix |
|---|---|---|
| Poor Focus | Stars look like blobs | Use a Bahtinov mask for precise focusing. |
| Atmospheric Turbulence | Stars twinkle excessively | Wait for a night with better seeing conditions. |
| Vibration | Stars have trails | Use a sturdy tripod and avoid touching the setup during exposure. |
Tips to Achieve Sharp Images
- Focus Meticulously: Use tools like a Bahtinov mask to get pinpoint focus.
- Reduce Vibration: Use a remote shutter release or timer to avoid camera shake.
- Choose the Right Night: Sometimes, the atmosphere just isnt cooperating. Pick nights with stable conditions.
For more on stabilizing your setup, check out tripods for astrophotography.
Future Developments in Adaptive Optics Technology
Upcoming Innovations
Imagine gazing at the night sky and capturing crystal-clear images of distant galaxies and nebulae. Adaptive optics (AO) technology can transform your astrophotography by correcting atmospheric distortions that blur celestial objects. But what’s on the horizon for AO technology? Let’s dive into some upcoming innovations that promise to elevate your astrophotography game.
Laser Guide Stars (LGS)
Laser Guide Stars are artificial stars created by shooting lasers into the sky. These stars act as reference points for AO systems, allowing more precise corrections. The latest advancements in LGS technology involve using multiple lasers and sophisticated algorithms to enhance image clarity. This means sharper, more detailed photos of the night sky.
Deformable Mirrors
These mirrors can change shape in real-time to counteract atmospheric turbulence. The next generation of deformable mirrors will feature thousands of tiny actuators for even finer adjustments. This will result in unprecedented image sharpness and resolution, making your astrophotography stand out.
Wavefront Sensors
Wavefront sensors measure the distortions caused by the atmosphere. Future sensors will be more sensitive and faster, enabling AO systems to correct distortions more quickly and accurately. This will be particularly beneficial for capturing fleeting astronomical events like meteor showers and eclipses.
| Innovation | Description | Benefits |
|---|---|---|
| Laser Guide Stars | Artificial stars created by lasers for precise AO corrections | Sharper, more detailed images |
| Deformable Mirrors | Mirrors that change shape in real-time to counteract atmospheric turbulence | Unprecedented image sharpness |
| Wavefront Sensors | Sensors that measure atmospheric distortions | Faster, more accurate corrections |
Potential for Amateur Astrophotographers
Adaptive optics technology isn’t just for professional observatories anymore. The advancements in AO are making it more accessible for amateur astrophotographers like you. Here’s how you can benefit from these innovations.
Affordable AO Systems
As technology advances, the cost of AO systems is decreasing. This means you can now afford equipment that was once reserved for professional astronomers. Affordable AO systems will allow you to capture stunning images without breaking the bank. For budget-friendly options, check out budget-friendly astrophotography gear for beginners.
User-Friendly Interfaces
Modern AO systems are designed with user-friendly interfaces, making them easier to operate. You don’t need to be a tech wizard to use these systems. Intuitive controls and automated features will help you get the most out of your equipment with minimal effort.
Portable AO Solutions
Portability is another area where AO technology is making strides. Compact and lightweight AO systems are now available, allowing you to take your astrophotography on the go. Whether you’re hiking to a remote location or setting up in your backyard, portable AO solutions make it easier to capture the night sky.
| Benefit | Description |
|---|---|
| Affordable AO Systems | Decreasing costs make AO technology accessible to amateur astrophotographers |
| User-Friendly Interfaces | Intuitive controls and automated features for easy operation |
| Portable AO Solutions | Compact and lightweight systems for on-the-go astrophotography |
Frenquently asked questions
How does adaptive optics improve astro photos?
Adaptive optics reduce blurring caused by Earth’s atmosphere. Crisp, clear shots every time.
Is adaptive optics hard to set up?
Nope! Most systems are now user-friendly. Follow the manual, and you’ll be set.
Can I use adaptive optics with any telescope?
Mostly, yes. But it’s best with high-quality telescopes. Check compatibility with your model.
Does adaptive optics require extra gear?
A few pieces, yes. Typically a deformable mirror and a wavefront sensor. Worth the investment!
What’s the main benefit of using adaptive optics for clearer astrophotography?
Sharper images, night after night. Your celestial shots will pop with detail and clarity.
