Using Photoshop for Astrophotography: Advanced Techniques can truly transform your celestial images into dazzling masterpieces. Imagine unveiling the hidden beauty of stars, nebulae, and galaxies with just a few smart edits. In this article, you’ll dive into the world of layer masks, color adjustments, and noise reduction, discovering practical tricks and tips for these advanced photo-editing magic tricks. Ready to elevate your night sky shots to the next level? Let’s embark on this cosmic journey!
Key Takeaways
- Adjust levels for better contrast.
- Layer to merge your images.
- Mask to keep details sharp.
- Curve to enhance colors.
- Filter to reduce noise.
Mastering Layer Masks for Stellar Effects
Creating Layer Masks for Star Enhancements
When you’re delving into astrophotography, you often end up with images that have a lot of potential but need a little extra magic. This is where layer masks come into play. Layer masks allow you to selectively apply adjustments to specific parts of your image, giving you the control to enhance stars without affecting the rest of the picture.
Steps to Create Layer Masks for Star Enhancements
- Open Your Image in Photoshop: Start by opening your astrophotography image in Photoshop. If you’re new to Photoshop, you might want to check out some basic tutorials.
- Duplicate the Background Layer: Always work on a copy of your original image. Duplicate the background layer by right-clicking on it and selecting “Duplicate Layer.”
- Create a New Adjustment Layer: Go to the “Layer” menu, select “New Adjustment Layer,” and choose “Levels” or “Curves.” These adjustments are perfect for enhancing stars.
- Add a Layer Mask: Click on the “Add Layer Mask” button at the bottom of the Layers panel. This will add a white box next to your adjustment layer, indicating that the mask is active.
- Invert the Mask: Press Ctrl+I (Cmd+I on Mac) to invert the mask. This will turn the mask black, hiding the adjustment.
- Paint with White to Reveal the Stars: Select the Brush tool, set the foreground color to white, and start painting over the stars you want to enhance. Adjust the brush size and hardness as needed.
Here’s a quick reference table to help you remember these steps:
| Step | Action |
|---|---|
| Open Image | Open your image in Photoshop |
| Duplicate Layer | Right-click and select “Duplicate Layer” |
| New Adjustment Layer | Layer > New Adjustment Layer > Levels/Curves |
| Add Layer Mask | Click “Add Layer Mask” button |
| Invert Mask | Press Ctrl+I (Cmd+I on Mac) |
| Paint with White | Brush tool, foreground color to white |
Blending Layers for a Seamless Look
Blending layers is crucial to making your adjustments look natural. If done correctly, your enhancements will look like they were part of the original shot.
Techniques for Blending Layers
- Feathering the Mask: Feathering softens the edges of your mask, making transitions smoother. To feather your mask, click on the mask thumbnail, go to “Properties,” and adjust the “Feather” slider.
- Using Gradient Masks: Sometimes, a gradient mask can provide a more natural blend. Select the Gradient tool, choose a black-to-white gradient, and drag it over the mask to create a smooth transition.
- Opacity Adjustments: Adjusting the opacity of your adjustment layer can also help blend the effect. Lower the opacity until the enhancement looks natural.
- Layer Blending Modes: Experiment with different blending modes like “Screen,” “Overlay,” or “Soft Light” to see how they affect your image. Each mode interacts with the underlying layers differently.
Heres a table summarizing these techniques:
| Technique | Description |
|---|---|
| Feathering | Softens the edges of the mask |
| Gradient Masks | Creates smooth transitions using gradients |
| Opacity Adjustments | Lowers the opacity for a natural look |
| Layer Blending Modes | Experiment with modes like Screen or Overlay |
Tips for Perfect Layer Masking
Layer masking can be tricky, but with a few tips, you can master it in no time.
Enhancing Star Colors with Adjustment Layers
In the vast expanse of the night sky, capturing the vivid hues of stars can elevate your astrophotography to new heights. Photoshop’s adjustment layers are indispensable tools for this task, allowing you to tweak and fine-tune colors with precision. Let’s dive into some advanced techniques to make those star colors pop.
Using Curves to Boost Star Colors
Curves adjustment layers are a powerhouse for color enhancement. They provide control over the tonal range of your image, allowing you to target specific color channels and adjust them independently.
Steps for Using Curves:
- Open Your Image: Start by opening your astrophotography image in Photoshop.
- Add a Curves Adjustment Layer: Go to Layer > New Adjustment Layer > Curves.
- Select a Channel: In the Curves properties panel, select the Red, Green, or Blue channel from the drop-down menu.
- Adjust the Curve: Click on the curve line and drag to adjust the tonal range. For instance, to enhance reds, you might drag the curve upwards in the Red channel.
- Fine-Tune: Repeat for the other channels as needed, adjusting the curves to enhance the star colors without affecting the background too much.
Here’s a quick reference table for common adjustments:
| Channel | Adjustment | Effect |
|---|---|---|
| Red | Upwards | Increases red tones |
| Green | Upwards | Increases green tones |
| Blue | Upwards | Increases blue tones |
| Red | Downwards | Decreases red tones |
| Green | Downwards | Decreases green tones |
| Blue | Downwards | Decreases blue tones |
Adjusting Hue and Saturation for Impact
Hue and Saturation adjustments can give the star colors more vibrancy and make them stand out against the dark sky.
Steps for Adjusting Hue and Saturation:
- Add a Hue/Saturation Adjustment Layer: Go to Layer > New Adjustment Layer > Hue/Saturation.
- Select Color Range: In the properties panel, use the drop-down menu to select a specific color range (e.g., Reds, Blues).
- Adjust Hue: Slide the Hue control to shift the selected color range. This can help you correct any color imbalances.
- Increase Saturation: Slide the Saturation control to the right to make the colors more vivid. Be cautious not to overdo it, as this can lead to unnatural-looking stars.
- Lightness: Adjust the Lightness slider to make the colors lighter or darker.
Best Practices for Color Adjustments
When working with color adjustments, it’s crucial to follow some best practices to achieve the best results without compromising the quality of your image.
Reducing Noise in Your Astrophotography Images
Astrophotography can be a magical experience, capturing the wonders of the night sky. However, the beauty of these images can be marred by noise. Noise in your photos is like static on a radio. Its unwanted and can ruin the clarity of your celestial captures. Lets dive into some advanced Photoshop techniques to reduce noise in your astrophotography images.
Applying Noise Reduction Techniques
First things first, noise reduction is crucial. You want your stars to shine without the speckles of noise. Here’s how you can do it:
- Open your image in Photoshop.
- Duplicate the layer. This allows you to work non-destructively.
- Convert the layer to a Smart Object. This step is essential as it lets you apply filters non-destructively.
Now, youre ready to apply noise reduction techniques.
Noise Reduction Techniques Table
| Technique | Description |
|---|---|
| Gaussian Blur | Softens the image to reduce noise but can also soften details. |
| Median Filter | Reduces noise by replacing each pixel’s value with the median value of the surrounding pixels. |
| Noise Reduction Filter | Photoshops built-in filter specifically designed for noise reduction. |
Using the Camera Raw Filter for Noise Control
The Camera Raw Filter is a powerhouse for noise control. It offers precise adjustments that can significantly enhance your images.
- Open the Camera Raw Filter by going to Filter > Camera Raw Filter.
- Navigate to the Detail panel. Here, youll find the Noise Reduction sliders.
Camera Raw Filter Noise Reduction Table
| Slider | Function |
|---|---|
| Luminance | Reduces grayscale noise. |
| Luminance Detail | Controls the balance between noise reduction and detail preservation. |
| Luminance Contrast | Adjusts the contrast of the noise reduction. |
| Color | Reduces color noise. |
| Color Detail | Controls the balance between color noise reduction and color detail preservation. |
Fine-Tuning Noise Reduction Settings
Fine-tuning is where the magic happens. Its like seasoning a dish; too much or too little can spoil it.
- Start with Luminance. Increase it until the noise starts to disappear.
- Adjust Luminance Detail. Find a balance where noise is reduced but details are preserved.
- Tweak Luminance Contrast. This helps in maintaining the contrast in your image.
- Move to Color Noise. Increase the Color slider to reduce color noise.
- Adjust Color Detail. Ensure that the colors in your image remain vibrant and true.
Creating Stunning Star Trails with Photoshop
Astrophotography is a magical blend of art and science. Capturing the night sky and transforming those images into stunning star trails requires not just a good camera but also advanced post-processing skills. Let’s dive into some advanced Photoshop techniques that will take your star trail photos to the next level.
Stacking Multiple Images for Star Trails
To create mesmerizing star trails, you need to stack multiple images. This technique involves combining several long-exposure shots to create a continuous trail of stars across the sky.
Step-by-Step Guide to Stacking
- Capture Multiple Exposures: Take a series of long-exposure shots, typically ranging from 20 to 30 seconds each. Using a sturdy tripod is crucial to avoid any movement.
- Import Images into Photoshop: Open Photoshop and import all your images. You can do this by going to File > Scripts > Load Files into Stack. This will create a single document with each image on a separate layer.
- Align Layers: Sometimes, slight movements can occur. To align the layers, select all layers and go to Edit > Auto-Align Layers. Choose the Auto option.
- Change Blending Mode: Select all layers except the bottom one and change the blending mode to Lighten. This mode allows the brightest parts of each layer to show through, creating the star trail effect.
Example Table for Stacking Parameters
| Parameter | Recommended Setting |
|---|---|
| Exposure Time | 20-30 seconds |
| Number of Images | 50-100 |
| ISO | 800-1600 |
| Aperture | f/2.8 – f/4 |
Blending Modes for Smooth Trails
Blending modes are essential for achieving smooth and continuous star trails. The Lighten blending mode is particularly useful for this purpose.
Using the Lighten Blending Mode
- Select Layers: Highlight all layers except the base layer.
- Apply Lighten Mode: Change the blending mode to Lighten. This will make the brightest pixels from each layer visible, creating a seamless trail.
Additional Tips
- Avoid Overlapping: Ensure that the layers are perfectly aligned to avoid any overlapping of stars.
- Use Masks: If some areas are too bright, use layer masks to selectively blend parts of the image.
Essential Tips for Star Trail Photography
Creating star trails isn’t just about post-processing. The initial capture process plays a crucial role. Here are some essential tips to get you started.
Equipment and Settings
- Use a Sturdy Tripod: Stability is key. A shaky tripod can ruin your shots. Check out the best tripods for astrophotography.
- Remote Shutter Release: This prevents camera shake during long exposures.
- Manual Focus: Autofocus struggles in low light. Switch to manual focus and use live view to focus on a bright star.
Camera Settings
- Low ISO: Start with an ISO of 800 to 1600. Higher ISO can introduce noise.
- Aperture: A wider aperture (f/2.8 – f/4) allows more light to hit the sensor.
- Exposure Time: Start with 20-30 seconds. Too long, and you’ll get star trails in individual shots.
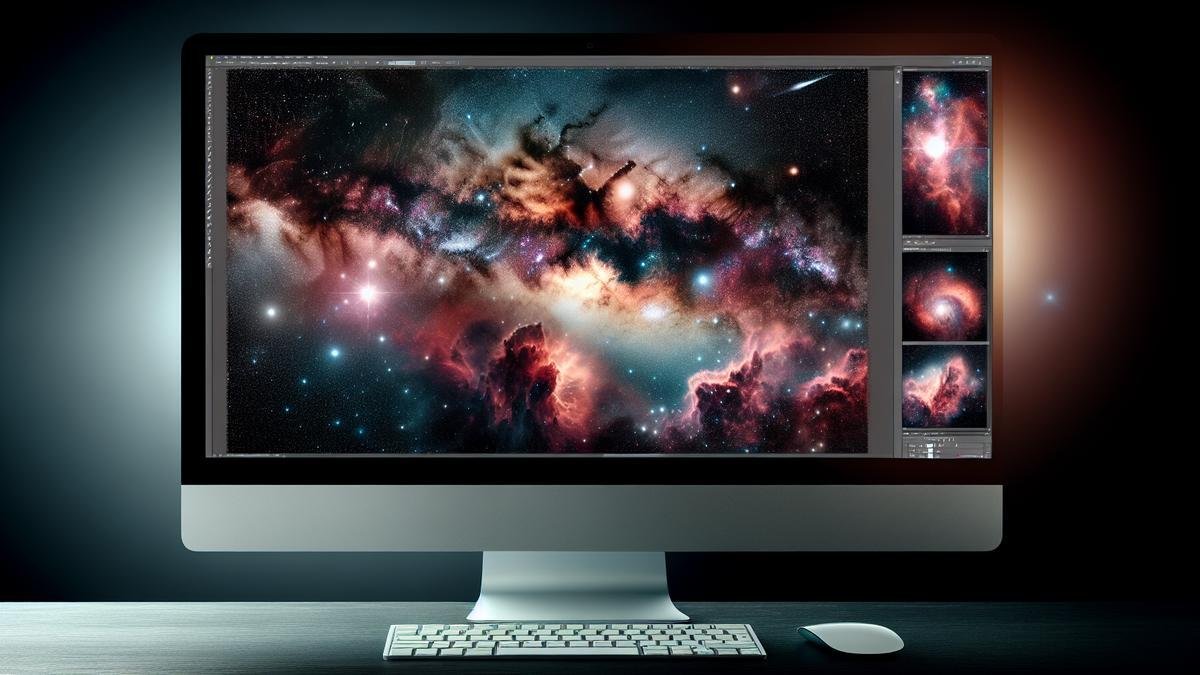
Bringing Out Details in Nebulae and Galaxies
When you look up at the night sky, you see a tapestry of stars, nebulae, and galaxies. Capturing these celestial wonders through your camera is only the beginning. The real magic happens in post-processing, where you can unveil the hidden details and bring your images to life using advanced Photoshop techniques.
Using High Pass Filter for Sharpness
The High Pass Filter is a powerful tool to enhance the sharpness of your astro images. It’s like giving your photos a pair of glasses, making everything clearer.
To start, duplicate your image layer. Go to Filter > Other > High Pass. You’ll see a grayscale version of your image with only the edges highlighted. Adjust the radius until you see the fine details without overdoing it. Usually, a radius of 2-3 pixels works well for astrophotography.
Next, change the blending mode of this layer to Overlay. This will merge the high pass layer with your original image, enhancing the sharpness. If the effect is too strong, you can reduce the opacity of the high pass layer.
Here’s a quick table to summarize the steps:
| Step | Action |
|---|---|
| 1 | Duplicate your image layer |
| 2 | Go to Filter > Other > High Pass |
| 3 | Adjust the radius (2-3 pixels) |
| 4 | Change blending mode to Overlay |
| 5 | Adjust opacity if needed |
Enhancing Details with Dodge and Burn
Dodging and burning are age-old techniques in photography, used to brighten or darken specific areas of an image. In astrophotography, these techniques can help you highlight the intricate details of nebulae and galaxies.
First, create a new layer and fill it with 50% gray. Change the blending mode to Overlay. This will make the layer invisible, but it allows you to dodge and burn without altering the original image.
Select the Dodge Tool to lighten areas and the Burn Tool to darken them. Use a soft brush and low exposure (around 10-15%) for subtle adjustments. Carefully work on the areas you want to enhance, like the bright cores of galaxies or the delicate filaments of nebulae.
Here’s a table to guide you through the process:
| Step | Action |
|---|---|
| 1 | Create a new layer and fill with 50% gray |
| 2 | Change blending mode to Overlay |
| 3 | Select Dodge Tool or Burn Tool |
| 4 | Use a soft brush with low exposure (10-15%) |
| 5 | Enhance specific areas of your image |
Using Photoshop for Astrophotography: Advanced Techniques
Combining Multiple Exposures for HDR
Combining multiple exposures for HDR (High Dynamic Range) is like creating a symphony from individual notes. Each exposure captures different details and when blended together, they reveal the full grandeur of the night sky. Youll need to follow these steps to get the most out of your astrophotography:
- Capture Multiple Exposures: Start by taking several shots of the same scene at different exposure levels. This could be short, medium, and long exposures to capture various details in the stars and the surrounding sky.
- Load Images into Photoshop: Open Photoshop and load your images. You can do this by going to File > Scripts > Load Files into Stack. Select your images and click OK.
- Align Layers: Once your images are loaded, align them to ensure that the stars and other celestial objects line up perfectly. Go to Edit > Auto-Align Layers and select Auto.
- Create an HDR Image: To merge the exposures, go to File > Automate > Merge to HDR Pro. Select your aligned layers and click OK. Adjust the settings in the HDR dialog box to bring out the details in the highlights and shadows.
- Fine-Tune the HDR Image: Use adjustment layers like Levels, Curves, and Brightness/Contrast to fine-tune your HDR image. This will help you bring out the faint details and enhance the overall appearance of your astrophotography.
Advanced Blending Techniques for Depth
Advanced blending techniques can add depth and realism to your astrophotography. These techniques allow you to combine different images seamlessly, enhancing the final result.
Layer Masks
Layer masks are essential for blending different exposures or elements in your image. They allow you to hide or reveal parts of a layer without permanently altering the image.
- Add a Layer Mask: Select the layer you want to blend and click on the Add Layer Mask button at the bottom of the Layers panel.
- Paint on the Mask: Use a soft brush with varying opacity to paint on the mask. Painting with black hides parts of the layer, while white reveals them. This technique is great for blending different exposures seamlessly.
Gradient Masks
Gradient masks are useful for creating smooth transitions between different exposures. They can help you blend the sky and the foreground in your astrophotography.
- Create a Gradient Mask: Add a layer mask to the layer you want to blend. Select the Gradient Tool and choose a black-to-white gradient.
- Apply the Gradient: Click and drag across the area you want to blend. The gradient will create a smooth transition between the two exposures.
Luminosity Masks
Luminosity masks allow you to make precise adjustments to specific tonal ranges in your image. This technique is particularly useful for enhancing the details in the stars and the Milky Way.
- Create a Luminosity Mask: Go to Select > Color Range and choose Highlights or Shadows. This will create a selection based on the brightness of the pixels.
- Apply the Mask: Add a layer mask to the adjustment layer you want to use. The luminosity mask will limit the adjustments to the selected tonal range.
Tips for Advanced Astrophotography Editing
Editing astrophotography images can be a complex process, but these tips will help you achieve stunning results:
Noise Reduction
Astrophotography often involves long exposures, which can introduce noise. Use Photoshops noise reduction tools to minimize noise without losing detail.
- Use the Reduce Noise Filter: Go to Filter > Noise > Reduce Noise and adjust the settings to reduce noise while preserving detail.
- Apply Noise Reduction Selectively: Use layer masks to apply noise reduction only to the areas that need it, such as the sky, while preserving the details in the stars and other celestial objects.
Enhance Star Colors
Enhancing the colors of stars can make your astrophotography more vibrant and visually appealing.
- Use the Hue/Saturation Adjustment Layer: Add a Hue/Saturation adjustment layer and increase the saturation to bring out the colors of the stars.
- Selective Color Adjustment: Use the Selective Color adjustment layer to fine-tune the colors of individual stars. This allows you to enhance the natural colors of different types of stars.
Sharpening
Sharpening is crucial for bringing out the fine details in your astrophotography images.
- Use the High Pass Filter: Duplicate your image layer and go to Filter > Other > High Pass. Set the radius to a low value and change the blending mode to Overlay or Soft Light.
- Apply Unsharp Mask: Go to Filter > Sharpen > Unsharp Mask and adjust the settings to sharpen the details without introducing artifacts.
Contrast Enhancement
Enhancing contrast can make your astrophotography images more dynamic and visually striking.
- Use the Curves Adjustment Layer: Add a Curves adjustment layer and create an S-curve to increase contrast. This will make the stars and other celestial objects stand out more.
- Local Contrast Enhancement: Use the Clarity slider in the Camera Raw filter to enhance local contrast and bring out the details in the stars and the Milky Way.
Color Balance
Achieving the right color balance is essential for creating realistic and visually appealing astrophotography images.
- Use the Color Balance Adjustment Layer: Add a Color Balance adjustment layer and adjust the sliders to achieve the desired color balance. This can help you correct any color casts and enhance the natural colors of the night sky.
- White Balance Adjustment: Use the White Balance tool in the Camera Raw filter to adjust the overall color temperature of your image. This can help you achieve a more natural and realistic look.
Frequently Asked Questions
How can I reduce noise in my astrophotography images using Photoshop?
You can use the Reduce Noise filter. Go to Filter > Noise > Reduce Noise. Tweak the settings until the noise lessens without losing too much detail.
What is the best way to enhance star colors in Photoshop?
Use the Vibrance and Saturation sliders. Go to Image > Adjustments > Vibrance. Increase the sliders until the star colors pop but remain natural.
How do I stack multiple astrophotography images in Photoshop?
Use the Auto-Align Layers feature. Load all images as layers, select them, then go to Edit > Auto-Align Layers. After that, use the blending mode to blend layers.
Can I fix star trails in Photoshop?
Yes, you can! Use the Spot Healing Brush or the Clone Stamp Tool to correct star trails. Zoom in close, and carefully paint over the trails.
What’s the best way to bring out details in galaxies and nebulae?
Use the Levels and Curves adjustments. Go to Image > Adjustments > Levels and Curves. Adjust sliders for contrast and brightness until you reveal more details.
Make sure to practice Using Photoshop for Astrophotography: Advanced Techniques to master these methods!

