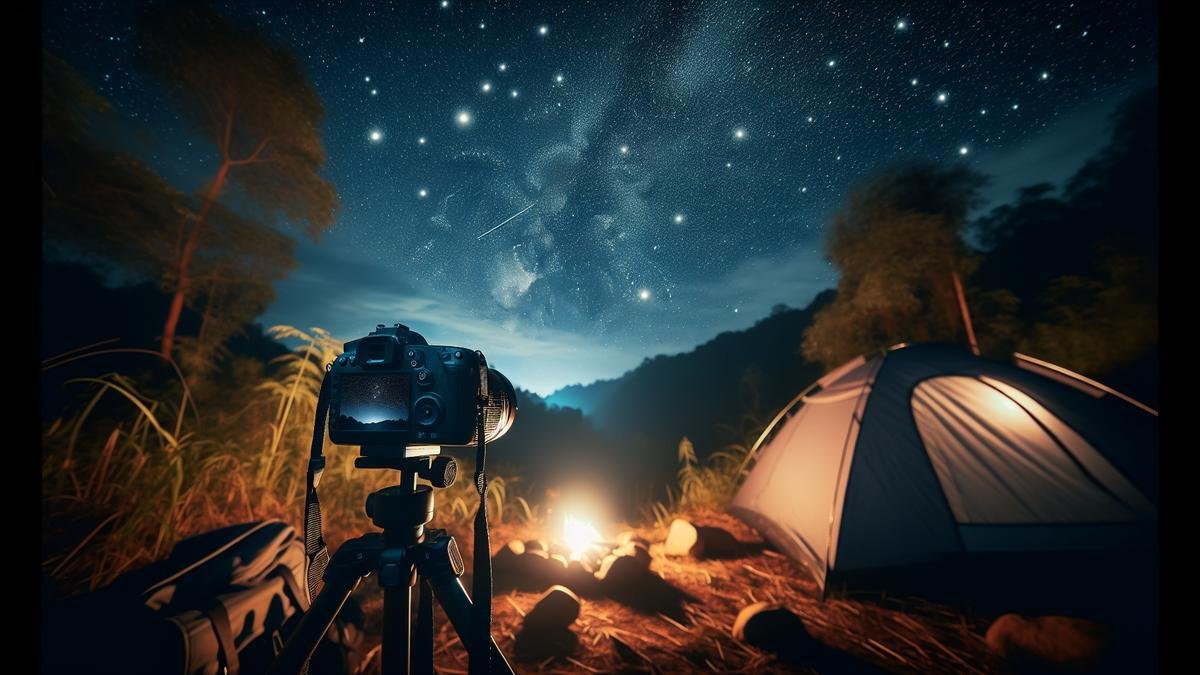
Panoramic Astrophotography: Creating Stunning Night Sky Panoramas can be a fascinating adventure if you are thrilled by the beauty of the cosmos. With the right gear and a bit of know-how, you’ll be able to capture breathtaking, wide-angle shots of the Milky Way and beyond. From choosing the perfect camera and lenses, to mastering night sky settings and stitching your images together, this guide has got you covered. Dive in, and let’s transform those twinkling wonders into jaw-dropping photos you’ll be proud to share. 🌌
Key Takeaways
- Use a sturdy tripod for clear shots.
- Plan your shoots around the moon phase.
- Stitch multiple photos for a wide view.
- Use long exposures for star trails.
- Post-process for the best results.
Equipment Essentials for Panoramic Astrophotography
Choosing the Right Camera
When you’re diving into the depths of panoramic astrophotography, your camera choice is pivotal. You need a camera that can handle low light and capture the vast expanses of the night sky with precision. Let’s break down what you’ll need.
Full-Frame vs. Crop Sensor
| Feature | Full-Frame | Crop Sensor |
|---|---|---|
| Low Light Performance | Excellent | Good |
| Field of View | Wider | Narrower |
| Cost | Higher | Lower |
Full-frame cameras are often the go-to for astrophotography enthusiasts. They offer superior low-light performance and a wider field of view. However, crop sensors can still deliver stunning results, especially if you’re on a budget.
Megapixels Matter
More megapixels mean more detail. For panoramic shots, you’ll want a camera with at least 20MP. Higher resolution cameras allow you to capture intricate details in the Milky Way and other celestial wonders.
ISO Sensitivity
High ISO performance is crucial. Look for a camera that performs well at ISO 3200 or higher. This will help you capture faint stars and other astronomical features without excessive noise.
Essential Lenses for Night Sky
Your lens choice is just as critical as your camera. The right lens can make or break your astrophotography experience.
Wide-Angle Lenses
Wide-angle lenses are your best friends in panoramic astrophotography. They allow you to capture a broad swath of the sky, perfect for creating expansive night sky panoramas.
| Lens Type | Focal Length | Aperture |
|---|---|---|
| Wide-Angle Prime | 14mm – 24mm | f/2.8 or lower |
| Wide-Angle Zoom | 16-35mm | f/2.8 or lower |
Fast Aperture
A fast aperture (f/2.8 or lower) is essential for gathering light. This is particularly important in low-light conditions, like those you encounter at night.
Low Distortion
Look for lenses with minimal distortion. Distortion can warp the stars and celestial objects, making your panorama look unnatural.
Planning Your Night Sky Shoot
Best Times for Astrophotography
Timing is everything in astrophotography. You want to capture the stars, planets, and celestial events at their best. Moon phases play a huge role. A new moon offers the darkest skies, which is perfect for capturing faint details. Avoid full moons unless you’re aiming to photograph the moon itself.
Seasons matter too. Winter skies are often clearer, but they come with the challenge of cold weather. Summer nights are warmer, but humidity can blur your images. Spring and fall strike a good balance.
| Moon Phase | Best for Astrophotography? |
|---|---|
| New Moon | Yes |
| Waxing Crescent | Yes |
| First Quarter | Yes |
| Waxing Gibbous | No |
| Full Moon | No |
| Waning Gibbous | No |
| Last Quarter | Yes |
| Waning Crescent | Yes |
Finding the Perfect Location
Location, location, location. It’s not just for real estate. Light pollution can ruin your shots. Aim for dark sky reserves or national parks. These places are often far from city lights and offer pristine conditions.
Elevation can also help. Higher altitudes have less atmospheric interference. Think mountains or high plateaus. Just be ready for the cold and thin air.
Use apps and websites to find dark skies. Tools like Dark Site Finder or Light Pollution Map can guide you to the best spots.
| Location Type | Light Pollution Level | Ideal? |
|---|---|---|
| City Center | High | No |
| Suburban Area | Moderate | No |
| Rural Area | Low | Yes |
| National Park | Very Low | Yes |
| High Altitude | Very Low | Yes |
Weather Considerations
Weather can make or break your shoot. Clear skies are a must. Cloud cover will block your view. Check the forecast and use apps that focus on astronomical weather, like Clear Outside.
Humidity can also be a problem. It causes lens fogging and reduces visibility. A dew heater can help keep your equipment dry.
Wind is another factor. It can shake your camera and blur your shots. Use a sturdy tripod and consider a wind shield.
| Weather Condition | Impact on Astrophotography |
|---|---|
| Clear Skies | Ideal |
| Cloudy | Poor |
| Humid | Poor |
| Windy | Poor |
| Calm | Ideal |
Advanced Astrophotography Techniques
Panoramic Astrophotography
Creating stunning night sky panoramas involves stitching multiple images together. This technique allows you to capture a broader view of the sky, showcasing the Milky Way in all its glory.
Equipment is key. A DSLR or mirrorless camera with a wide-angle lens is a good start. A sturdy tripod is essential to keep your shots steady. An intervalometer can help automate the shooting process.
Settings are crucial. Use a low ISO to reduce noise, but not so low that you miss faint details. A wide aperture lets in more light, and a long exposure captures more stars.
Planning your shots is the first step. Use apps like Stellarium or SkySafari to see what the sky will look like at your location and time. This helps you plan your composition.
Shooting involves taking multiple overlapping shots. Start from one side and move across the sky, making sure each shot overlaps the previous one by about 30%.
Stitching the images together can be done in software like Adobe Lightroom or PTGui. These programs align and blend the images to create a seamless panorama.
| Step | Action |
|---|---|
| Equipment | DSLR, wide-angle lens, tripod, intervalometer |
| Settings | Low ISO, wide aperture, long exposure |
| Planning | Use apps to plan composition |
| Shooting | Take overlapping shots |
| Stitching | Use software to blend images |
Mastering Camera Settings for Night Sky Panoramas
Adjusting ISO and Shutter Speed
When you’re out there under the vast, starry sky, your camera settings can make or break your shot. Let’s dive into the ISO and shutter speed adjustments first.
ISO is all about your camera’s sensitivity to light. For night sky panoramas, you typically want a higher ISO. This allows your camera to capture more light, revealing the beautiful details of the stars and Milky Way. However, a higher ISO can also introduce noise. Balancing is key. Start with an ISO of around 1600 to 3200 and adjust from there based on your specific conditions.
| ISO Setting | Light Sensitivity | Noise Level |
|---|---|---|
| 800 | Low | Very Low |
| 1600 | Medium | Low |
| 3200 | High | Medium |
| 6400 | Very High | High |
Next up, shutter speed. The longer the shutter stays open, the more light it captures. But there’s a catch. If you leave it open too long, the stars start to trail, creating streaks instead of sharp points. A good rule of thumb is the 500 Rule: Divide 500 by the focal length of your lens. For example, if you’re using a 24mm lens, 500/24 gives you about 20 seconds. This is your maximum shutter speed to avoid star trails.
| Focal Length (mm) | Max Shutter Speed (seconds) |
|---|---|
| 14 | 35 |
| 24 | 20 |
| 50 | 10 |
| 100 | 5 |
Setting the Aperture
Now, let’s talk about aperture. This is the opening in your lens that lets light in. For night photography, you want it wide open. This means using the smallest f-number your lens allows, like f/2.8 or f/1.8. A wide aperture lets in more light, which is crucial for capturing those dim stars.
However, a wider aperture also means a shallower depth of field. This isn’t a big deal for sky shots, but if you’re including foreground elements, you’ll need to balance aperture with focus.
| Aperture (f-stop) | Light Intake | Depth of Field |
|---|---|---|
| f/1.4 | Very High | Very Shallow |
| f/2.8 | High | Shallow |
| f/4 | Medium | Medium |
| f/8 | Low | Deep |
Stitching Your Panoramic Photos Together
Creating panoramic shots of the night sky is no small feat. But when you get it right, the results are breathtaking. Lets dive into the nitty-gritty of stitching your panoramic photos together.
Using Software for Panoramas
When you have your series of shots ready, the next step is to merge them into a single, seamless panorama. This is where software comes into play. There are several programs you can use, each with its own set of features and quirks.
Popular Software Options:
| Software | Key Features | Price |
|---|---|---|
| Adobe Lightroom | Easy to use, great for beginners | Subscription-based |
| PTGui | Advanced features, high-quality output | One-time purchase |
| Hugin | Free, open-source | Free |
| Autopano Giga | Handles large files, automatic stitching | Subscription-based |
Adobe Lightroom is a favorite among many photographers. Its user-friendly and integrates well with other Adobe products. To create a panorama, simply import your photos, select them, and use the “Photo Merge” option. Its that easy.
PTGui is another excellent choice, especially if youre looking for more control. It offers advanced features like exposure fusion and HDR (High Dynamic Range) blending. This can be particularly useful for astrophotography, where lighting conditions can vary.
Hugin is a fantastic free alternative. Its open-source and has a robust set of features. While it might have a steeper learning curve, its worth the effort for those on a budget.
Autopano Giga is known for its ability to handle large files and automatic stitching. This can save you a lot of time, especially if youre working with high-resolution images.
Tips for Seamless Stitching
Stitching your photos together can be tricky. But with a few tips, you can make the process smoother and achieve better results.
1. Overlap Your Shots:
Ensure each photo overlaps with the next by about 30-50%. This gives the software enough data to align the images accurately.
2. Keep the Camera Level:
Use a tripod with a level indicator to keep your camera steady and level. This reduces distortion and makes stitching easier.
3. Consistent Exposure:
Maintain consistent exposure settings for all your shots. This helps avoid visible seams where the photos meet.
4. Use Manual Focus:
Autofocus can vary between shots. Manual focus keeps everything sharp and consistent.
5. Shoot in RAW:
RAW files contain more data than JPEGs, giving you more flexibility in post-processing.
Avoiding Common Mistakes
Even seasoned photographers can make mistakes. Here are some common pitfalls and how to avoid them.
1. Not Enough Overlap:
If your shots dont overlap enough, the software may struggle to stitch them together. Always aim for at least 30% overlap.
2. Varying Exposure:
Changing exposure settings between shots can lead to visible seams. Use manual exposure settings to keep everything consistent.
3. Moving Objects:
Moving objects like clouds or planes can create ghosting effects. Try to shoot when the sky is clear.
4. Distortion:
Wide-angle lenses can introduce distortion, making stitching harder. Use a lens with minimal distortion or correct it in post-processing.
5. Poor Alignment:
If your camera isnt level, youll get a warped panorama. Use a tripod with a level indicator to keep everything straight.
Enhancing Your Panoramic Astrophotography Images
Basic Editing Techniques
Astrophotography is a mesmerizing hobby, capturing the cosmos in all its glory. But, snapping the shot is only half the battle. The real magic happens in the editing room. So, let’s dive into some basic editing techniques to make your panoramic shots truly shine.
Adjusting Exposure and Contrast
First things first, adjust the exposure. Your camera might not capture the night sky perfectly. You might find your images are too dark or too bright. Use your editing software to tweak the exposure. This will bring out the stars and the Milky Way. Contrast adjustment is next. Boost the contrast to make the stars pop against the dark sky. Be careful not to overdo it, though. You want a natural look.
White Balance Correction
White balance is crucial in astrophotography. The night sky can have a lot of different colors. Sometimes, it might appear too blue or too orange. Adjust the white balance to get the true colors of the stars and the Milky Way. This can make a big difference in the overall look of your image.
Noise Reduction
Night photography often comes with a lot of noise. This is the grainy texture you see in your images. Use the noise reduction tool in your editing software. But, be gentle. Too much noise reduction can make your image look soft and lose detail.
Cropping and Straightening
Cropping helps you focus on the best part of your image. Maybe there’s a distracting element at the edge of your photo. Crop it out. Straightening is also important. A tilted horizon can ruin an otherwise perfect shot. Use the straighten tool to level your horizon.
Advanced Editing Tricks
Once youve mastered the basics, its time to step up your game. Advanced editing techniques can transform your panoramic astrophotography from good to breathtaking.
Layer Masking
Layer masking is a powerful tool. It allows you to apply adjustments to specific parts of your image. For example, you might want to brighten the Milky Way without affecting the rest of the sky. Create a layer mask for the Milky Way and adjust the brightness. This gives you more control over your edits.
Star Reduction
Sometimes, your image might have too many stars. This can make it look cluttered. Star reduction is a technique to reduce the number of stars in your image. This makes the main features, like the Milky Way, stand out more. There are specific tools and plugins for star reduction in most editing software.
Color Grading
Color grading is the process of adjusting the colors in your image. This can give your photo a specific mood or feel. For example, you might want a cooler, blue tone for a more mysterious look. Or a warmer, orange tone for a more inviting feel. Experiment with different color grades to see what works best for your image.
Panorama Stitching
Panorama stitching is the process of combining multiple photos into one. This is especially useful in astrophotography. The night sky is vast, and a single photo might not capture everything. Use panorama stitching to create a wide, sweeping view of the night sky. Most editing software has a panorama stitching tool. Align your photos and let the software do the rest.
Using Filters and Presets
Filters and presets can save you a lot of time. They apply a set of adjustments to your image with one click. This can be a great starting point for your edits.
Gradient Filters
Gradient filters are useful for astrophotography. They allow you to apply adjustments to a specific part of your image. For example, you might want to darken the sky while keeping the foreground bright. Use a gradient filter to darken the sky gradually. This creates a more natural look.
Custom Presets
Custom presets are a set of adjustments that you can save and apply to other images. Create a preset for your astrophotography edits. This can include exposure, contrast, white balance, and noise reduction settings. Save it and apply it to other images with one click. This ensures consistency across your photos.
Popular Presets
There are many popular presets available online. Some are free, while others are paid. Look for presets specifically designed for astrophotography. These can give your images a professional look with minimal effort. Experiment with different presets to see which ones work best for your style.
Combining Filters and Presets
Dont be afraid to combine filters and presets. Apply a preset to get a good starting point. Then, use gradient filters to fine-tune specific parts of your image. This gives you the best of both worlds – speed and precision.
Tools and Software
Choosing the right tools and software is crucial for editing your astrophotography images. Here are some popular options:
| Software | Description |
|---|---|
| Adobe Photoshop | A powerful editing tool with a wide range of features. Ideal for advanced editing techniques. |
| Adobe Lightroom | Great for basic and advanced edits. User-friendly and has many presets available. |
| PixInsight | Specialized software for astrophotography. Offers advanced features like star reduction and noise reduction. |
| DeepSkyStacker | Free software for stacking multiple images. Helps reduce noise and bring out more detail. |
| GIMP | A free alternative to Photoshop. Offers many of the same features. |
Tips and Tricks
Here are some additional tips and tricks to enhance your panoramic astrophotography images:
Plan Your Shoot
Planning is key. Check the weather and moon phases. A clear, moonless night is ideal. Use apps like Stellarium to find the best time and location for your shoot.
Use a Tripod
A sturdy tripod is essential for astrophotography. It keeps your camera steady and reduces blur. Invest in a good tripod for the best results.
Shoot in RAW
Always shoot in RAW format. This gives you the most flexibility in editing. RAW files contain more data than JPEGs, allowing you to make more adjustments.
Experiment with Settings
Dont be afraid to experiment with different camera settings. Try different exposure times, ISO settings, and apertures. Find what works best for your style.
Sharing and Showcasing Your Night Sky Panoramas
So, you’ve spent countless hours under the stars, capturing the beauty of the night sky in stunning panoramas. Now, it’s time to share your work with the world. Lets dive into the best ways to showcase your astrophotography.
Best Platforms for Sharing
Choosing the right platform to share your night sky panoramas is crucial. Here are some popular options:
| Platform | Features | Pros | Cons |
|---|---|---|---|
| Photo and video sharing, Stories, IGTV | Wide reach, Easy to use | Image compression, Limited resolution | |
| Flickr | Photo hosting, Albums, Groups | High resolution, Community engagement | Less popular, Limited audience |
| 500px | Professional photo sharing, Marketplaces | High-quality audience, Licensing options | Paid memberships, Smaller community |
| Subreddits, Community voting | Engaged community, Feedback | Can be harsh, Not photo-centric | |
| Photo albums, Groups, Pages | Large audience, Easy sharing | Privacy concerns, Algorithm changes | |
| Your Own Website | Customizable, Portfolio | Full control, Professional appearance | Requires maintenance, SEO knowledge |
Each platform has its strengths and weaknesses. Choose the one that aligns best with your goals and audience.
Creating a Portfolio
A well-organized portfolio is like a gallery of your best work. Heres how you can create one:
- Select Your Best Shots: Quality over quantity. Pick images that showcase your skills and creativity.
- Organize by Theme or Location: Group your images in a way that tells a story. It could be by constellation, location, or event.
- Edit Meticulously: Ensure your images are polished. Pay attention to details like noise reduction, color correction, and sharpness.
- Write Descriptions: Add context to your images. Describe the location, the equipment used, and any interesting anecdotes.
- Use a Professional Platform: Consider using platforms like Squarespace, Wix, or WordPress to create a sleek, professional-looking portfolio.
Here’s an example of how you can organize your portfolio:
| Category | Description | Example Image |
|---|---|---|
| Milky Way | Panoramas capturing the Milky Way galaxy in all its glory | |
| Star Trails | Long exposure shots showing the movement of stars | |
| Auroras | Stunning images of the Northern and Southern Lights | |
| Eclipses | Captures of lunar and solar eclipses | |
| Constellations | Panoramas highlighting specific constellations |
Engaging with the Astrophotography Community
Engagement is key to growing as an astrophotographer. Heres how you can connect with the community:
Join Online Forums and Groups
Platforms like Reddit, Facebook, and specialized forums like Cloudy Nights offer a wealth of knowledge and a supportive community. Share your work, ask for feedback, and learn from others.
Attend Workshops and Meetups
Look for local or online workshops and meetups. These events are great for networking, learning new techniques, and getting inspired.
Collaborate with Other Photographers
Collaboration can open up new creative possibilities. Partner with other photographers for joint projects, share tips, and learn from each others experiences.
Participate in Contests
Entering photography contests can be a great way to gain recognition and improve your skills. Look for contests specifically for astrophotography or general photography contests that include a night sky category.
Frequently asked questions
What is Panoramic Astrophotography: Creating Stunning Night Sky Panoramas?
Panoramic Astrophotography: Creating Stunning Night Sky Panoramas is a technique where you capture multiple images and stitch them together to form a wide, breathtaking view of the night sky.
How do you start with panoramic astrophotography?
Start by using a tripod and a wide-angle lens. Take multiple overlapping shots. You will then stitch these images together in post-processing.
What gear do you need for Panoramic Astrophotography?
You will need a DSLR or mirrorless camera, a sturdy tripod, a wide-angle lens, and a remote shutter release. A panoramic head on your tripod is a bonus.
How do you avoid noise in night sky panoramas?
Use a low ISO and a longer exposure time. Always shoot in RAW format. Post-processing software can help reduce noise further.
Why are night sky panoramas so stunning?
They capture the vastness and beauty of the universe in a single frame. The panoramic view makes the night sky look like an endless, glittering spectacle.

