Capturing the Enchanting Orion Stars: Your Ultimate Guide
Dreaming of capturing the Orion stars in all their glory? This guide is crafted especially for you! From the essential techniques to the best camera settings and equipment, we’ll walk you through everything you need to get those stunning shots of Betelgeuse, Rigel, and the Orion Nebula. Whether you’re snapping photos in an urban jungle or a serene countryside, you’ll find the right tips to make your Orion shots pop. And dont worry, weve got you covered with post-processing tricks to enhance every star in your frame. Ready to dive into the cosmos and unlock the mysteries of Orion? Let’s get started!
Key Takeaways
- Use a DSLR or mirrorless camera for best results.
- Find a dark location away from city lights.
- Frame Betelgeuse, Rigel, and M42 for stunning shots.
- Experiment with long exposure times for clear stars.
- Edit photos to enhance colors and details.

Essential Techniques for Capturing Orion Stars
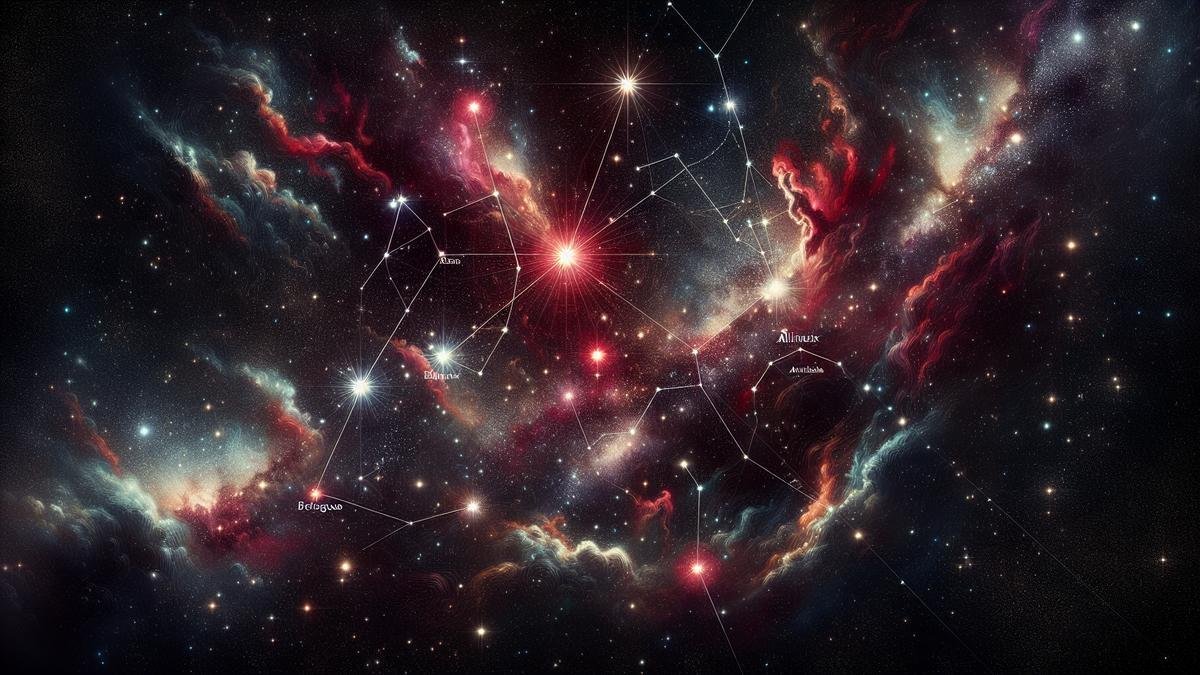
So, you’re ready to capture the awe-inspiring Orion constellation? Great choice! Orion is one of the most recognizable and stunning constellations in the night sky. From the bright Betelgeuse to the dazzling Rigel and the mesmerizing Orion Nebula (M42), photographing this constellation can be a thrilling experience. Let’s dive into the essential techniques and equipment you’ll need to capture Orion in all its glory.
Best Camera Settings for Orion Stars
First things first, getting your camera settings right is crucial. You don’t want to miss out on the beauty of Orion because of a simple setting error. Heres a quick guide to help you out:
| Setting | Recommended Value |
|---|---|
| Aperture | f/2.8 – f/4 |
| ISO | 800 – 3200 |
| Shutter Speed | 15 – 30 seconds |
| White Balance | Auto or 4000K |
Aperture
You’ll want to use a wide aperture (low f-number) to let in as much light as possible. This is especially important for capturing the faint stars and nebulae in Orion. An aperture of f/2.8 to f/4 is ideal.
ISO
ISO controls the cameras sensitivity to light. A higher ISO will make your camera more sensitive, which is great for night photography. However, too high an ISO can introduce noise. Start with ISO 800 and go up to 3200 if needed.
Shutter Speed
A longer shutter speed allows more light to hit the camera sensor. But if you go too long, the stars will start to trail due to Earth’s rotation. A shutter speed between 15 to 30 seconds is usually perfect for capturing sharp stars.
White Balance
Auto white balance works fine for most situations, but setting it to around 4000K can help bring out the natural colors of the stars and nebulae.
Choosing the Right Lens for Orion Stars
The lens you choose can make or break your astrophotography. Heres what you need to know:
| Type of Lens | Recommended Focal Length |
|---|---|
| Wide-Angle | 14mm – 24mm |
| Standard | 35mm – 50mm |
| Telephoto | 70mm – 200mm |
Wide-Angle Lens
A wide-angle lens, typically between 14mm and 24mm, is fantastic for capturing the entire constellation along with some landscape elements. This lens type is perfect for those iconic shots where Orion dominates the sky.
Standard Lens
A standard lens with a focal length between 35mm and 50mm offers a balanced view, capturing both the constellation and some surrounding stars. This lens is great if you want a closer look at Orion but still include some context.
Telephoto Lens
For detailed shots of specific stars like Betelgeuse or Rigel, or the Orion Nebula (M42), a telephoto lens between 70mm and 200mm is ideal. This lens allows you to zoom in and capture intricate details that would be missed with a wider lens.
Tripod Stability for Clear Orion Shots
A sturdy tripod is your best friend when photographing the night sky. Heres why its essential and how to make the most of it:
Why Stability Matters
Even the slightest movement can ruin a long-exposure shot. A stable tripod ensures that your camera remains perfectly still, allowing for crisp, clear images of Orion.
Choosing the Right Tripod
Look for a tripod thats both sturdy and lightweight. Carbon fiber tripods are excellent because they offer great stability without being too heavy.
Tips for Stability
- Use a Remote Shutter Release: This avoids any shake from pressing the shutter button.
- Add Weight: Hang a weight from the center column of your tripod to increase stability.
- Find Solid Ground: Set up your tripod on firm ground to prevent any wobbling.
Framing the Constellation
Framing Orion correctly can elevate your photo from good to breathtaking. Here are some tips:
Rule of Thirds
Use the rule of thirds to position Orion in your frame. Imagine your frame divided into nine equal parts by two horizontal and two vertical lines. Place Orion along these lines or at their intersections.
Include Foreground Elements
Incorporate interesting foreground elements like trees, mountains, or buildings to add context and depth to your photo. This can make your image more compelling and visually appealing.
Experiment with Angles
Dont be afraid to try different angles. Shoot from a low angle to make Orion appear larger in the sky, or include some horizon to give a sense of scale.
Post-Processing Techniques
Post-processing can bring out the hidden details in your photos. Heres how to do it:
Software
Use software like Adobe Lightroom or Photoshop for post-processing. These tools offer a range of features to enhance your astrophotography.
Adjusting Levels
- Brightness and Contrast: Increase the brightness and contrast to make the stars pop.
- Color Balance: Adjust the color balance to bring out the natural hues of the stars and nebulae.
- Noise Reduction: Use noise reduction tools to minimize the graininess that can appear at high ISO settings.
Layer Masking
Layer masking allows you to make selective adjustments to specific parts of your image. This is particularly useful for enhancing the Orion Nebula without affecting the surrounding stars.
Capturing Orion in Different Settings
Whether youre in a bustling city or a remote countryside, you can still capture stunning images of Orion. Heres how:
Urban Environments
- Light Pollution: Use a light pollution filter to reduce the orange glow from city lights.
- Higher ISO: Increase your ISO to compensate for the reduced visibility.
- Framing: Include cityscapes or landmarks to add an urban touch to your photo.
Rural Environments
- Dark Skies: Take advantage of the dark skies to capture more stars and details.
- Lower ISO: Use a lower ISO to reduce noise and capture cleaner images.
- Foreground Elements: Incorporate natural elements like trees or mountains for a more serene composition.
Equipment You Need to Photograph Orion Stars
Photographing the Orion constellation can be one of the most rewarding experiences for any astrophotographer. Whether you’re a newbie or a seasoned pro, capturing the beauty of Orion, with its famous stars like Betelgeuse and Rigel, and the mesmerizing Orion Nebula (M42), requires the right gear. Let’s dive into the essential equipment you’ll need.
Must-Have Accessories for Orion Stars Photography
When you’re setting up to photograph Orion, having the right accessories can make a world of difference. Here are the must-haves:
1. Camera:
A DSLR or mirrorless camera with manual settings is crucial. You’ll need to control the exposure, ISO, and focus to capture the night sky effectively.
2. Lens:
A wide-angle lens (14-24mm) is ideal for capturing the entire constellation. However, a telephoto lens (70-200mm) can help you zoom in on specific stars like Betelgeuse or the Orion Nebula.
3. Tripod:
A sturdy tripod is non-negotiable. It keeps your camera steady, which is essential for long exposure shots.
4. Memory Cards:
High-capacity and high-speed memory cards are a must. Shooting in RAW format consumes a lot of space, but it’s worth it for the detail you can capture.
5. Battery Packs:
Cold nights can drain your camera battery faster than you think. Always carry extra batteries.
6. Red Light Headlamp:
A red light headlamp helps you see in the dark without ruining your night vision or affecting your camera settings.
7. Star Tracker:
A star tracker can be a game-changer. It follows the rotation of the Earth, allowing you to take longer exposures without star trails.
Using a Star Tracker for Orion Stars
A star tracker is a nifty gadget that can elevate your astrophotography game. Here’s how to use it effectively:
1. Setting Up:
First, mount your camera on the star tracker, which is then placed on your tripod. Make sure everything is balanced to avoid any shakes or movements.
2. Polar Alignment:
Align the star tracker with Polaris (the North Star). Most trackers come with a polar scope to help you with this. Proper alignment is crucial for accurate tracking.
3. Adjusting Settings:
Once aligned, set your camera to a low ISO (around 800-1600) and a long exposure time (30 seconds to several minutes). The star tracker will compensate for the Earth’s rotation, keeping the stars sharp.
4. Framing Orion:
Point your camera towards Orion, ensuring you frame the constellation well. Use a wide-angle lens to capture the entire constellation or a telephoto lens to zoom in on specific stars or the Orion Nebula.
5. Taking the Shot:
Use a remote shutter release or the camera’s timer to avoid any camera shake. Take multiple shots to increase your chances of getting that perfect image.
Remote Shutter Release for Steady Shots
A remote shutter release is a small but mighty tool in your astrophotography arsenal. Here’s why it’s essential and how to use it:
1. Why You Need It:
Pressing the shutter button manually can cause slight camera shakes, ruining your long exposure shots. A remote shutter release eliminates this risk.
2. Types of Remote Shutter Releases:
- Wired Remote: Simple and reliable, it connects directly to your camera.
- Wireless Remote: Offers more flexibility, allowing you to trigger the shutter from a distance.
3. Using a Remote Shutter Release:
- Setup: Connect the remote to your camera.
- Timer Function: Some remotes come with a built-in timer, allowing you to set specific exposure times.
- Bulb Mode: For very long exposures, use the bulb mode on your camera and control the exposure length with your remote.
4. Benefits:
- Steady Shots: No camera shake means sharper images.
- Convenience: Easily take multiple shots without touching the camera.
- Long Exposures: Perfect for capturing the faint details of the Orion Nebula.

Post-Processing Tips for Orion Stars
Enhancing Orion Stars in Lightroom
Alright, you’ve captured those stunning shots of the Orion constellation. Now what? It’s time to make those stars pop using Lightroom. Lightroom is your best friend when it comes to bringing out the beauty in your night sky photos.
First off, import your images into Lightroom. Once they’re in, head to the Develop module. This is where the magic happens.
Basic Adjustments
- Exposure: Adjust the exposure to brighten up the stars without blowing out the highlights. Be gentle with this slider.
- Contrast: Increase the contrast to make the stars stand out against the dark sky.
- Highlights and Shadows: Lower the highlights to recover any detail in the bright stars like Betelgeuse and Rigel. Increase the shadows slightly to reveal more of the nebula.
- Whites and Blacks: Adjust the whites to make the stars shine, and tweak the blacks to deepen the night sky.
Clarity, Vibrance, and Saturation
- Clarity: Boost the clarity to enhance the details of the stars and the nebula.
- Vibrance: Increase vibrance to make the colors of the Orion Nebula (M42) more vivid.
- Saturation: Use this sparingly. Overdoing it can make your photo look unnatural.
Tone Curve
The Tone Curve is like a secret weapon. Create an S-curve to add more contrast. This will make the stars pop even more.
| Adjustment | Recommended Settings |
|---|---|
| Exposure | +0.5 to +1.0 |
| Contrast | +20 to +30 |
| Highlights | -20 to -30 |
| Shadows | +10 to +20 |
| Whites | +10 to +20 |
| Blacks | -10 to -20 |
| Clarity | +15 to +25 |
| Vibrance | +10 to +20 |
| Saturation | +5 to +10 |
Removing Noise from Orion Stars Photos
Night sky photos often come with noise. It’s like the unwelcome guest at a party. But don’t worry, Lightroom can help you kick it out.
Noise Reduction Basics
- Luminance Noise Reduction: This slider helps reduce the grainy look in your photos. Start with a value around 20 and adjust as needed.
- Detail: Increase the detail to retain sharpness in the stars.
- Contrast: Adjust the contrast to balance the noise reduction.
Color Noise Reduction
Color noise appears as random colors in the dark areas of your photo. Use the Color Noise Reduction slider to fix this. A value of 25 is a good starting point.
Masking
Use the masking slider in the sharpening section to apply sharpening only to the stars and not the sky. Hold the Alt key (Option key on Mac) while moving the slider to see the mask.
| Noise Reduction | Recommended Settings |
|---|---|
| Luminance | 20-40 |
| Detail | 50-70 |
| Contrast | 10-20 |
| Color | 25-50 |
| Masking | 60-80 |
Adjusting Colors for Stunning Orion Images
Colors can make or break your astrophotography. Getting them right is crucial.
White Balance
Start with the white balance. Set it to “Daylight” or use the eyedropper tool to pick a neutral area in your photo. This will give you a good starting point.
HSL/Color Panel
The HSL/Color panel lets you fine-tune the colors in your photo.
- Hue: Adjust the hue of the blues and purples to make the Orion Nebula stand out.
- Saturation: Increase the saturation of the blues and purples to make the nebula more vibrant.
- Luminance: Adjust the luminance to make the stars and nebula brighter.
| Color Adjustment | Recommended Settings |
|---|---|
| Hue (Blues) | -10 to +10 |
| Hue (Purples) | -10 to +10 |
| Saturation | +10 to +20 |
| Luminance | +10 to +20 |
Capturing Orion Stars in Different Environments
Photographing the Orion constellation is like capturing a piece of the universe. This constellation includes some of the most stunning stars like Betelgeuse, Rigel, and the Orion Nebula (M42). Whether you’re in a bustling city or a quiet countryside, you can still capture the essence of Orion. Lets dive into the techniques and tips that will help you photograph Orion in various settings.
Urban Photography Tips for Orion Stars
Photographing stars in a city can be challenging due to light pollution. But don’t worry, with the right techniques, you can still get amazing shots.
Essential Equipment
- Camera: A DSLR or a mirrorless camera with manual settings.
- Lens: A wide-angle lens with a low f-stop (f/2.8 or lower).
- Tripod: To keep your camera steady.
- Remote Shutter Release: To avoid camera shake.
Camera Settings
- ISO: Set it between 800-1600 to capture more light.
- Aperture: Use the widest aperture (lowest f-stop) available.
- Shutter Speed: Start with 15-20 seconds. Adjust as needed.
- Focus: Manually focus on a bright star or use live view.
Framing Orion
- Find Orion: Look for Orions Belt, three stars in a straight line.
- Include Landmarks: Frame Orion with city landmarks for a unique composition.
- Use Leading Lines: Use streets or buildings to guide the viewer’s eye to Orion.
Post-Processing Tips
- Reduce Noise: Use noise reduction tools in software like Lightroom.
- Increase Clarity: Enhance the constellations details.
- Adjust Contrast: Make the stars stand out against the night sky.
Rural Photography Tips for Orion Stars
In rural areas, the sky is darker, making it easier to capture stars. Heres how to make the most of it.
Essential Equipment
- Camera: A DSLR or mirrorless camera.
- Lens: A wide-angle lens with a low f-stop.
- Tripod: To keep the camera steady.
- Remote Shutter Release: To avoid camera shake.
Camera Settings
- ISO: Set it between 1600-3200.
- Aperture: Use the widest aperture (lowest f-stop) available.
- Shutter Speed: Start with 20-30 seconds.
- Focus: Manually focus on a bright star or use live view.
Framing Orion
- Find Orion: Look for Orions Belt.
- Include Foreground: Use trees, mountains, or lakes for a compelling composition.
- Use the Rule of Thirds: Place Orion off-center for a balanced shot.
Post-Processing Tips
- Reduce Noise: Use noise reduction tools.
- Enhance Details: Increase clarity and sharpness.
- Adjust Colors: Bring out the natural colors of the stars and nebula.
Overcoming Light Pollution Challenges
Light pollution can be a major hurdle, but there are ways to overcome it.
Use a Light Pollution Filter
- Filters: Use a light pollution filter to reduce unwanted light.
- Types: Consider filters like the Hoya Red Intensifier or L-Pro.
Choose the Right Time
- Moon Phases: Shoot during a new moon for darker skies.
- Time of Night: Late night or early morning when city lights are dimmer.
Frequently Asked Questions
How can I start photographing Orion stars?
First, you’ll need a DSLR camera, a sturdy tripod, and a remote shutter. Aim for clear skies in a dark location.
What are the best settings for capturing Orion stars?
Use a wide-angle lens, set your ISO between 800-1600, and use a long exposure time of about 20-30 seconds. Adjust as needed.
How do I frame the Orion constellation in my shots?
Find Orion’s Belt; it’s a line of three bright stars. Use that as a guide to frame the surrounding stars like Betelgeuse, Rigel, and the Orion Nebula.
Can I photograph Orion stars in an urban environment?
Yes, but light pollution can be a problem. Use a light pollution filter and try shooting during a new moon for the best results.
What post-processing techniques bring out Orion’s details?
Use software like Adobe Lightroom or Photoshop. Increase contrast, adjust the exposure, and boost the clarity to make stars pop.