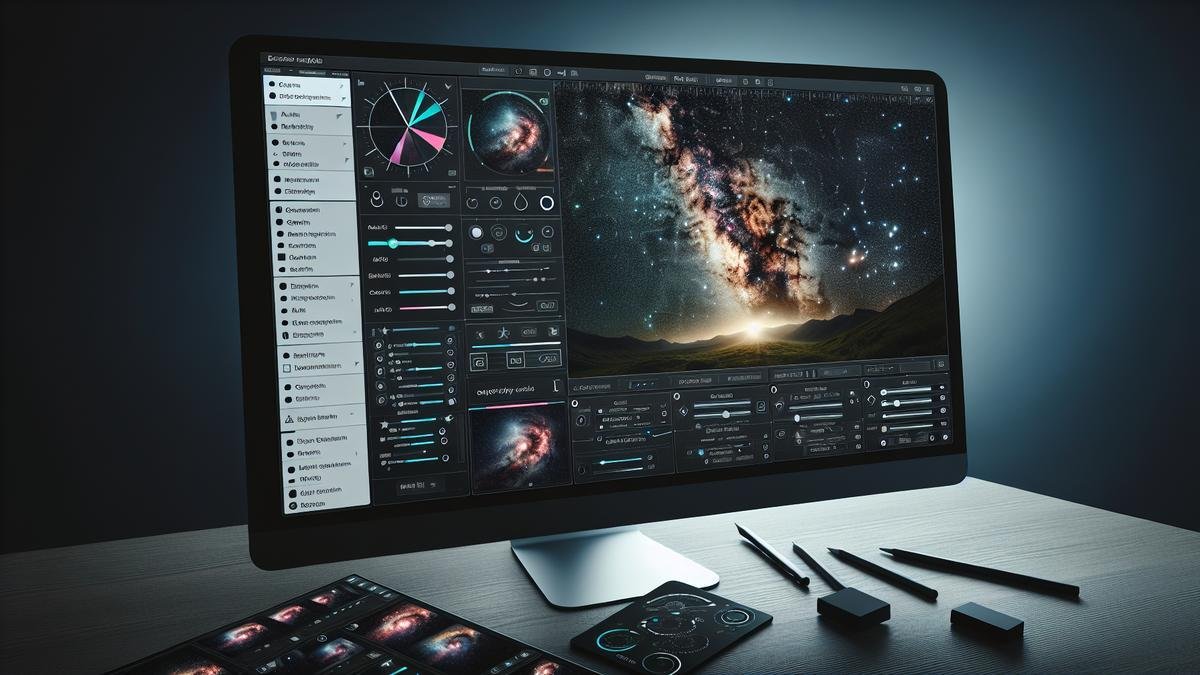
Enhancing Milky Way photos with post-processing can seem tricky at first, but it doesn’t have to be. You’re about to dive into a world of popular post-processing tools, both free and paid, that fit your needs. From basic adjustments to advanced techniques, we’ll guide you step-by-step. Whether you want to tweak exposure, enhance colors, or achieve that dreamy look, this article has got you covered. You’ll also learn how to avoid common mistakes and ensure your photos stay natural and stunning. So, ready to make your Milky Way shots shine? Let’s get started!
Key Takeaways
- Use software like Lightroom or Photoshop.
- Adjust exposure and contrast.
- Increase the clarity and sharpness.
- Reduce noise in the photo.
- Use the saturation tool sparingly.

Choosing the Right Software for Enhancing Milky Way Photos
When diving into the captivating world of Milky Way photography, post-processing is your secret weapon. It’s where the magic happens, transforming your raw images into breathtaking masterpieces. But with a myriad of software options available, how do you choose the right one? Let’s break it down and explore the best tools to bring out the beauty of your Milky Way photos.
Popular Post-Processing Tools
In the vast universe of post-processing software, some names shine brighter than others. Here are a few that have garnered popularity among astrophotographers:
Adobe Photoshop
Adobe Photoshop is a powerhouse in the world of photo editing. Known for its versatility, it offers a range of tools specifically designed for astrophotography. From noise reduction to enhancing star colors, Photoshop provides a comprehensive suite of features to elevate your Milky Way photos.
Lightroom
Lightroom, another gem from Adobe, is particularly user-friendly. Its great for batch processing, which means you can apply the same adjustments to multiple photos at once. This is particularly useful for Milky Way photography, where consistency is key.
PixInsight
PixInsight is a specialized tool for astrophotography. It offers advanced features like gradient removal and star alignment, making it a favorite among serious astrophotographers. While it has a steeper learning curve, the results can be truly spectacular.
DeepSkyStacker
For those who focus on stacking images to reduce noise and enhance detail, DeepSkyStacker is a fantastic choice. It’s free and specifically designed for astrophotography, making it an excellent starting point for beginners.
Comparing Free and Paid Software
When it comes to choosing between free and paid software, its essential to weigh the pros and cons. Here’s a comparison to help you navigate this decision:
| Feature | Free Software | Paid Software |
|---|---|---|
| Cost | $0 | Varies ($10 – $100/month) |
| Ease of Use | Generally user-friendly | Can be complex but powerful |
| Features | Basic to moderate | Advanced and extensive |
| Support and Updates | Limited | Regular updates and support |
| Examples | GIMP, DeepSkyStacker | Photoshop, Lightroom, PixInsight |
Free Software
Free software like GIMP and DeepSkyStacker are excellent starting points. They offer basic to moderate features that can still produce stunning results. However, they may lack some of the advanced tools and regular updates that paid software provides.
Paid Software
Paid software, such as Photoshop and PixInsight, often comes with a steeper price tag. But with this investment, you gain access to a broader range of features, regular updates, and robust customer support. These tools can significantly enhance your Milky Way photos, providing you with the flexibility and precision needed for professional-quality results.
Best Software for Beginners
If you’re just starting your journey into Milky Way photography, it’s crucial to choose software that is both effective and easy to use. Here are some recommendations:
Lightroom
Lightroom stands out as an excellent choice for beginners. Its intuitive interface and powerful editing tools make it easy to enhance your Milky Way photos. You can adjust exposure, contrast, and colors with just a few clicks, making it a great starting point.
DeepSkyStacker
DeepSkyStacker is another fantastic option for newcomers. It simplifies the process of stacking multiple images to reduce noise and improve detail. Plus, its free, making it accessible for those who are just starting out.
Basic Adjustments to Improve Your Milky Way Photos
Adjusting Exposure and Contrast
When you first peek at your Milky Way photos, they might seem a bit underwhelming. But don’t fret! Adjusting exposure and contrast can breathe life into those celestial captures. Exposure is about controlling the brightness of your image. Start by increasing the exposure slightly; this will reveal hidden details in the dark areas. However, be cautious not to overexpose, as it can wash out the stars.
Contrast is your best friend here. It helps in distinguishing the Milky Way from the background. Increasing contrast will make the stars pop and the dark sky even darker. Use the contrast slider in your preferred editing software and watch the magic unfold.
Here’s a quick guide to help you out:
| Adjustment | Description | Effect on Photo |
|---|---|---|
| Exposure | Controls the brightness of the image | Reveals hidden details in dark areas |
| Contrast | Distinguishes between light and dark areas | Makes stars pop, darkens the sky |
Enhancing Colors and Saturation
The Milky Way isn’t just a bunch of white dots on a black canvas. It’s a colorful spectacle! Enhancing colors and saturation can bring out the hidden hues in your photos. Saturation increases the intensity of colors. Be gentle with this adjustment; too much saturation can make your photo look artificial.
Vibrance is another tool you can use. It adjusts the intensity of the more muted colors, leaving the already vivid ones alone. This helps in achieving a balanced look without overdoing it.
Here’s a simple table to guide your adjustments:
| Adjustment | Description | Effect on Photo |
|---|---|---|
| Saturation | Increases the intensity of all colors | Makes colors more vivid |
| Vibrance | Increases intensity of muted colors | Balances the overall color intensity |

Advanced Techniques for Stunning Milky Way Shots
Noise Reduction Tips
Capturing the Milky Way can be an exhilarating experience, but the journey doesn’t end with pressing the shutter. Post-processing is where the magic truly happens. One of the biggest hurdles you will face is noise. This pesky graininess can detract from the beauty of your celestial captures. Here are some noise reduction tips to help you out.
1. Use Dedicated Noise Reduction Software
While programs like Adobe Lightroom and Photoshop have built-in noise reduction tools, sometimes you need something more powerful. Topaz DeNoise and Nik Dfine are excellent options. These tools are designed to tackle noise without sacrificing detail.
2. Work with Multiple Exposures
Stacking multiple exposures is a fantastic way to reduce noise. By combining several shots, you can average out the noise, resulting in a cleaner image. Software like DeepSkyStacker can help you align and stack your images with ease.
3. Adjusting ISO and Exposure Time
Balancing ISO and exposure time is crucial. A higher ISO can introduce more noise, but a longer exposure can help mitigate this. Experiment with different settings to find the sweet spot for your camera.
4. Post-Processing Techniques
- Luminance and Color Noise Reduction: In Lightroom, navigate to the ‘Detail’ panel. Here, you can adjust the luminance and color sliders to reduce noise.
- Use Masks: Apply noise reduction selectively using masks. This way, you can target specific areas without affecting the entire image.
Sharpening and Clarity Adjustments
Once you’ve tackled noise, it’s time to focus on sharpening and clarity. These adjustments can make your Milky Way shots pop, revealing the intricate details of our galaxy.
1. Global vs. Local Adjustments
- Global Adjustments: Start with global adjustments to enhance the overall sharpness and clarity. In Lightroom, use the ‘Clarity’ slider to add mid-tone contrast.
- Local Adjustments: For more control, use local adjustments. The ‘Adjustment Brush’ in Lightroom allows you to paint clarity and sharpness onto specific areas.
2. Deconvolution Sharpening
Deconvolution sharpening is a technique that can significantly improve the clarity of your Milky Way photos. Software like PixInsight offers deconvolution tools that can help you recover fine details.
3. High Pass Filter in Photoshop
The High Pass Filter is a powerful tool for sharpening. Here’s a quick guide:
- Duplicate your image layer.
- Apply the High Pass Filter (Filter > Other > High Pass).
- Set the blending mode to ‘Overlay’ or ‘Soft Light’.
4. Use Contrast Adjustment
Adding contrast can also enhance sharpness. In Photoshop, use the ‘Curves’ or ‘Levels’ adjustment layers to fine-tune the contrast.
Layering for Depth and Detail
Layering is a technique that can add depth and detail to your Milky Way photos. By combining multiple layers, you can create a more dynamic and visually appealing image.
1. Blend Multiple Exposures
Blending multiple exposures can help you capture a wider dynamic range. Use software like Photoshop to layer your images and blend them using masks.
2. Use Luminosity Masks
Luminosity masks are a powerful way to make targeted adjustments. They allow you to select specific tonal ranges and apply adjustments only to those areas. Here’s how you can create a luminosity mask in Photoshop:
- Create a new channel based on the brightness of your image.
- Use this channel as a mask to apply adjustments only to the selected tonal range.
3. Enhance Star Colors
Enhancing star colors can add a new dimension to your Milky Way photos. Use the ‘HSL’ panel in Lightroom to boost the saturation and luminance of specific colors. For more advanced techniques, you can explore this guide on enhancing star colors.
4. Add Foreground Interest
Adding a foreground element can make your Milky Way shots more compelling. This could be a landscape, a silhouette, or even an interesting structure. Use layers to blend the foreground with the sky seamlessly.
Tools and Software for Post-Processing
| Software | Purpose | Key Features |
|---|---|---|
| Adobe Lightroom | Basic adjustments, noise reduction | Clarity, noise reduction sliders |
| Adobe Photoshop | Advanced adjustments, layering | High Pass Filter, Luminosity Masks |
| Topaz DeNoise | Noise reduction | AI-based noise reduction |
| DeepSkyStacker | Image stacking | Align and stack multiple exposures |
| PixInsight | Advanced astrophotography | Deconvolution, advanced processing |
Using Filters and Effects to Enhance Your Photos
When you dive into post-processing your Milky Way photos, you unlock a treasure trove of tools and techniques. These can transform a good shot into a breathtaking image. Let’s explore some of these techniques, starting with filters and effects.
Applying Gradient Filters
Gradient filters can be your best friend when polishing Milky Way shots. They help balance the exposure between the bright sky and the darker foreground. Here’s a step-by-step guide to applying gradient filters:
- Open Your Editing Software: Whether you’re using Lightroom, Photoshop, or another tool, load up your photo.
- Select the Gradient Filter Tool: This tool is often found in the toolbar or under the filter menu.
- Drag the Filter Across Your Photo: Start from the top of your image and drag downwards. This will create a gradient effect, darkening the sky gradually.
- Adjust the Settings: Play with the exposure, contrast, and saturation sliders to find the perfect balance.
Example Table: Gradient Filter Settings
| Setting | Description | Recommended Value |
|---|---|---|
| Exposure | Adjusts the brightness | -0.5 to -1.5 |
| Contrast | Enhances the difference in tones | +10 to +30 |
| Saturation | Intensifies colors | +5 to +15 |
| Highlights | Controls the brightest parts | -10 to -20 |
Adding Starburst Effects
Starburst effects can add a magical touch to your Milky Way photos. They make the stars pop and give your image a whimsical feel. Here’s how to add starburst effects:
- Choose the Right Photo: A photo with clear, bright stars works best.
- Use the Starburst Brush: Many editing tools have a brush specifically for creating starburst effects.
- Apply the Brush to the Stars: Carefully paint over the stars you want to enhance.
- Adjust the Intensity: Use the brush settings to control the size and brightness of the starburst.
Example Table: Starburst Brush Settings
| Setting | Description | Recommended Value |
|---|---|---|
| Size | Controls the size of the starburst | 5 to 10 pixels |
| Brightness | Adjusts the brightness of the effect | +20 to +50 |
| Opacity | Controls the transparency | 80% to 100% |
Creating a Dreamy Look
To give your Milky Way photos a dreamy, ethereal quality, you can use a combination of blur and glow effects. Here’s how:
- Duplicate Your Layer: In your editing software, create a duplicate of your photo layer.
- Apply a Gaussian Blur: Go to the filter menu and select Gaussian Blur. Adjust the radius until you achieve a soft, out-of-focus look.
- Change the Blending Mode: Set the blending mode of the blurred layer to “Screen” or “Overlay.”
- Adjust the Opacity: Lower the opacity of the blurred layer to blend it seamlessly with the original photo.

Saving and Exporting Your Enhanced Milky Way Photos
Best File Formats for Quality
When you’ve poured your heart into capturing the Milky Way, you want to preserve every detail. The file format you choose for saving your photos plays a crucial role in maintaining their quality. Let’s dive into the best options.
RAW Files: Always start with RAW files. They capture all the data from your camera sensor, giving you the most flexibility in post-processing. The downside? They can be huge, easily taking up gigabytes of storage.
TIFF Files: If you’re looking for a balance between quality and file size, consider saving your enhanced photos as TIFF files. TIFFs retain a lot of detail and don’t compress your image like JPEGs do. Plus, they support layers, making them perfect for further editing.
JPEG Files: While JPEGs are not ideal for initial post-processing, they are useful for sharing your final images. They compress the file size significantly, making them easy to upload or email. However, this compression comes at the cost of some image quality.
Here’s a quick comparison table to help you decide:
| File Format | Pros | Cons |
|---|---|---|
| RAW | Maximum detail, best for editing | Large file size, requires special software |
| TIFF | High quality, supports layers | Large file size, not as widely supported as JPEG |
| JPEG | Small file size, easy to share | Loss of detail due to compression |
Optimizing for Social Media
Social media platforms have their own quirks and requirements. If you want your Milky Way photos to shine online, you’ll need to optimize them accordingly. Here are some tips to make your images stand out.
Resolution and Aspect Ratio: Different platforms prefer different resolutions and aspect ratios. For instance, Instagram loves square images with a resolution of 1080×1080 pixels. Facebook, on the other hand, favors landscape photos with a resolution of 1200×630 pixels.
Compression: Social media platforms often compress your images, which can affect their quality. To minimize this, save your photos in the highest quality JPEG format before uploading. Some platforms also allow you to upload images in PNG format, which can preserve more detail.
Color Profile: Most social media platforms use the sRGB color profile. Make sure your photos are converted to sRGB before uploading to ensure the colors look as vibrant as possible.
Here’s a handy table for quick reference:
| Platform | Preferred Resolution | Aspect Ratio | Color Profile |
|---|---|---|---|
| 1080×1080 pixels | 1:1 | sRGB | |
| 1200×630 pixels | 1.91:1 | sRGB | |
| 1024×512 pixels | 2:1 | sRGB |
Common Mistakes to Avoid in Post-Processing
Over-Editing Pitfalls
When you’re working on your Milky Way photos, it’s easy to get carried away with the editing tools at your disposal. You might think that cranking up the saturation or sharpening every star to the max will make your photo pop. However, over-editing can lead to unnatural results that detract from the beauty of the night sky.
Over-saturation is a common mistake. While you want the colors of the Milky Way to stand out, pushing the saturation too far can make the stars and the sky look artificial. Its like putting too much seasoning on a dish – it overpowers the natural flavors.
Another pitfall is over-sharpening. When you sharpen an image too much, it can introduce noise and artifacts, making the stars look harsh and pixelated. Think of it like over-sharpening a pencil; instead of a fine point, you end up with a broken tip.
To avoid these pitfalls, it’s essential to use a light touch and frequently step back to evaluate your progress. Remember, less is often more in post-processing.
Keeping a Natural Look
Maintaining a natural look in your Milky Way photos is crucial. You want your audience to feel like they are gazing up at the night sky, not looking at a digitally altered image.
Color balance plays a significant role here. The night sky has a subtle range of colors that can easily be distorted with heavy-handed editing. Aim to keep the blues and purples of the Milky Way soft and true to life.
Contrast and brightness adjustments should also be made carefully. Too much contrast can make the stars look like they are cut out from the sky, while too much brightness can wash out the delicate details of the Milky Way.
A good practice is to compare your edited photo with the original. This can help you see if youve gone too far and need to dial back some adjustments.
Frequently Asked Questions
How can I quickly enhance Milky Way photos?
Use software like Lightroom or Photoshop. Tweak exposure, contrast, and sharpness. You’ll see a huge difference.
What tools are best for Enhancing Milky Way Photos with Post-Processing?
Lightroom, Photoshop, and even apps like Snapseed. They offer easy yet powerful ways to make your photos pop.
How do I bring out the stars more clearly?
Boost the contrast and highlights. Decrease the blacks. The stars shine brighter against a darker background.
Can I fix a noisy photo of the Milky Way?
Yes, you can reduce noise using noise reduction tools in software like Lightroom or Photoshop. Be gentle, though; overdoing it can blur the stars.
What’s the best color balance for Milky Way photos?
Adjust the white balance to a cooler tone. Blues and purples often enhance the cosmic feel of the Milky Way.