If youre diving into the world of astrophotography, knowing some essential Color Correction Tips for Astrophotography can help you capture breathtaking images. In this guide, youll discover why color correction matters and how to fine-tune your photos to highlight stars, nebulae, and galaxies, all while avoiding common mistakes. You’ll learn about key tools and software, adjusting white balance, correcting light pollution, and using histograms for better color accuracy. Ready to make your night sky shots truly mesmerizing? Let’s get started!
Key Takeaway
- Adjust white balance for true star colors.
- Use histograms to balance exposure.
- Apply curves for contrast.
- Reduce noise with software.
- Boost color vibrance subtly.

Understanding the Basics of Color Correction
Why Color Correction Matters in Astrophotography
When you’re venturing into astrophotography, capturing the night sky’s splendor is just the beginning. The real magic happens during post-processing, where color correction transforms your raw images into celestial masterpieces. Color correction is crucial because it helps reveal the true colors of stars, galaxies, and nebulae, making your photos more vibrant and accurate.
Imagine capturing the Milky Way, but your image has a strong green or red tint. Without proper color correction, the beauty of the galaxy can be lost. Correcting colors ensures that the hues are balanced, and the celestial objects appear as they should. Its like polishing a diamond; the brilliance is there, but you need to bring it out.
Key Tools for Color Correction
To master color correction, you’ll need a set of tools that can help you adjust and fine-tune your images. Here are some essential tools and techniques:
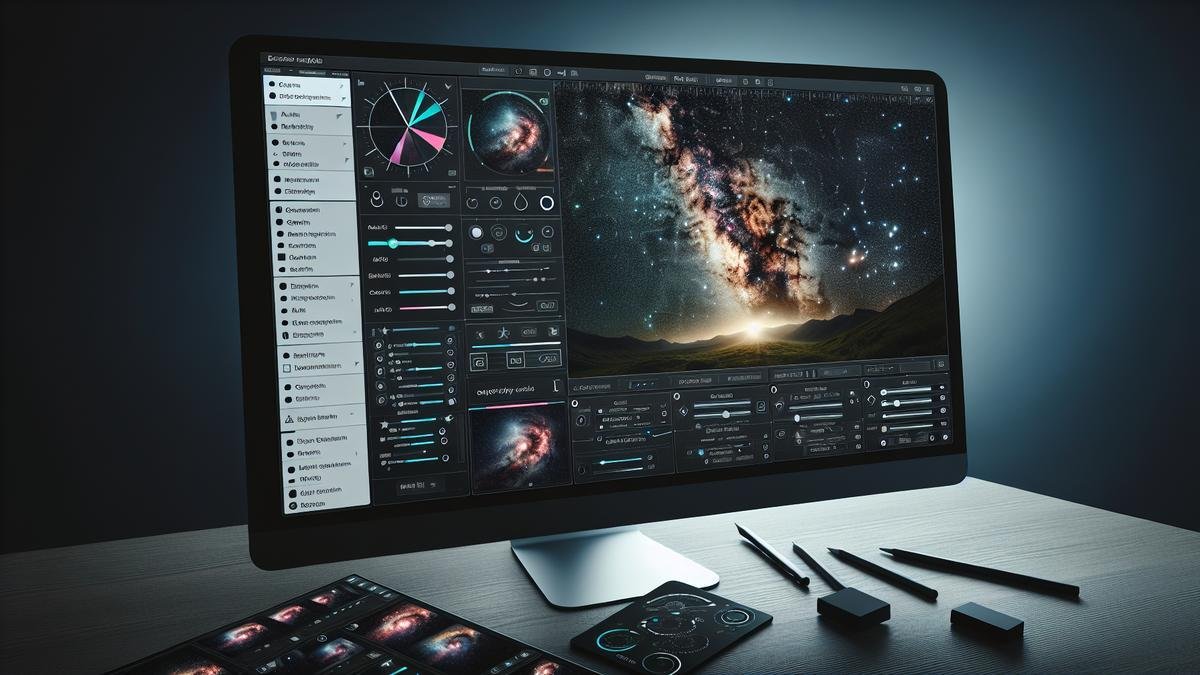
Choosing the Right Software
The software you choose for color correction can make a significant difference. Heres a quick comparison of some popular options:
| Software | Features | Ease of Use | Price |
|---|---|---|---|
| Adobe Photoshop | Advanced color correction, layers, masks | Moderate to difficult | Subscription-based |
| Lightroom | User-friendly, presets, batch processing | Easy | Subscription-based |
| PixInsight | Specialized for astrophotography, powerful tools | Difficult | One-time purchase |
| GIMP | Free, open-source, basic tools | Moderate | Free |
| Affinity Photo | One-time purchase, good range of tools | Moderate | One-time purchase |
Adobe Photoshop and Lightroom are favorites among photographers due to their robust features and flexibility. If you’re looking for specialized tools tailored for astrophotography, PixInsight is an excellent choice. For those on a budget, GIMP offers a free alternative with essential tools.
Tips on Color Correction to Bring Out the Best in Your Astrophotography Images
Now that you understand the basics and have chosen your software, lets dive into some practical tips for color correction.
Tip 1: Adjust White Balance
White balance is the foundation of color correction. It ensures that the colors in your image are neutral and balanced. Most astrophotography images tend to have a color cast due to light pollution or atmospheric conditions. Adjusting the white balance can remove these unwanted tints.
- Manual Adjustment: Use the white balance sliders in your software to manually adjust the colors until the image looks natural.
- Custom White Balance: Some software allows you to set a custom white balance by selecting a neutral area in your image.
Tip 2: Use Curves and Levels
Curves and levels are powerful tools for adjusting the brightness and contrast of your image. They can also help in fine-tuning the colors.
- Curves: Adjust the RGB channels individually to correct color imbalances. This can help in bringing out the true colors of stars and nebulae.
- Levels: Use the levels tool to set the black and white points of your image. This can enhance the contrast and make the colors pop.
Tip 3: Reduce Light Pollution
Light pollution can add unwanted colors to your images. Using filters can help reduce this, but you can also correct it during post-processing.
- Gradient Removal: Use gradient removal tools to eliminate the gradient caused by light pollution.
- Selective Color Adjustment: Adjust the colors selectively to remove the unwanted color cast.
Tip 4: Enhance Star Colors
Stars come in different colors, and enhancing these can add depth and interest to your photos.
- Saturation: Increase the saturation of the stars to make their colors more vivid.
- Selective Color: Use selective color adjustments to enhance specific star colors without affecting the rest of the image.
Tip 5: Combine Multiple Exposures
Combining multiple exposures can help in reducing noise and improving the overall quality of your image. This technique, known as stacking, can also enhance the colors.
- Stacking Software: Use software like DeepSkyStacker or Sequator to stack your images.
- Post-Processing: After stacking, use your color correction tools to fine-tune the colors.
Tip 6: Use Presets and Plugins
Many software options offer presets and plugins specifically designed for astrophotography. These can save you time and provide a good starting point for your color correction.
- Presets: Use presets to quickly apply basic color corrections.
- Plugins: Explore plugins that offer advanced color correction tools.
Adjusting White Balance for Accurate Colors
Alright, let’s dive into the magic of astrophotography. When you’re capturing the night sky, getting the colors just right is crucial. And that’s where white balance comes into play. You see, white balance is like the secret sauce that makes your photos pop with accurate colors, especially when you’re dealing with the vast and varied hues of the cosmos.
How to Set White Balance
Setting white balance might sound technical, but it’s simpler than you think. You’re basically telling your camera what “white” looks like under the current lighting conditions. For astrophotography, this can be a bit tricky because the light sources are so diverse – from the cool blues of distant stars to the warm glow of nebulae.
- Manual White Balance: Most astrophotographers prefer to set the white balance manually. This gives you control over the final image. Start by setting your camera to manual white balance mode. Then, choose a color temperature that matches the natural look of the night sky. A good starting point is around 3500K to 4500K.
- Custom White Balance: If you’re shooting in RAW (which you should be), you can adjust the white balance during post-processing. Take a test shot of a neutral grey card under the same lighting conditions, and use this shot to set a custom white balance.
- Pre-Set Modes: Some cameras have pre-set white balance modes like “Daylight” or “Tungsten.” These can work in a pinch, but they often don’t account for the unique lighting conditions of astrophotography. It’s better to go manual or custom for more accurate results.
| White Balance Setting | Ideal Use |
|---|---|
| Manual White Balance | Full control over color temperature |
| Custom White Balance | Using a grey card for precise settings |
| Pre-Set Modes | Quick adjustments, less accurate |
Common White Balance Mistakes
Even seasoned photographers can stumble when it comes to white balance. Here are some common pitfalls and how to avoid them.
- Using Auto White Balance: Auto white balance is great for everyday photography, but it can be a disaster for astrophotography. The camera might get confused by the varied light sources and give you inconsistent results. Stick to manual or custom settings.
- Ignoring Light Pollution: Light pollution can throw off your white balance big time. If you’re shooting near a city or any artificial lights, make sure to account for this in your white balance settings. You might need to adjust the color temperature to counteract the yellow or orange glow.
- Not Checking the Histogram: Your camera’s histogram is a fantastic tool for checking exposure and color balance. If the histogram looks skewed to one side, your white balance might be off. Adjust accordingly to get a more balanced distribution.
| Common Mistake | Solution |
|---|---|
| Using Auto White Balance | Use manual or custom settings |
| Ignoring Light Pollution | Adjust color temperature to counteract artificial lights |
| Not Checking the Histogram | Use the histogram to ensure balanced colors |

Enhancing Star Colors
Astrophotography is a mesmerizing journey. Capturing the night sky, with its myriad of stars, planets, and other celestial wonders, is a thrilling experience. However, bringing out the true colors of these stars can be a bit tricky. Here are some essential tips to help you enhance star colors in your astrophotography images.
Bringing Out Star Colors
When you first look at your raw astrophotography images, you might notice that the stars appear white or lack the vibrancy you expected. This is where color correction comes in.
White Balance
The first step is adjusting the white balance. This setting helps you correct the color temperature of your image. For astrophotography, you should set your white balance to a cooler temperature, around 3500K to 4000K. This will help bring out the blue hues in the stars.
Saturation and Vibrance
Next, you want to increase the saturation and vibrance of your image. Be careful not to overdo it, as this can lead to unnatural colors. A slight boost in saturation can make the colors pop without making them look artificial.
Using Filters
Filters can also play a significant role in bringing out star colors. For instance, using a light pollution filter can help reduce the yellowish hue caused by city lights, making the natural colors of the stars more prominent. You can explore more about the best filters for enhancing your astrophotography shots here.
Avoiding Over-Saturation
While it’s tempting to crank up the saturation to make your stars look vibrant, it’s essential to strike a balance. Over-saturation can lead to loss of detail and unnatural-looking stars.
Subtle Adjustments
Make small, incremental adjustments to the saturation and vibrance settings. This way, you can see the changes and decide if they look natural.
Histogram Analysis
Use the histogram to monitor the color distribution in your image. If you notice any color channels peaking or clipping, it might be a sign that you’re over-saturating your image.
Color Calibration
Consider using a color calibration tool. This can help you achieve accurate colors and avoid over-saturation.
Balancing Star Colors with Background
Balancing the colors of the stars with the background is crucial for a natural-looking astrophotography image. The background should complement the stars without overpowering them.
Background Neutralization
Use the background neutralization tool in your editing software to remove any color cast from the background. This will help make the stars stand out more.
Contrast Adjustment
Adjust the contrast to make the stars pop against the background. Increasing the contrast slightly can help the stars appear more vibrant.
Noise Reduction
Applying noise reduction techniques can help you achieve a cleaner background, making the stars more prominent. You can learn more about noise reduction techniques for astrophotography here.
Correcting Light Pollution
Identifying Light Pollution
Light pollution can be a real thorn in the side of any budding astrophotographer. Imagine setting up your gear for that perfect shot of the Milky Way, only to have the image marred by an orange glow from nearby streetlights. Its like trying to listen to a whisper in a crowded room. But how do you pinpoint the source of this pesky light pollution?
First, you need to understand the different types of light pollution:
| Type | Description |
|---|---|
| Skyglow | The diffuse glow over populated areas, visible from miles away. |
| Glare | Excessive brightness causing visual discomfort. |
| Light Trespass | Unwanted or intrusive light spilling into areas. |
| Clutter | Bright, confusing, and excessive groupings of light sources. |
Once youve identified the type of light pollution affecting your images, you can take steps to mitigate it. If youre in an urban area, you might be dealing with skyglow. In suburban settings, light trespass from nearby homes or streetlights might be the culprit. Recognizing the type of light pollution helps you choose the right tools and techniques to combat it.
Techniques to Reduce Light Pollution
Now that youve identified the light pollution, its time to roll up your sleeves and tackle it head-on. Think of it like cleaning a dirty window to get a clearer view of the stars. Here are some techniques to help you reduce light pollution in your astrophotography:
- Choose the Right Location: Sometimes, the best solution is to pack up your gear and head to a darker location. Use light pollution maps to find dark sky sites near you. A little travel can make a world of difference.
- Use a Light Pollution Filter: These filters are designed to block wavelengths of light commonly associated with artificial lighting, while allowing the natural light from stars and celestial objects to pass through.
- Shield Your Lens: If you cant escape to a darker location, consider using physical barriers to block nearby light sources. A lens hood can help, or you can get creative with makeshift barriers.
- Adjust Your Camera Settings: Longer exposures can increase the impact of light pollution. Experiment with shorter exposures and higher ISO settings to find a balance that works for your specific situation.
- Post-Processing Techniques: Software like Photoshop or Lightroom can help you reduce the effects of light pollution in post-processing. Use tools to adjust the levels, curves, and colors in your images to minimize the unwanted glow.
Using Filters for Better Results
Filters can be a game-changer in astrophotography. Think of them as sunglasses for your camera, helping to cut through the glare and bring out the true colors of the night sky.
Types of Filters
| Filter Type | Purpose |
|---|---|
| Light Pollution Filters | Block out specific wavelengths associated with artificial lighting. |
| UV/IR Cut Filters | Remove ultraviolet and infrared light that can cause blurring. |
| Color Correction Filters | Enhance specific colors in your images, making celestial objects pop. |
Using the right filter can significantly improve the quality of your astrophotography. For instance, a light pollution filter can help you capture clearer images even in moderately polluted areas. Meanwhile, color correction filters can bring out the vibrant hues of nebulae and galaxies, making your photos truly spectacular.
When choosing a filter, consider the type of astrophotography youre doing. Are you focusing on wide-field shots of the Milky Way, or are you zooming in on distant galaxies? Different filters are designed for different purposes, so choose one that fits your needs.
By combining these techniques and tools, you can significantly reduce the impact of light pollution on your astrophotography. This way, youll be able to capture the beauty of the night sky in all its glory, without the interference of artificial lights.
Tips on Color Correction to Bring Out the Best in Your Astrophotography Images
Understanding Color Balance
Color balance is crucial in astrophotography. Imagine painting a picture of the night sky, but using the wrong colors. It just wouldnt look right. The same goes for your photos. Getting the color balance right can make your images look more natural and appealing.
Adjusting White Balance
White balance settings on your camera can help you get the colors right from the start. Heres a quick guide:
| White Balance Setting | Use Case |
|---|---|
| Auto | Good for general use, but not always accurate for night skies. |
| Tungsten | Adds a blue tint, useful for reducing the orange glow of light pollution. |
| Daylight | Neutral setting, often a good starting point. |
| Custom | Allows you to manually set the white balance for precise control. |
Experiment with different white balance settings to see which one gives you the best results. You can always fine-tune the colors in post-processing, but getting it close in-camera saves you time and effort.
Using Software for Color Correction
Post-processing software like Adobe Lightroom and Photoshop are your best friends when it comes to color correction. Think of them as your digital darkroom, where you can tweak and enhance your images to perfection.
Basic Color Correction Steps
- Adjust Levels and Curves: Use these tools to enhance the contrast and bring out the details in your images.
- Color Balance: Fine-tune the colors to make the stars and celestial objects pop.
- Saturation and Vibrance: Boost these settings to make the colors more vivid, but be careful not to overdo it.
Heres a simple table to guide you through the process:
| Step | Tool | Purpose |
|---|---|---|
| 1 | Levels | Adjust overall brightness and contrast. |
| 2 | Curves | Fine-tune the contrast and highlight details. |
| 3 | Color Balance | Correct color casts and enhance specific colors. |
| 4 | Saturation | Increase color intensity. |
| 5 | Vibrance | Enhance colors without oversaturating. |
Enhancing Specific Colors
Sometimes, you might want to bring out specific colors in your astrophotography. For example, the red hues of a nebula or the blue tones of a galaxy. Heres how you can do it:
- Selective Color Tool: This tool allows you to adjust individual colors in your image. Use it to enhance the specific colors you want to highlight.
- Hue/Saturation Adjustment: This tool lets you change the hue, saturation, and lightness of specific colors. Its great for making subtle adjustments.
- Color Grading: Use color grading tools to add a creative touch to your images. This can help you achieve a unique look that sets your photos apart.
Using Presets and Filters
Presets and filters can save you a lot of time and effort in post-processing. Theyre like recipes for your images, giving you a starting point for your edits.
Popular Presets for Astrophotography
| Preset Name | Description |
|---|---|
| Milky Way Magic | Enhances the contrast and colors of the Milky Way. |
| Nebula Glow | Brings out the vibrant colors of nebulae. |
| Starry Night | Boosts the brightness and clarity of stars. |
You can find presets online or create your own. Using presets can help you achieve consistent results and speed up your workflow.
Combining Multiple Exposures
Combining multiple exposures can help you capture more detail and reduce noise in your astrophotography. Its like stacking layers of a cake to make it taller and more impressive.
Heres a simple workflow for combining multiple exposures:
- Capture Multiple Exposures: Take several shots of the same scene with different exposure settings.
- Align the Images: Use software like Photoshop or specialized astrophotography software to align the images.
- Stack the Images: Combine the aligned images to create a single, detailed photo.
- Adjust the Colors: Use the color correction techniques mentioned earlier to enhance the final image.
By combining multiple exposures, you can capture more detail and create stunning astrophotography images that are rich in color and clarity.
Using Advanced Techniques
For those looking to take their astrophotography to the next level, advanced techniques like High Dynamic Range (HDR) imaging and infrared photography can open up new possibilities.
High Dynamic Range (HDR) Imaging
HDR imaging involves capturing multiple exposures and combining them to create a single image with a greater dynamic range. This technique can help you capture details in both the bright and dark areas of your photos.
Infrared Photography
Infrared photography allows you to capture light thats invisible to the naked eye. This can reveal hidden details and add a unique perspective to your astrophotography.

Fine-Tuning Nebula and Galaxy Colors
When you delve into astrophotography, you quickly discover that capturing the night sky is only half the battle. The real magic happens during post-processing, where you can transform a good image into a breathtaking one. One of the most critical aspects of this process is color correction. Let’s dive into some tips that will help you bring out the best in your astrophotography images.
Highlighting Nebula Details
Nebulae are some of the most captivating subjects in astrophotography. Their intricate structures and vibrant colors can make for stunning images. However, to truly make these details pop, you need to focus on color correction.
1. Use a Histogram for Balance
The histogram is your best friend when it comes to color correction. It helps you balance the colors and ensure that none of them are too overpowering. Aim for a balanced histogram where the peaks are not too skewed to the left or right.
2. Adjust the White Balance
White balance is crucial for highlighting nebula details. Most cameras have a default setting that might not be ideal for astrophotography. Adjust the white balance to bring out the natural colors of the nebula. A slight shift towards the cooler end of the spectrum can often enhance the blues and purples.
3. Enhance Contrast and Sharpness
Increasing the contrast can help bring out the finer details in the nebula. Use the contrast slider in your editing software, but be careful not to overdo it. Similarly, a touch of sharpness can make the intricate structures more defined.
4. Use Selective Color Adjustment
Selective color adjustment allows you to target specific colors within your image. For nebulae, you might want to enhance the reds and blues. This technique can help you bring out the subtle variations in color that make nebulae so mesmerizing.
| Tool | Purpose |
|---|---|
| Histogram | Balance overall colors |
| White Balance | Adjust natural colors |
| Contrast and Sharpness | Enhance details and structures |
| Selective Color Adjustment | Target specific colors for enhancement |
Enhancing Galaxy Colors
Galaxies are another favorite subject in astrophotography. Their swirling arms and bright cores can be a challenge to capture correctly, but with the right color correction techniques, you can make your galaxy photos truly shine.
1. Focus on the Core
The core of a galaxy is often the brightest part, and it can easily become overexposed. Use your editing software to reduce the highlights and bring out the details in the core.
2. Enhance the Spiral Arms
The spiral arms of a galaxy are where a lot of the color and detail lie. Use the saturation and vibrance sliders to enhance these areas. Be careful not to oversaturate, as this can lead to unnatural-looking colors.
3. Use Curves for Fine-Tuning
The curves tool is incredibly powerful for fine-tuning colors. You can adjust the curves for each color channel individually to get the perfect balance. This is especially useful for bringing out the subtle blues and purples in the spiral arms.
4. Reduce Noise
Galaxies are often faint, and capturing them can introduce a lot of noise. Use noise reduction tools to clean up your image without losing too much detail. Balancing noise reduction with detail preservation is key.
| Tool | Purpose |
|---|---|
| Highlight Reduction | Bring out core details |
| Saturation and Vibrance | Enhance spiral arms |
| Curves | Fine-tune individual color channels |
| Noise Reduction | Clean up the image |
Using Histograms for Better Color Correction
Astrophotography is all about capturing the awe-inspiring beauty of the night sky. However, even the best shots can look dull without proper color correction. One of the most effective tools for this task is the histogram. This graphical representation of the tonal values in your image can be your best friend when it comes to bringing out the vivid colors of the cosmos.
Reading a Histogram
Understanding a histogram might seem like deciphering an alien language at first, but it’s simpler than it appears. A histogram is essentially a bar graph that shows the distribution of tones in your image. The left side represents the shadows, the middle section is for midtones, and the right side is for highlights.
Key Points to Note:
- Shadows: The dark areas of your image.
- Midtones: The middle range of tones, neither too dark nor too light.
- Highlights: The bright areas of your image.
Here’s a basic table to help you remember:
| Section | Represents |
|---|---|
| Left Side | Shadows |
| Middle | Midtones |
| Right Side | Highlights |
When you look at your histogram, you’re essentially seeing a summary of the tonal range in your image. A well-balanced histogram often resembles a bell curve, but this can vary based on the scene you’re capturing.
Adjusting Colors with Histograms
Now that you’ve got the hang of reading a histogram, let’s talk about using it to adjust colors. Color correction can turn a good astrophotography shot into a great one by enhancing the natural hues of the night sky.
Steps to Adjust Colors:
- Identify the Imbalance: Look at your histogram. If its skewed too far to the left, your image might be too dark. If it’s leaning right, it might be too bright.
- Adjust Exposure: Use the histogram to guide your exposure adjustments. Aim for a balanced distribution of tones.
- Tweak the Colors: Use color balance tools in your editing software. Adjust the sliders while keeping an eye on the histogram to avoid overcorrection.
Here’s a quick guide:
| Issue | Histogram Clue | Solution |
|---|---|---|
| Too Dark | Skewed to the left | Increase exposure |
| Too Bright | Skewed to the right | Decrease exposure |
| Color Imbalance | Peaks in specific channels | Adjust color balance sliders |
Avoiding Common Histogram Mistakes
Even seasoned astrophotographers can make mistakes with histograms. Here are some pitfalls to avoid:
Over-Reliance on the Histogram
While histograms are incredibly useful, they shouldn’t be your only tool. Always cross-check with the actual image. Sometimes, a histogram might suggest an issue that isn’t there, especially with complex scenes like starry skies.
Ignoring Clipped Highlights and Shadows
Clipping occurs when the histogram touches the far left or right edge, indicating loss of detail in shadows or highlights. Always aim to keep the histogram within the bounds to preserve detail.
Frequently Asked Questions
How do you get rid of the green tint in your astrophotography images?
Use color balance tools. Use the mid-tones slider to decrease green.
What is the best software for color correction in astrophotography?
Adobe Lightroom and Photoshop are top choices. Free options? Try GIMP.
How do you correct the colors of stars in your photos?
Use a star mask in your editing software. Adjust hue and saturation carefully.
Which color space should you use for astrophotography?
sRGB for web sharing. Adobe RGB for print. Choose wisely based on your needs.
Can white balance affect your astrophotography images?
Yes! Set it to “auto” during shooting. Tweak in post-processing for perfection.