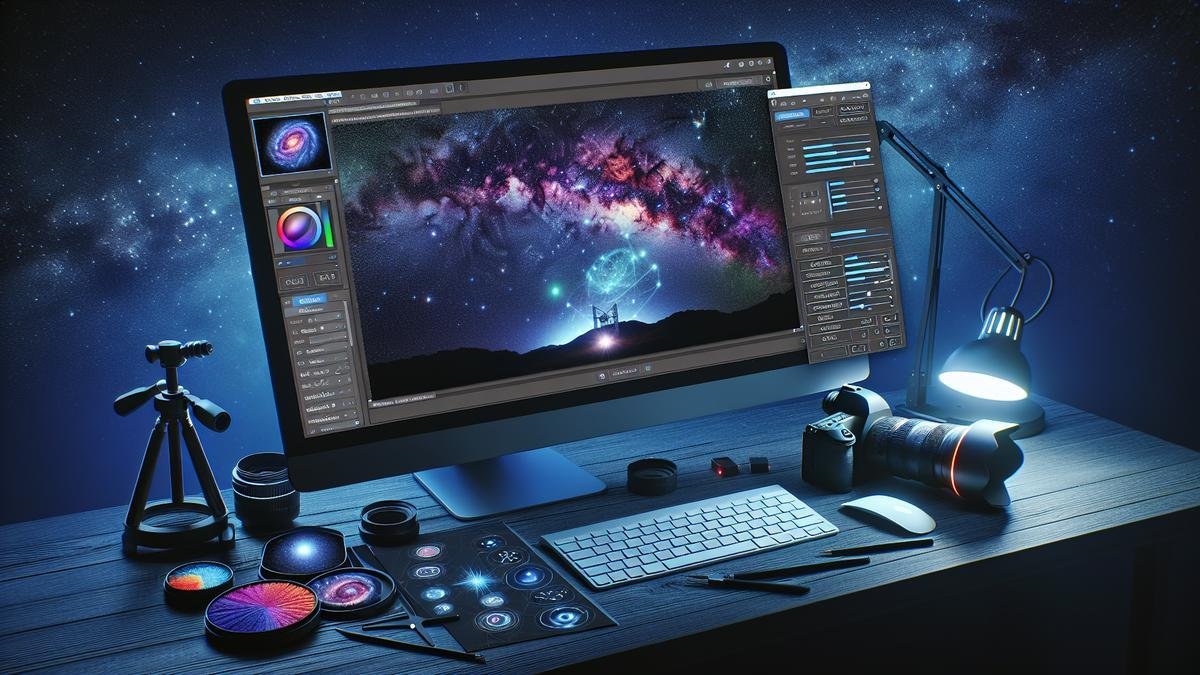
Ready to elevate your stargazing game? Advanced Processing of Astrophotography Data is simpler than it sounds, and it’s the key to transforming those faint glimmers in the night sky into captivating cosmic vistas. Whether you’re curious about calibration frames, mastering noise reduction, or enhancing those stellar details, this guide will walk you through every step. You’ll discover how to process your celestial snapshots like a pro, ensuring your final images are nothing short of stellar. Time to turn those twinkling pixels into breathtaking star portraits!
Key Takeaways
- Use multiple exposures
- Stack your images
- Apply noise reduction
- Enhance colors carefully
- Sharpen with caution

Understanding Your Astrophotography Data
When delving into advanced processing of astrophotography data, it’s all about making the most out of the information your camera captures. The night sky is full of wonders, and with the right techniques, you can reveal its hidden beauty. Let’s dive into the nitty-gritty of understanding your astrophotography data.
Types of Data You Collect
In astrophotography, you collect various types of data to create those stunning images of the cosmos. Each type of data plays a crucial role in the final outcome. Here’s a quick rundown:
| Data Type | Description |
|---|---|
| Light Frames | These are your actual images of the night sky, capturing stars, nebulae, galaxies, etc. |
| Dark Frames | Shots taken with the lens cap on to capture sensor noise. |
| Bias Frames | Extremely short exposures to capture the camera’s readout noise. |
| Flat Frames | Images of a uniformly lit surface to correct for vignetting and dust spots. |
Each type of data is essential for different reasons. Light frames are your primary images, while the other frames help in calibrating and correcting these images.
Importance of Calibration Frames
Calibration frames are the unsung heroes of astrophotography. Without them, your images would be riddled with noise, uneven lighting, and other imperfections. Let’s break down why these frames are so important.
Why You Need Bias Frames
Bias frames are all about capturing the electronic noise that your camera sensor produces. This noise is present in every image you take, and if not corrected, it can degrade the quality of your final image. Here’s a closer look:
| Aspect | Details |
|---|---|
| Purpose | To measure and correct the camera’s readout noise. |
| How to Capture | Take a series of images with the shortest possible exposure time and the lens cap on. |
| When to Use | During the preprocessing stage, before stacking your light frames. |
| Benefits | Reduces random noise, leading to a cleaner final image. |
Bias frames are quick and easy to capture, and they make a significant difference in the quality of your astrophotography.
Techniques for Processing Astrophotography Data
Now that you understand the types of data you collect and the importance of calibration frames, let’s move on to the techniques for processing this data. The goal is to bring out the best in your images, revealing the hidden details of the night sky.
Stacking Images
Stacking is a fundamental technique in astrophotography. By combining multiple exposures, you can reduce noise and increase the signal-to-noise ratio. This process involves aligning and averaging your light frames, dark frames, bias frames, and flat frames.
| Step | Description |
|---|---|
| Aligning | Ensures all images are perfectly aligned to avoid blurring. |
| Averaging | Combines the data from multiple frames to enhance detail and reduce noise. |
| Software | Tools like DeepSkyStacker or PixInsight are popular choices for stacking. |
Stacking is a powerful technique that can transform your raw data into a stunning image of the night sky.
Noise Reduction
Noise is the bane of astrophotographers. It can obscure faint details and make your images look grainy. To combat this, you can use various noise reduction techniques during post-processing.
| Technique | Details |
|---|---|
| Median Filtering | Averages out noise while preserving edges and details. |
| Adaptive Filtering | Adjusts noise reduction based on the local image structure. |
| Software | Tools like Photoshop, Lightroom, or dedicated astrophotography software. |
Noise reduction is a delicate balance. Too much can blur details, while too little can leave noise in your image. Experiment with different techniques to find the right balance.
Enhancing Star Colors
Stars come in different colors, and enhancing these colors can add a new dimension to your astrophotography. Here’s how you can bring out the vibrant hues of the stars.
| Step | Description |
|---|---|
| Color Balance | Adjust the color balance to emphasize the natural colors of the stars. |
| Saturation | Increase the saturation to make the star colors more vivid. |
| Selective Color | Use selective color adjustments to enhance specific star colors. |
| Software | Photoshop, Lightroom, or other image editing tools. |
Enhancing star colors can make your images pop, revealing the true beauty of the night sky.
Contrast and Brightness Adjustments
Adjusting the contrast and brightness is another crucial step in processing your astrophotography data. These adjustments can help bring out the faint details and make your image more visually appealing.
| Adjustment | Description |
|---|---|
| Contrast | Increases the difference between the dark and light areas of your image. |
| Brightness | Adjusts the overall lightness of your image. |
| Curves | Use curves adjustments for more precise control over contrast and brightness. |
| Levels | Adjust the levels to fine-tune the shadows, midtones, and highlights. |
Proper contrast and brightness adjustments can make your astrophotography images stand out, revealing the intricate details of the cosmos.
Advanced Techniques
For those looking to take their astrophotography to the next level, there are several advanced techniques you can explore.
| Technique | Description |
|---|---|
| HDR Imaging | Combines multiple exposures to capture a wider dynamic range. |
| Panoramic Imaging | Creates wide-field images by stitching multiple frames together. |
| Infrared Imaging | Captures the invisible infrared light, revealing new details. |
| Software | Specialized tools like PixInsight, AstroPixelProcessor, and others. |
These advanced techniques can help you push the boundaries of your astrophotography, revealing new and exciting aspects of the night sky.
Pre-Processing Techniques for Clear Images
When you dive into the world of astrophotography, pre-processing your images is crucial. This step helps eliminate noise, correct color, and improve overall clarity. Let’s explore some techniques that will elevate your astrophotography game.
Stacking Your Images
Stacking is a powerful method to enhance the quality of your astrophotography images. By combining multiple exposures, you can significantly reduce noise and bring out more details. Imagine it as layering cakes; each layer adds more flavor and texture.
Benefits of Stacking:
- Noise Reduction: Combining several images helps to average out the noise, resulting in a cleaner final image.
- Increased Detail: More exposures mean more data, which translates to finer details in your final image.
- Dynamic Range: Stacking can help capture a wider range of light levels, from the darkest shadows to the brightest highlights.
Steps for Stacking:
- Capture Multiple Exposures: Take several shots of the same scene. Aim for at least 10-20 images.
- Align the Images: Use software like DeepSkyStacker or Sequator to align the stars in each photo.
- Combine the Images: The software will then stack the aligned images, averaging out the noise and enhancing details.
| Software | Features | Platform |
|---|---|---|
| DeepSkyStacker | Free, easy to use, great for beginners | Windows |
| Sequator | Handles star trails and landscape astrophotography | Windows |
| AstroPixelProcessor | Advanced features, supports various file formats | Windows, Mac, Linux |
For those using DSLRs or mirrorless cameras, stacking can make a huge difference. Check out this comparison of DSLRs and mirrorless cameras for astrophotography to see which might work best for you.
Removing Light Pollution
Light pollution is the bane of every astrophotographer’s existence. It can wash out the stars and obscure faint details. But don’t worry; there are ways to mitigate its effects.
Techniques for Reducing Light Pollution:
- Use Light Pollution Filters: These filters block out specific wavelengths of light from streetlights and other sources. They’re a game-changer for urban astrophotographers.
- Choose a Dark Site: If possible, travel to a location with minimal light pollution. Apps like Dark Sky Finder can help you locate the darkest spots near you.
- Post-Processing: Software tools can help remove the gradient caused by light pollution.
| Filter Type | Best For | Example |
|---|---|---|
| Broadband Filters | General light pollution | L-Pro, IDAS LPS-D1 |
| Narrowband Filters | Specific wavelengths (e.g., H-alpha) | Optolong L-eNhance, Astronomik CLS-CCD |
For more on filters, this guide on the best filters for enhancing your astrophotography shots can provide further insights.

Enhancing Details in Your Photos
When you dive into the world of astrophotography, the devil is in the details. Capturing the night sky is only half the battle; the real magic happens during post-processing. Here, we’ll explore advanced techniques to bring out the best in your images, focusing on sharpening and noise reduction methods.
Sharpening Techniques
Sharpening your astrophotography images is all about making the stars pop and the details in nebulas and galaxies stand out. But be cautious—over-sharpening can introduce artifacts that detract from the beauty of your shot.
Unsharp Masking
Unsharp Masking is a classic technique that enhances the contrast along the edges within your image. This method is particularly effective in bringing out the fine details in star clusters and nebulae.
| Parameter | Recommended Setting |
|---|---|
| Amount | 150% – 200% |
| Radius | 1.0 – 2.0 pixels |
| Threshold | 0 – 5 |
Deconvolution
Deconvolution is a more sophisticated technique that attempts to reverse the blurring effects caused by your telescope and atmospheric conditions. This method can significantly enhance the sharpness of your images but requires careful handling.
| Parameter | Recommended Setting |
|---|---|
| Iterations | 10 – 30 |
| PSF (Point Spread Function) | Custom based on your setup |
Noise Reduction Methods
Noise is the bane of astrophotography. High ISO settings and long exposures can introduce unwanted graininess. Effective noise reduction techniques can help you achieve cleaner, crisper images.
Gaussian Blur
Applying a Gaussian Blur to the luminance channel can help reduce noise without sacrificing too much detail. This method is particularly useful for images with large, smooth areas like the Milky Way.
| Parameter | Recommended Setting |
|---|---|
| Radius | 2.0 – 3.0 pixels |
Median Filters
Median Filters are excellent for reducing noise while preserving edges. This technique is particularly effective for images with star fields, as it maintains the sharpness of the stars.
Using Median Filters
Median Filters work by replacing each pixel’s value with the median value of the surrounding pixels. This method is less likely to blur edges compared to other noise reduction techniques.
| Parameter | Recommended Setting |
|---|---|
| Radius | 1.0 – 2.0 pixels |
For a more in-depth understanding of how to choose the best telescope for astrophotography, you might want to explore this guide.
Combining Techniques for Optimal Results
Combining sharpening and noise reduction techniques can yield stunning results. For instance, you might start with Unsharp Masking to enhance details, followed by a Median Filter to reduce noise. Always remember to work in layers so you can adjust the intensity of each effect.
Advanced Software Tools
Utilizing advanced software can make a significant difference in your post-processing workflow. Software like PixInsight offers specialized tools for deconvolution and noise reduction, tailored specifically for astrophotography.
For those interested in exploring more about the best software for editing astrophotography images, check out this comprehensive guide.
Practical Tips
- Work in Layers: Always use layers in your editing software. This allows you to make non-destructive edits and fine-tune each adjustment.
- Histogram Stretching: Use histogram stretching to improve the contrast in your images. This technique can help bring out faint details in nebulas and galaxies.
- Color Balance: Adjust the color balance to bring out the natural hues of the night sky. This can make a significant difference in the overall appearance of your image.
Essential Gear
Having the right gear is crucial for capturing high-quality astrophotography images. From cameras and lenses to tripods and filters, each piece of equipment plays a vital role. For a detailed look at essential lenses for capturing the night sky, you might find this article particularly useful.
Color Correction and Balancing
Astrophotography is like painting with light. But once you’ve captured those stunning images, you need to bring out their best features. This is where color correction and balancing come into play. Let’s dive into the techniques that will help you make your night sky photos pop.
Adjusting White Balance
White balance is the cornerstone of color correction. It ensures that the colors in your photo are accurate and natural. When you’re capturing the night sky, the colors can be influenced by various factors such as light pollution, atmospheric conditions, and even your camera’s settings.
- Identify the Light Source:
- Determine the primary light source in your image. This could be the moon, nearby city lights, or even a distant galaxy.
- Use this information to set your white balance. For instance, if you’re dealing with city lights, you might need to adjust for a warmer color temperature.
- Use Software Tools:
- Software like Adobe Lightroom or Photoshop offers tools to adjust white balance.
- In Lightroom, use the “Temperature” and “Tint” sliders. Move the sliders until the colors look natural.
- In Photoshop, use the “Camera Raw Filter” to tweak the white balance.
- Manual Adjustments:
- Sometimes, automatic adjustments might not work perfectly. In such cases, manually adjust the white balance.
- Use a reference point in your image that should be white or gray. Adjust the white balance until this point looks neutral.
Enhancing Star Colors
Stars are not just white dots in the sky. They come in various colors, from blue to red. Enhancing these colors can add depth and beauty to your astrophotography.
- Boost Saturation and Vibrance:
- Use the “Saturation” and “Vibrance” sliders in your editing software to enhance star colors.
- Be careful not to overdo it. Too much saturation can make your image look unnatural.
- Selective Color Adjustments:
- Use selective color adjustment tools to enhance specific colors. For instance, if you want to bring out the blue in certain stars, focus on boosting the blue tones.
- This can be done using the “HSL/Color” panel in Lightroom or the “Selective Color” adjustment in Photoshop.
- Color Masks:
- Create color masks to isolate and enhance specific star colors. This technique allows you to adjust the colors of stars without affecting the rest of the image.
- For example, you can create a mask for blue stars and increase their saturation while keeping the background and other stars unchanged.

Advanced Techniques for Deep Sky Objects
Exploring deep sky objects in astrophotography is like peeling back the layers of the universe. You’ll uncover galaxies, nebulae, and star clusters that are invisible to the naked eye. But capturing these celestial wonders requires more than just a camera and a telescope. Advanced processing techniques can elevate your images to new heights.
HDR Processing
High Dynamic Range (HDR) processing is a game-changer for astrophotography. It allows you to capture a wider range of light and detail from the darkest shadows to the brightest highlights. Heres how you can master HDR processing:
Step-by-Step Guide:
- Capture Multiple Exposures: Take several photos of the same object with different exposure settings. This will help you capture details in both the dark and bright areas.
- Align Your Images: Use software to align your images perfectly. Misaligned images can blur the final result.
- Merge the Exposures: Combine your aligned images into a single HDR image. Most photo editing software has an HDR merge function.
- Fine-Tune the Result: Adjust the brightness, contrast, and saturation to bring out the best in your HDR image.
Tools to Use:
| Software | Features |
|---|---|
| Adobe Photoshop | Advanced HDR merging and editing tools |
| Aurora HDR | User-friendly interface with powerful features |
| Lightroom | Excellent for initial adjustments and merging |
Multi-Scale Processing
Multi-scale processing is another advanced technique that can help you bring out fine details in your astrophotography images. It involves processing different scales of detail separately and then combining them into a single image.
How to Perform Multi-Scale Processing:
- Decompose the Image: Use software to break down your image into different scales of detail. This usually involves separating the image into high, medium, and low-frequency components.
- Process Each Scale Separately: Enhance each scale separately. For example, you might sharpen the high-frequency details and smooth the low-frequency background.
- Recompose the Image: Combine the processed scales back into a single image. This will give you a final image with enhanced details at all scales.
Recommended Software:
| Software | Features |
|---|---|
| PixInsight | Specialized tools for multi-scale processing |
| Photoshop | Advanced layer and filter options |
| GIMP | Free and open-source alternative with powerful features |
Final Touches and Presentation
Cropping and Framing
When you’ve captured a stunning image of the night sky, the next step is to perfect the composition. Cropping and framing are essential techniques to bring out the best in your astrophotography.
First, consider the rule of thirds. This technique involves dividing your image into a 3×3 grid and aligning the most critical elements along these lines or their intersections. This can make your photo more engaging and balanced. For example, if you have a striking Milky Way shot, you might want to position the galaxy along one of these lines.
Important Tip: Always crop with intention. Ask yourself, what story are you trying to tell? Are you highlighting a particular constellation, or is the focus on the interplay between the stars and the landscape?
Common Cropping Techniques for Astrophotography
| Technique | Description |
|---|---|
| Rule of Thirds | Align key elements along the grid lines or their intersections. |
| Golden Ratio | Use the golden ratio to create a naturally pleasing composition. |
| Centering | Place the main subject in the center for a powerful, straightforward image. |
| Diagonal Lines | Use diagonal lines to guide the viewer’s eye through the photo. |
Adding Annotations
Annotations can elevate your astrophotography by providing context and guiding the viewer’s eye to essential features. This is particularly useful for educational purposes or when showcasing your work to an audience that may not be familiar with the night sky.
Types of Annotations
| Annotation Type | Use Case |
|---|---|
| Constellation Lines | Draw lines connecting stars to highlight constellations. |
| Labels | Add text labels to identify planets, stars, or other celestial objects. |
| Arrows | Use arrows to point out specific features or areas of interest. |
When adding annotations, less is often more. Overloading your image with too much information can be overwhelming. Focus on the most critical elements you want to highlight.
Pro Tip: Use a subtle, non-distracting color for your annotations. White or light grey often works well against the dark backdrop of the night sky.
Preparing for Print
Printing your astrophotography can be the final step in bringing your vision to life. Whether you’re preparing a piece for an exhibition or a personal collection, there are several factors to consider to ensure your print is as breathtaking as your digital image.
Choosing the Right Paper
The type of paper you choose can significantly impact the final appearance of your print. Here’s a quick guide to some popular options:
| Paper Type | Characteristics |
|---|---|
| Glossy | High shine, vibrant colors, and deep blacks. |
| Matte | No shine, softer colors, and reduced glare. |
| Metallic | Shiny, reflective surface that enhances contrast and colors. |
| Fine Art Paper | High-quality, textured paper that adds a tactile element to prints. |
Frequently Asked Questions
What software should you use for advanced processing of astrophotography data?
You can use popular software like PixInsight, Adobe Photoshop, or DeepSkyStacker. These tools help you fine-tune your images and bring out hidden details.
How do you reduce noise in astrophotography images?
Use noise reduction filters in your editing software. Try stacking multiple images to average out the noise while preserving details.
What’s the best way to enhance the colors in your astrophotography photos?
Adjust the levels and curves in your software. Use saturation and color balance tools to highlight the colors without oversaturating.
How do you manage star size in advanced processing of astrophotography data?
Use deconvolution and star reduction filters in your processing software. This helps make stars look sharper and more defined.
How can you bring out more details in the faint objects of your images?
Increase the contrast and use selective sharpening tools. Mask the brighter areas to focus adjustments on the faint structures.
