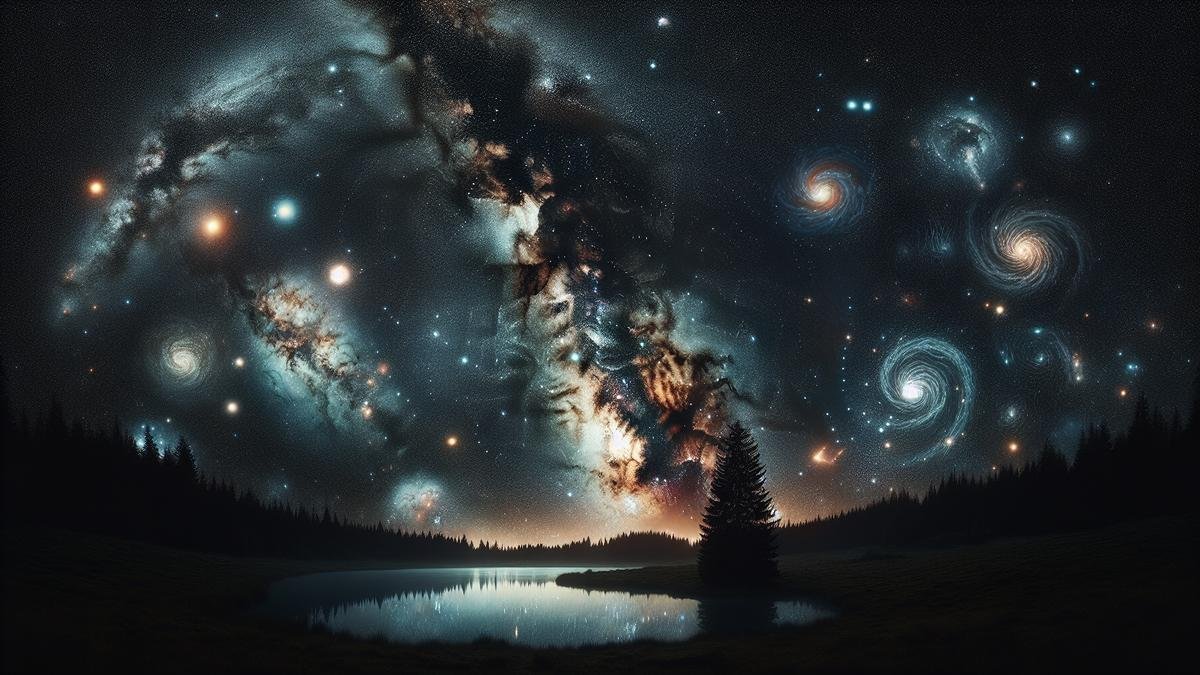
Astrophotography with multiple exposure blending can transform your starry sky photos into true works of art. Whether you’re a beginner looking to capture the twinkling wonders of the night or an experienced photographer aiming to perfect your craft, mastering this technique is key. You’ll learn everything from the essential equipment you need, to capturing those perfect shots, and even the post-processing magic to bring it all together. Ready to take your night-time photography to new heights? Let’s dive right in on your journey to becoming an astrophotography pro!
Key Takeaways
- Learn how to stack multiple images for clear night skies.
- Use software tools for perfect exposure blending.
- Balance light and dark areas in your photos.
- Reduce noise by combining several shots.
- Practice patience for the best astrophotography results.

Understanding the Basics of Astrophotography with Multiple Exposure Blending
Astrophotography isn’t just about pointing your camera at the night sky and clicking a button. It often requires a more nuanced approach, especially when you’re aiming for high-quality images. One such method is Multiple Exposure Blending. This technique allows you to merge several photos into one, bringing out the best elements of each shot. Let’s dive into what this means and why it’s a game-changer for your astrophotography.
What is Multiple Exposure Blending?
Multiple Exposure Blending is a technique where you take several photos of the same scene and combine them. Each photo captures different elements or exposures of the scene. By blending these exposures, you can create a single image that showcases the best aspects of each shot. This method is particularly useful in astrophotography, where lighting conditions can be challenging.
Key Components of Multiple Exposure Blending
| Component | Description |
|---|---|
| Base Exposure | The main shot that captures the overall scene. |
| Highlight Detail | Shots taken to capture details in the bright areas. |
| Shadow Detail | Shots focused on capturing details in the darker areas. |
| Noise Reduction | Multiple exposures help in reducing noise, especially in low-light photos. |
Why Use Multiple Exposures in Astrophotography?
You might wonder why it’s worth the effort to take multiple exposures. The answer lies in the details and quality you can achieve. Astrophotography often deals with extreme contrasts between the dark sky and bright stars or celestial objects. Single exposures can struggle to balance these contrasts, but multiple exposures can handle them beautifully.
Key Benefits of Multiple Exposure Blending
Multiple Exposure Blending offers several benefits that can elevate your astrophotography to new heights. Here are some of the key advantages:
- Enhanced Detail: By blending multiple exposures, you can bring out intricate details in both the shadows and highlights.
- Reduced Noise: Noise is a common issue in low-light photography. Multiple exposures can help to significantly reduce this noise.
- Dynamic Range: This technique allows for a greater dynamic range, capturing both the darkest and brightest parts of the scene.
- Star Trails and Moving Objects: Blending exposures can create stunning star trails or capture moving celestial objects more effectively.
Practical Tips for Multiple Exposure Blending
| Tip | Explanation |
|---|---|
| Use a Tripod | Keeps your camera stable, ensuring that all exposures align perfectly. |
| Manual Settings | Control your camera settings manually to maintain consistency across shots. |
| Post-Processing Software | Use specialized software like Adobe Photoshop or Lightroom for blending. |
| Experiment with Exposure Times | Try different exposure times to capture various details in the scene. |
Selecting the Right Gear
The gear you use can make or break your astrophotography experience. Investing in the right equipment is crucial for capturing high-quality images. For instance, choosing between DSLRs and Mirrorless Cameras can significantly impact your results. Similarly, using Essential Lenses designed for night sky photography can enhance your shots.
Gear Recommendations
| Gear Type | Recommendation |
|---|---|
| Camera | Consider models from our Top 10 Cameras for Astrophotography. |
| Lens | Use wide-angle lenses for capturing expansive night skies. |
| Tripod | A sturdy tripod is essential for stability. Check out Tripods for Astrophotography. |
| Filters | Filters can enhance specific elements in your photos. Explore Best Filters. |
Techniques for Blending Multiple Exposures
Blending multiple exposures isn’t just about taking several photos and merging them. It involves a meticulous process to ensure that the final image is both stunning and accurate. Here are some techniques to help you get started:
Layering in Post-Processing
One of the most common methods for blending exposures is using layers in post-processing software. This allows you to manually adjust the opacity and blending modes of each layer to achieve the desired effect.
| Step | Description |
|---|---|
| Import Photos | Import all your exposures into the software. |
| Align Layers | Make sure all layers are perfectly aligned. |
| Adjust Opacity | Adjust the opacity of each layer to blend them smoothly. |
| Use Masks | Apply masks to control which parts of each layer are visible. |
Automated Blending Tools
Some software offers automated tools for blending multiple exposures. These tools can save time and simplify the process, especially for beginners.
| Tool | Description |
|---|---|
| HDR Merge | Automatically merges multiple exposures to create a high dynamic range image. |
| Stacking | Stacks multiple images to reduce noise and enhance detail. |
| Panorama Merge | Useful for creating wide, panoramic shots of the night sky. |
Advanced Techniques and Tips
Once you’re comfortable with the basics, you can explore more advanced techniques to further improve your astrophotography.
Using Star Trackers
Star trackers can help you capture long-exposure shots without the stars turning into trails. This is especially useful for deep-sky objects like nebulae and galaxies. Learn more about Using Star Trackers for perfect astrophotography.
High ISO Techniques
Using high ISO settings can help you capture faint details in the night sky. However, it also introduces noise. Combining multiple high ISO exposures can help mitigate this issue. Check out our High ISO Tips and Tricks for more information.
Capturing Meteor Showers and Northern Lights
Special celestial events like meteor showers and the Northern Lights require specific techniques. Blending multiple exposures can help you capture the full beauty of these phenomena. For more detailed guides, visit our sections on Photographing Meteor Showers and Capturing the Northern Lights.
Essential Equipment for Astrophotography with Multiple Exposure Blending
Diving into the fascinating world of astrophotography? Youre about to embark on a journey that requires not just passion but also the right tools. Multiple exposure blending can elevate your images to celestial heights. Lets get you geared up with the essentials.
Choosing the Right Camera
Your camera is the heart of your astrophotography setup. Its crucial to pick one that can capture the night sky in all its glory. Heres a handy table to help you decide:
| Camera Type | Pros | Cons |
|---|---|---|
| DSLR | High image quality, interchangeable lenses | Bulky, can be expensive |
| Mirrorless | Compact, silent shooting | Shorter battery life, can overheat |
| Dedicated Astro Cam | Superior low-light performance, cooling system | Expensive, complex for beginners |
For a deeper dive, you might want to check out this comparison of DSLRs and mirrorless cameras.
Must-Have Accessories
Accessories can make or break your astrophotography experience. Heres what you need:
Lenses: A good lens is crucial. Wide-angle lenses are perfect for capturing expansive night skies. Prime lenses with a fast aperture (f/2.8 or lower) are ideal. For more insights, explore essential lenses for capturing the night sky.
Filters: Filters can enhance your shots by reducing light pollution and highlighting specific celestial features. Check out the best filters for astrophotography.
Mounts and Tracking Systems: To capture sharp images of stars, you need a sturdy mount and a tracking system. These tools help you follow the stars movement, preventing blurriness. Learn more in this guide to mounts and tracking systems.
Portable Power Solutions: Nighttime shoots can drain your cameras battery quickly. Portable power solutions can keep you shooting all night. Heres a guide to portable power solutions.
Star Trackers: For even more precision, consider using a star tracker. These devices help you achieve perfect alignment with the stars. Discover the benefits in this star tracker guide.

Step-by-Step Guide to Capturing Multiple Exposures
Setting Up Your Camera
Alright, let’s dive into the nitty-gritty of setting up your camera for astrophotography. This part is like preparing for a grand adventure. You wouldn’t go hiking without the right gear, right? The same goes for snapping those jaw-dropping night sky photos.
First off, choose your camera wisely. If you’re still on the fence about which one to get, have a look at this comparison of DSLRs and mirrorless cameras for astrophotography. Once you’ve got your camera, make sure it’s mounted securely on a sturdy tripod. Wobbly setups are a big no-no. You want your camera as steady as a rock.
Here’s a quick checklist to get your camera ready:
| Step | Action |
|---|---|
| 1 | Set your camera to manual mode. |
| 2 | Choose a wide-angle lens. Check out essential lenses for capturing the night sky. |
| 3 | Adjust your ISO settings. High ISOs are your friend here. For more tips, see astrophotography with high ISO. |
| 4 | Set your aperture wide open. |
| 5 | Focus manually on a bright star. |
Techniques for Capturing Stars and Landscapes
Now that your camera is all set, let’s talk about capturing both stars and landscapes. This is where the magic happens. You might think of it as painting with light.
Capturing Stars
For stars, you’ll need to master the art of long exposure photography. It’s like leaving your cameras eyes open for a longer time to soak in all the light. Here’s a quick rundown:
- Exposure Time: Start with 20-30 seconds. Too long, and you’ll get star trails unless that’s what you’re aiming for.
- ISO Settings: Go high, but not too high. High ISO settings help capture more light, but too high can introduce noise.
- Aperture: Keep it wide open to let in as much light as possible.
For a deeper dive into long exposure techniques, check out this guide to mastering long exposure astrophotography.
Capturing Landscapes
Landscapes add context to your starry sky photos. They ground your celestial images. Here’s how to blend them seamlessly:
- Foreground Lighting: Use a low-intensity light to illuminate the foreground.
- Multiple Exposures: Take one shot for the sky and another for the landscape. This way, you can blend them later.
Best Times for Astrophotography
Timing is everything. You wouldnt want to go fishing in a puddle, right? The same principle applies here. The best times to capture the night sky are during new moon phases and clear nights.
| Time | Why It’s Best |
|---|---|
| New Moon | The sky is darker, making stars more visible. |
| Clear Nights | Less atmospheric interference. |
For more detailed guidance, you can explore using software for advanced astrophotography planning.
Blending Multiple Exposures
Now, lets get to the heart of the matter – blending multiple exposures. This is where your photos go from good to extraordinary. Think of it as layering flavors in a gourmet dish. Each layer adds depth and richness.
Software Tools
Youll need some software to blend your images. Adobe Photoshop is a popular choice, but there are other options like GIMP and Affinity Photo.
Post-Processing Tips for Blending Exposures
Using Editing Software
When you’re diving into the world of astrophotography, editing software becomes your best friend. These powerful tools allow you to blend multiple exposures seamlessly. By combining different shots, you can create an image that captures the full beauty of the night sky.
First, you need to choose the right software. Programs like Adobe Photoshop, Lightroom, and GIMP are popular choices. Each of these offers a range of features to help you perfect your images.
| Software | Key Features | Price Range |
|---|---|---|
| Adobe Photoshop | Layers, masks, advanced blending modes | Subscription-based |
| Lightroom | Non-destructive editing, presets, easy workflow | Subscription-based |
| GIMP | Free, open-source, extensive plugins | Free |
Once you’ve selected your software, start by importing your images. Make sure your exposures are aligned. This is crucial for a clean blend. Most software has an auto-align feature, but you can also do it manually.
Next, adjust the exposure levels. Each image may have different brightness levels, so balancing them is essential. You can use curves, levels, or exposure sliders to achieve this.
Layering and Masking Techniques
Layering and masking are the bread and butter of blending exposures. These techniques allow you to combine the best parts of each image into a single, stunning photograph.
Layering involves stacking your images on top of each other in the software. Each layer represents a different exposure. This way, you can edit each one individually without affecting the others.
Masking is where the magic happens. Masks let you hide or reveal parts of a layer. This is perfect for blending exposures because you can control which parts of each image are visible.
Here’s a quick guide to layering and masking:
- Import Your Images: Load your exposures into the software.
- Create Layers: Stack your images as separate layers.
- Add Masks: Apply a mask to each layer.
- Blend: Use brushes or gradients to blend the layers together.
| Step | Action | Tools Used |
|---|---|---|
| Import Images | Load your exposures into the software | File > Import |
| Create Layers | Stack images as separate layers | Layer > New Layer |
| Add Masks | Apply a mask to each layer | Layer > Add Mask |
| Blend | Use brushes or gradients to blend layers together | Brush Tool, Gradient Tool |

Common Challenges and How to Overcome Them
Venturing into astrophotography can be as thrilling as it is challenging. You might find yourself grappling with a myriad of obstacles, from light pollution to pesky star trails. But don’t worry! Let’s dive into some common issues and how you can tackle them head-on.
Dealing with Light Pollution
Light pollution can be the bane of an astrophotographer’s existence. Those bright city lights often wash out the stars and make it difficult to capture the night sky in all its glory.
Strategies to Combat Light Pollution:
| Method | Description |
|---|---|
| Travel to Dark Sites | Find locations far from urban areas. Use apps to locate dark sky sites. |
| Use Light Pollution Filters | Special filters can block out artificial light, enhancing star visibility. Explore the best filters for enhancing your astrophotography shots. |
| Post-Processing Techniques | Software like Adobe Photoshop can help reduce the impact of light pollution in your images. |
Avoiding Star Trails
Star trails can be both a creative choice and a nuisance. If you’re aiming for sharp, pinpoint stars, these trails can ruin your shot.
Tips to Avoid Star Trails:
| Technique | Description |
|---|---|
| Shorter Exposures | Use shorter exposure times to prevent stars from trailing. |
| Star Trackers | Invest in a star tracker to follow the stars’ movement. Learn more about using star trackers. |
| Multiple Exposures | Blend multiple shorter exposures to create one sharp image. |
Managing Noise in Your Photos
Noise can be a real headache, especially in low-light conditions. It can make your photos look grainy and detract from the details.
Noise Reduction Techniques:
| Method | Description |
|---|---|
| Lower ISO | Use a lower ISO setting to reduce noise. Check out high ISO tips and tricks. |
| Multiple Exposures | Stack multiple exposures to reduce noise while maintaining detail. |
| Noise Reduction Software | Utilize software like Lightroom or specialized astrophotography tools for noise reduction. |
Blending Multiple Exposures for High-Quality Astrophotography
Blending multiple exposures is a game-changer in astrophotography. It allows you to combine the best elements of several shots into one stunning image. Here’s how you can master this technique.
Why Blend Multiple Exposures?
Blending multiple exposures can help you achieve higher dynamic range, reduce noise, and capture more detail. It’s like having the best of all worlds in one image.
Steps to Blend Multiple Exposures
- Capture Multiple Shots: Take several photos with different exposure settings.
- Align Your Images: Use software to align the images perfectly.
- Stack and Blend: Combine the images, blending the best parts of each.
Tools for Blending Multiple Exposures:
| Software | Description |
|---|---|
| Adobe Photoshop | Widely used for stacking and blending images. |
| DeepSkyStacker | Specialized for astrophotography, great for aligning and stacking. |
| Sequator | Another excellent option for stacking and blending astrophotography images. |
Practical Tips for Blending
Use a Sturdy Tripod: A stable base is crucial for capturing multiple exposures. Find the best tripods for stability and precision.
Shoot in RAW: RAW files retain more detail and are better for post-processing.
Manual Focus: Autofocus can struggle in low light. Switch to manual focus for sharper images.
Advanced Techniques
HDR (High Dynamic Range): Combine exposures with different brightness levels to capture the full range of light.
Focus Stacking: Blend images focused at different distances for greater depth of field.
Noise Reduction Stacking: Combine multiple shots to average out noise, resulting in a cleaner image.
Tools and Gear to Enhance Your Workflow
Having the right tools can make a world of difference. Let’s look at some essential gear and software.
Essential Gear:
| Gear | Purpose |
|---|---|
| Telescope | Capture distant celestial objects. Choose the best telescope for astrophotography. |
| Camera | Both DSLRs and mirrorless cameras work well. Compare DSLRs and mirrorless cameras. |
| Lenses | Different lenses for various types of shots. Explore essential lenses. |
Software:
| Software | Description |
|---|---|
| Adobe Lightroom | Excellent for post-processing and noise reduction. |
| Starry Landscape Stacker | Great for stacking landscape astrophotography shots. |
| PixInsight | Advanced software for deep-sky astrophotography. |
Practical Examples
Imagine you’re out in the field, aiming to capture the Milky Way. You take a series of shots with varying exposures. Later, you use software to align and stack these images, blending the best parts of each. The result? A stunning, high-quality image that showcases the Milky Way in all its glory.
Troubleshooting Common Issues
Even with the best techniques, you might run into problems. Here are some common issues and how to fix them:
Blurry Images: Ensure your tripod is stable and use a remote shutter release to avoid camera shake.
Misaligned Stars: Use software to align your images perfectly.
Excessive Noise: Lower your ISO and use noise reduction techniques.
Real-World Applications
Blending multiple exposures isn’t just for capturing the Milky Way. You can use it for photographing nebulae, galaxies, and even the Northern Lights. Each celestial event presents its own set of challenges and rewards.
Photographing Nebulae: Use long exposures and stack multiple shots. Learn how to photograph nebulae and galaxies.
Capturing the Northern Lights: Shorter exposures work best. Blend multiple shots to capture the full range of colors. Follow a step-by-step guide to capturing the Northern Lights.
Showcasing Your Astrophotography Work
Astrophotography isn’t just about capturing stunning images of the night sky. It’s also about sharing your work with the world. Let’s dive into how you can showcase your astrophotography and make it stand out.
Sharing on Social Media
Social Media is a powerful tool for getting your astrophotography in front of a wider audience. Platforms like Instagram, Facebook, and Twitter are perfect for sharing your work. Here’s how you can make the most of them:
Instagram is a visual platform, making it ideal for astrophotography. Use hashtags like #astrophotography, #nightphotography, and #milkyway to reach a broader audience. Engage with your followers by responding to comments and joining relevant conversations.
Facebook groups dedicated to astrophotography can be a great place to share your work and get feedback. Look for groups like “Astrophotography Enthusiasts” or “Night Sky Photographers.” Sharing your images in these groups can help you connect with other photographers and learn new techniques.
Twitter might not be as visually focused as Instagram, but it’s still a great place to share your work. Use relevant hashtags and tag other astrophotographers to increase your reach. Twitter chats related to photography can also be a good way to engage with the community.
Building an Online Portfolio
An online portfolio is like a digital gallery for your astrophotography. It allows you to showcase your best work in a professional manner. Here are some steps to build an impressive portfolio:
Choose a Platform
There are many platforms available for creating an online portfolio. Some popular options include:
| Platform | Features |
|---|---|
| WordPress | Highly customizable, numerous plugins |
| Squarespace | User-friendly, beautiful templates |
| Wix | Drag-and-drop builder, affordable plans |
| SmugMug | Specifically designed for photographers |
Organize Your Work
Organize your portfolio in a way that makes it easy for viewers to navigate. Consider categorizing your images by subject, such as Milky Way, Star Trails, and Deep Sky Objects.
Include Descriptions
Add descriptions to your images to provide context. Mention the equipment you used, the settings, and any special techniques. For example, if you used a star tracker, explain how it helped you capture the image.
Joining Photography Communities
Being part of a photography community can provide you with support, inspiration, and valuable feedback. Here are some ways to get involved:
Online Forums
Online forums like Cloudy Nights and AstroBin are great places to connect with other astrophotographers. You can share your work, ask for advice, and learn from others’ experiences.
Local Clubs
Joining a local astronomy or photography club can be beneficial. These clubs often have regular meetings, workshops, and outings. It’s a great way to meet other enthusiasts and improve your skills.
Workshops and Conferences
Attending astrophotography workshops and conferences can provide you with hands-on experience and the opportunity to learn from experts. These events can also be a great way to network with other photographers.
Blending Multiple Exposures for High-Quality Astrophotography Images
Blending multiple exposures is a technique that can help you achieve high-quality astrophotography images. It involves taking several shots at different exposures and combining them to create a single, detailed image. Let’s explore some methods for blending multiple exposures.
Why Blend Multiple Exposures?
Blending multiple exposures can help you capture more detail in both the bright and dark areas of your image. This technique is especially useful for astrophotography, where the dynamic range can be quite large.
Methods for Blending Multiple Exposures
There are several methods for blending multiple exposures. Here are some of the most common ones:
Manual Blending
Manual blending involves using software like Photoshop to combine multiple exposures. This method gives you the most control over the final image but can be time-consuming.
HDR (High Dynamic Range) Software
HDR software can automate the blending process. Programs like Photomatix and Aurora HDR are popular choices. These tools can quickly combine multiple exposures and produce a high-quality image.
Stacking
Stacking involves taking multiple exposures of the same scene and combining them to reduce noise and increase detail. Software like DeepSkyStacker and Sequator can help you with this process.
Tips for Successful Blending
Here are some tips to help you achieve the best results when blending multiple exposures:
- Use a Tripod: A stable tripod is essential for keeping your camera steady during long exposures.
- Take Multiple Shots: The more exposures you have, the better your final image will be. Aim for at least 10-20 shots.
- Use a Remote Shutter: A remote shutter can help you avoid camera shake during long exposures.
- Experiment with Settings: Try different exposure times, ISO settings, and apertures to see what works best for your scene.
Frequently Asked Questions
How many exposures should you take for astrophotography?
For optimal results, aim for around 10-15 exposures. This balances noise reduction and detail capture.
What software can you use to blend multiple exposures?
Popular choices include Adobe Photoshop, Lightroom, and DeepSkyStacker. Each offers unique tools for blending.
Can you blend exposures without professional software?
Yes, you can use free options like GIMP or Sequator. They are effective for beginners in astrophotography with multiple exposure blending.
Why is stacking multiple exposures beneficial?
Stacking enhances image quality. It reduces noise and highlights faint celestial details that single shots miss.
Do you need a special camera for astrophotography with multiple exposure blending?
Not necessarily. A DSLR or mirrorless camera with manual settings and good low-light performance works well.
