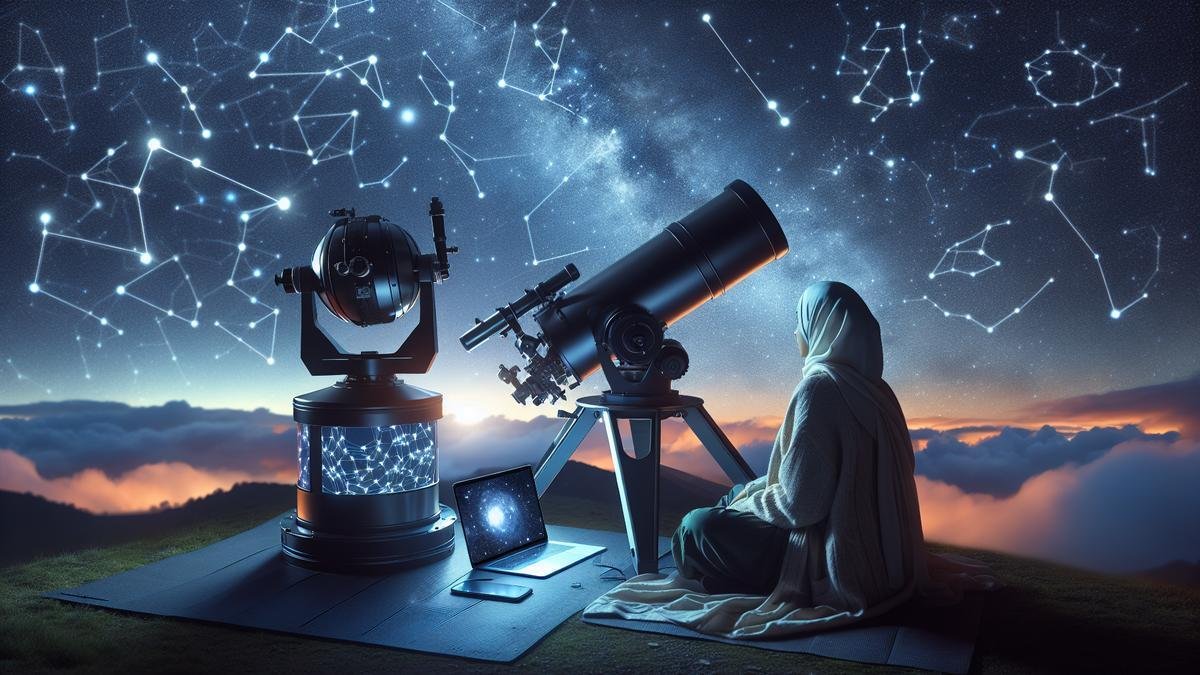
Using telescope automation for efficient astrophotography could revolutionize the way you capture the night sky. Imagine saving time, reducing human error, and getting crystal clear images with ease. This article will guide you through setting up your automated telescope, choosing the right gear, and installing the necessary software. From planning your night sky sessions to troubleshooting common issues, you’ll learn the best practices for automated astrophotography. Get ready to unlock advanced features, and enhance your star-gazing adventures like never before!
Main Points
- Save time with automated settings
- Capture better images effortlessly
- Focus quickly using software tools
- Track stars accurately with automation
- Simplify your astrophotography process
Benefits of Telescope Automation in Astrophotography
Save Time with Automated Telescopes
Imagine this: You’re standing under a blanket of stars, telescope at the ready, but instead of spending hours manually adjusting your equipment, you press a button, and your telescope does all the hard work for you. That’s the magic of telescope automation. Automated telescopes can save you precious time, allowing you to focus on capturing breathtaking images rather than fiddling with settings.
Time-Saving Features
Automated telescopes come with a host of features designed to make your life easier. Here’s a quick look at some of the top benefits:
| Feature | Benefit |
|---|---|
| Auto-Alignment | No more manual alignment; the telescope aligns itself with celestial objects. |
| Pre-Set Coordinates | Input coordinates for specific stars or planets, and the telescope will find them for you. |
| Remote Control | Operate your telescope from a distance using a smartphone or computer. |
| Scheduled Imaging | Set a schedule for your telescope to capture images at specific times. |
By utilizing these features, you can streamline your astrophotography sessions and make the most of your time under the stars.
Capture More Images in Less Time
With an automated telescope, you can capture more images in a shorter amount of time. This is especially useful if you’re working on a project that requires multiple shots of the same celestial object or if you’re trying to capture a rare astronomical event.
Increased Efficiency
Automated telescopes are designed to be efficient. Here’s how they help you capture more images:
| Efficiency Feature | How It Helps |
|---|---|
| Fast Slewing | Quickly move from one object to another without manual adjustments. |
| Auto-Focus | Ensure your images are always sharp without constant tweaking. |
| Image Stacking | Automatically stack multiple images to create a clearer, more detailed final product. |
By leveraging these features, you can maximize your time and capture more stunning images.
Using Telescope Automation for Efficient Astrophotography
Telescope automation isn’t just about saving time; it’s about making your astrophotography sessions more efficient and enjoyable. Here’s how you can use automation to streamline your process and improve your results.
Setting Up Your Automated Telescope
Setting up an automated telescope is easier than you might think. Follow these steps to get started:
- Choose the Right Telescope: Not all telescopes are created equal. Make sure you select one that’s compatible with automation features. For guidance, check out this guide to choosing the best telescope for astrophotography.
- Install the Software: Most automated telescopes come with software that you’ll need to install on your computer or smartphone.
- Calibrate Your Telescope: Follow the manufacturer’s instructions to calibrate your telescope. This usually involves aligning it with a few known stars.
- Input Your Coordinates: Enter the coordinates of the celestial objects you want to capture. The telescope will do the rest.
- Set Your Schedule: If you’re planning to capture images over a long period, you can set a schedule for your telescope to follow.
How to Set Up Your Automated Telescope
Choosing the Right Telescope for Automation
So, you’re ready to dive into the mesmerizing world of astrophotography. But before you can capture those stunning celestial images, you need the right telescope. Choosing the right telescope for automation is crucial. You want something that not only offers excellent optical performance but is also compatible with automation software.
Key Features to Look For:
| Feature | Description |
|---|---|
| Aperture | A larger aperture allows more light to enter, making faint objects visible. |
| Mount Type | Equatorial mounts are ideal for tracking celestial objects. |
| Compatibility | Ensure the telescope is compatible with automation software. |
| Portability | If you plan to travel, consider the weight and size. |
You might want to explore how to choose the best telescope for astrophotography to get a detailed understanding of what suits your needs.
Installing Automation Software
Once you have your telescope, the next step is to install automation software. This software is the brain behind your telescope, guiding it to track and photograph celestial objects with precision.
Steps to Install Automation Software:
- Select the Software: There are several options available, such as Stellarium, Cartes du Ciel, and SkySafari. Choose one that fits your requirements.
- Download and Install: Follow the instructions on the software’s website to download and install it on your computer.
- Connect Your Telescope: Use a USB or serial cable to connect your telescope to your computer. Some modern telescopes also offer wireless connections.
- Calibrate: Align your telescope with known stars to calibrate the software. This step is crucial for accurate tracking.
Automation software not only simplifies the process but also enhances efficiency. For more details, you might find the guide to astrophotography mounts and tracking systems useful.
Improving Image Quality with Automation
Reducing Human Error in Astrophotography
Imagine this scenario: It’s a clear night, and you’re all set up with your telescope, ready to capture the stunning beauty of the cosmos. But as you start, you realize that a tiny mistake in alignment or a slight nudge can ruin your shot. Human error, no matter how small, can make a significant difference in astrophotography.
Here’s where telescope automation comes in. By automating the process, you can significantly reduce the chances of human error. Automated systems can handle the precise movements and adjustments required, leaving you free to focus on other aspects of your shoot.
Benefits of Reducing Human Error
| Benefit | Explanation |
|---|---|
| Precision | Automated systems can make adjustments with a level of accuracy that is hard to achieve manually. |
| Consistency | Once set up, automated systems can replicate the same settings and adjustments repeatedly. |
| Efficiency | Automation reduces the time spent on manual adjustments, allowing you to capture more images. |
Consistent Tracking for Clearer Images
One of the biggest challenges in astrophotography is keeping your telescope perfectly aligned with the object you’re photographing. Even a slight deviation can result in blurry images. Consistent tracking is crucial for capturing clear, sharp images of celestial objects.
Why Consistent Tracking Matters
| Reason | Explanation |
|---|---|
| Sharp Images | Consistent tracking ensures that your telescope stays aligned with the object, resulting in sharper images. |
| Long Exposures | For long exposure shots, consistent tracking is essential to avoid star trails. |
| Less Post-Processing | With better tracking, you’ll spend less time correcting errors in post-processing. |
Using Telescope Automation for Efficient Astrophotography
So, how can you use telescope automation to streamline your astrophotography sessions and improve efficiency? Let’s dive into the details.
Setting Up Your Automated Telescope
First, you’ll need to set up your telescope with an automated mount. These mounts are designed to make precise movements and adjustments, ensuring that your telescope stays aligned with the object you’re photographing.
| Step | Description |
|---|---|
| Choose the Right Mount | Select a mount that is compatible with your telescope and offers the level of automation you need. Guide to Astrophotography Mounts and Tracking Systems |
| Calibrate Your Mount | Follow the manufacturer’s instructions to calibrate your mount for accurate tracking. |
| Connect to a Computer | Many automated mounts can be connected to a computer for more precise control. |
Using Software for Automation
There are several software options available that can help you automate your astrophotography sessions. These programs can control your telescope, camera, and other equipment, allowing you to focus on capturing the perfect shot.
| Software | Features |
|---|---|
| Stellarium | A planetarium software that can control your telescope and help you plan your shoots. |
| Astro Photography Tool (APT) | Offers a range of automation features, including autofocus and image capture. |
| BackyardEOS | Designed for Canon DSLR cameras, this software offers automated image capture and processing. |
Automating Image Capture
Once your telescope is set up and connected to your computer, you can automate the image capture process. This involves setting up your camera to take a series of images at specific intervals, allowing you to capture a sequence of shots without having to manually trigger the shutter.
| Step | Description |
|---|---|
| Set Up Your Camera | Connect your camera to your computer and configure the settings for your shoot. |
| Use Intervalometer | An intervalometer can automate the process of taking multiple exposures. |
| Monitor Progress | Keep an eye on the progress of your shoot to ensure everything is running smoothly. |
Best Practices for Automated Astrophotography
Planning Your Night Sky Sessions
When youre diving into the mesmerizing world of automated astrophotography, planning is your best ally. Its like preparing for a grand adventure. You wouldnt set sail without a map, right? Heres your roadmap to the stars.
Check the Weather
First things first, always check the weather forecast. Clear skies are a must. Cloudy or rainy nights are a no-go. You can use apps like Clear Outside or Weather Underground to get accurate forecasts.
Moon Phases
The moon can be both a friend and a foe. A full moon can wash out the stars, while a new moon provides the darkest skies. Plan your sessions around the moon phases. A simple moon phase calendar can be a lifesaver.
Light Pollution
Light pollution is the bane of astrophotographers. Find dark sky locations using tools like Dark Site Finder or Light Pollution Map. The darker the sky, the better your results.
Target Selection
What do you want to capture? Planets, galaxies, nebulae? Your target will dictate your equipment and settings. Apps like Stellarium or SkySafari can help you locate and identify celestial objects.
Time Management
Astrophotography is a waiting game. Plan your session so youre not wasting precious dark hours. Set up your equipment before sunset and have a checklist to make sure youre ready to go when the stars come out.
| Planning Aspect | Tools/Apps |
|---|---|
| Weather Forecast | Clear Outside, Weather Underground |
| Moon Phases | Moon Phase Calendar |
| Light Pollution | Dark Site Finder, Light Pollution Map |
| Target Selection | Stellarium, SkySafari |
Regular Maintenance of Your Equipment
Your equipment is your trusty steed in this cosmic journey. Regular maintenance is crucial to keep it in top shape. Heres how to keep your gear performing at its best.
Clean Your Optics
Dust and grime can ruin your shots. Use a blower to remove dust and a microfiber cloth for smudges. Avoid touching the lenses directly.
Check Your Power Supply
Nothing is worse than running out of power in the middle of a session. Use a reliable power source and always have spare batteries or a power bank.
Inspect Cables and Connections
Loose or damaged cables can cause connectivity issues. Regularly inspect and replace any worn-out cables.
Software Updates
Keep your software and firmware updated. Manufacturers often release updates that improve performance and fix bugs.
Store Properly
When not in use, store your equipment in a dry, dust-free environment. Use protective cases and covers to prevent damage.
| Maintenance Task | Tips |
|---|---|
| Clean Optics | Blower, Microfiber Cloth |
| Power Supply | Spare Batteries, Power Bank |
| Cables and Connections | Regular Inspections |
| Software Updates | Check Manufacturers Website |
| Proper Storage | Use Protective Cases |
Using Telescope Automation for Efficient Astrophotography
Automation is the magic wand that transforms your astrophotography sessions from laborious to seamless. Heres how to leverage telescope automation for efficient and breathtaking results.
Automated Mounts
Automated mounts are the backbone of your setup. They track celestial objects with precision, eliminating the need for manual adjustments. Brands like Celestron and Sky-Watcher offer excellent options.
Software Integration
Software like NINA (Nighttime Imaging N Astronomy) or SGP (Sequence Generator Pro) can automate your entire session. From focusing to capturing images, these programs handle it all.
Focusing Automation
Automated focusers like the ZWO EAF (Electronic Automatic Focuser) ensure your images are razor-sharp. They adjust the focus throughout the night, compensating for temperature changes.
Guiding Systems
Guiding systems like PHD2 Guiding keep your telescope locked onto your target, preventing star trails. They make long-exposure astrophotography a breeze.
Troubleshooting Common Automation Issues
Dealing with Software Glitches
When you’re deep into a mesmerizing astrophotography session, the last thing you want is a software glitch. These hiccups can throw a wrench in your well-oiled machine. So, how do you tackle these pesky problems?
First, keep your software updated. Regular updates often squash bugs and improve performance. If there’s a glitch, check if an update is available. Next, restart your system. Sometimes, a simple reboot can clear out temporary issues. If the problem persists, check compatibility. Ensure your software is compatible with your telescope and other equipment.
Here’s a quick troubleshooting table for common software issues:
| Issue | Possible Cause | Solution |
|---|---|---|
| Software crashes | Outdated version | Update to the latest version |
| Unresponsive interface | Memory overload | Restart the software and computer |
| Connection issues | Incompatible drivers | Reinstall or update drivers |
| Inaccurate tracking | Calibration error | Recalibrate your telescope |
Handling Mechanical Problems
Mechanical issues can be just as frustrating as software glitches. Your telescope might not move smoothly, or the motor might make strange noises. Heres how you can tackle these problems:
Start by inspecting the hardware. Look for any visible damage or loose parts. Tighten any loose screws and ensure all components are securely fastened. Next, lubricate moving parts. Over time, parts can become stiff, so a bit of lubrication can work wonders. If you notice any unusual noises, it might be a sign of wear and tear. In such cases, replacing the worn-out parts can prevent further damage.
Heres a handy table for mechanical troubleshooting:
| Issue | Possible Cause | Solution |
|---|---|---|
| Stiff movement | Lack of lubrication | Apply appropriate lubricant |
| Unusual noises | Worn-out parts | Replace the affected parts |
| Loose components | Loose screws or bolts | Tighten all screws and bolts |
| Motor not working | Electrical issue | Check wiring and connections |
Advanced Features of Automated Telescopes
Remote Control Capabilities
Imagine this: You’re in your cozy living room, sipping hot cocoa, while your telescope outside is busy capturing stunning images of the cosmos. Sounds like a dream, right? Well, with remote control capabilities, this dream can become your reality. Modern automated telescopes come equipped with features that allow you to control them from a distance. Whether you’re using a smartphone, tablet, or computer, you can adjust the telescope’s position, focus, and even start or stop imaging sessions without ever stepping outside.
This not only adds a layer of comfort but also boosts efficiency. You can monitor weather conditions, make quick adjustments, and ensure that your telescope is always capturing the best possible images. Plus, you can easily share your live feed with friends or fellow astronomy enthusiasts, making the experience even more enjoyable.
Integrating with Other Devices
Your telescope doesn’t have to work alone. By integrating it with other devices, you can create a seamless astrophotography setup that maximizes your results. Here are some key integrations to consider:
- Cameras: Connect your telescope to a high-quality camera to capture detailed images of celestial objects. Check out this guide to top cameras for astrophotography for some excellent options.
- Lenses: Enhance your telescope’s capabilities with specialized lenses. Learn more about essential lenses for capturing the night sky.
- Star Trackers: Improve your tracking accuracy by integrating a star tracker with your telescope. This can help you achieve perfect astrophotography shots.
- Filters: Use filters to enhance the quality of your images. Discover the best filters for enhancing your astrophotography shots.
Using Telescope Automation for Efficient Astrophotography
Now, let’s dive into how you can use telescope automation to streamline your astrophotography sessions and improve efficiency.
Setting Up Your Telescope
Before you start capturing images, you need to set up your telescope properly. Automated telescopes often come with user-friendly interfaces that guide you through the setup process. Here’s a quick checklist to get you started:
- Align the Telescope: Use the built-in alignment tools to ensure your telescope is pointing in the right direction.
- Calibrate the Mount: Proper calibration is crucial for accurate tracking. Refer to this guide to astrophotography mounts and tracking systems for more information.
- Connect Your Devices: Integrate your camera, lenses, and other devices to create a cohesive setup.
Automating Your Imaging Sessions
Once your telescope is set up, you can automate your imaging sessions to save time and effort. Most automated telescopes come with software that allows you to schedule imaging sessions, set exposure times, and even create custom imaging sequences. Here’s how you can make the most of these features:
- Schedule Imaging Sessions: Plan your imaging sessions in advance and let the software handle the rest. This way, you can capture images even when you’re not around.
- Set Exposure Times: Adjust the exposure times based on the celestial objects you’re capturing. For example, you might need longer exposures for faint objects like nebulae.
- Create Custom Sequences: Design custom imaging sequences to capture multiple objects in one session. This can help you make the most of your time and resources.
Monitoring and Adjusting Your Sessions
Automation doesn’t mean you can completely forget about your telescope. You still need to monitor your sessions and make adjustments as needed. Here are some tips to help you stay on top of things:
- Monitor Weather Conditions: Keep an eye on the weather to avoid capturing images during cloudy or rainy nights.
- Adjust Focus and Position: Use the remote control capabilities to fine-tune the focus and position of your telescope.
- Review Images in Real-Time: Check the images as they are being captured to ensure they meet your quality standards.
Frequently asked questions
How do you start using telescope automation for efficient astrophotography?
– Begin by setting up your automated mount and camera system. Connect everything to your computer. Launch your software and input your target coordinates.
What software do you need for telescope automation?
– You’ll need planetarium software, like Stellarium, for choosing targets. Auto-guiding software such as PHD2 keeps your telescope on track.
Can telescope automation improve your efficiency?
– Absolutely! It saves you time and effort. Plus, you can capture more images with less hassle.
How do you ensure your telescope automation works well?
– Regularly update your software and firmware. Double-check all connections. Perform a test run before starting your session.
What are the benefits of using telescope automation for efficient astrophotography?
– It provides consistent tracking and accurate imaging. It also frees you up to focus on other tasks, improving your overall productivity.

