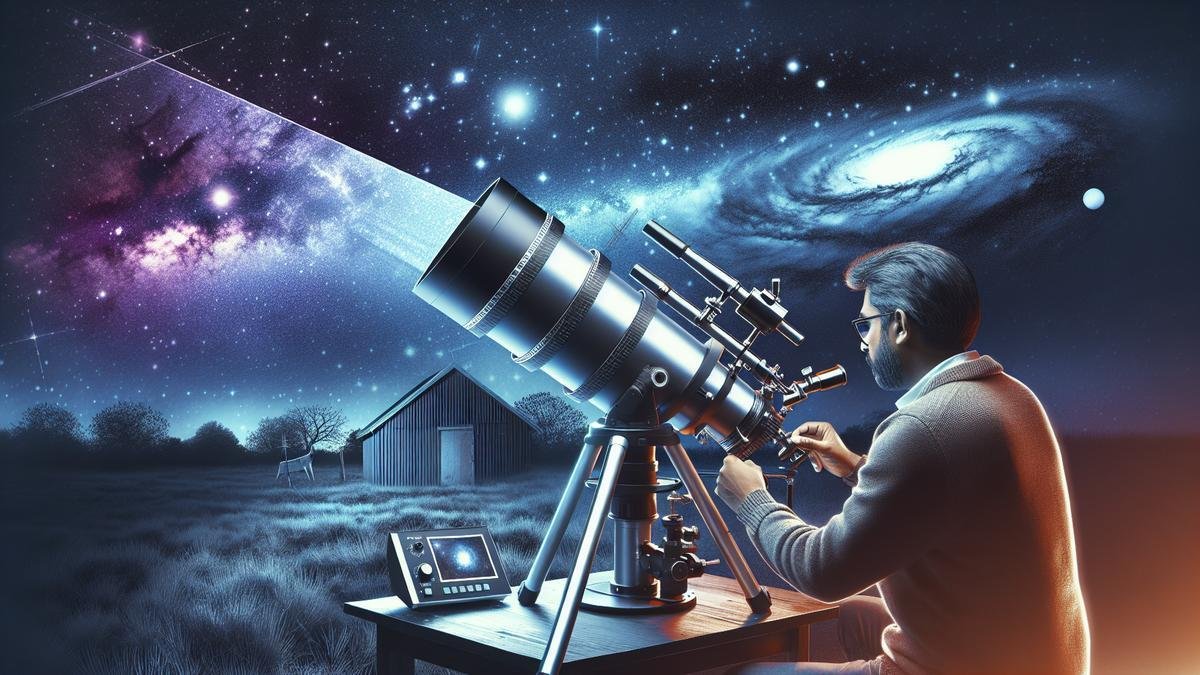
Narrowband Imaging: Enhancing Your Astrophotography is your gateway to capturing the stunning beauty of the cosmos. Have you ever wondered how professionals get those jaw-dropping images of nebulae? This guide unravels the secrets behind narrowband imaging, explaining how it works and the essential gear you’ll need. Whether you’re a newbie or a seasoned astrophotographer, you’ll learn tips for setting up your camera, best exposure settings, and how to tackle common challenges like light pollution and star halos. Plus, we’ll dive into post-processing techniques and how to share your dazzling work with the world. Ready to turn your stargazing passion into breathtaking art? Let’s get started!
Key Takeaways
- Enhances detail in your photos.
- Helps with light pollution issues.
- Brings out specific nebula features.
- Makes your images more vibrant.
- Simplifies post-processing work.

Understanding Narrowband Imaging
What is Narrowband Imaging?
So, you’ve heard about narrowband imaging, huh? It sounds fancy, but let’s break it down. Narrowband imaging is a technique in astrophotography that focuses on capturing specific wavelengths of light emitted by celestial objects. Instead of snapping a picture of the whole visible spectrum, you zero in on just a tiny slice of it. Think of it like tuning a radio to a specific frequency to hear a particular station clearly, without the static from other channels.
Narrowband imaging is particularly useful for photographing nebulae. These glowing clouds of gas in space emit light at very specific wavelengths. By using filters that only let through these wavelengths, you can capture stunning details that would otherwise be lost in the noise of the broader spectrum.
Here’s a quick comparison to help you understand:
| Type of Imaging | Wavelength Range | Typical Use |
|---|---|---|
| Broadband Imaging | Wide range | General astrophotography |
| Narrowband Imaging | Specific wavelengths | Detailed nebula photography |
How Does Narrowband Imaging Work?
Alright, now that you know what narrowband imaging is, let’s dive into how it works. The magic happens with filters. These filters are designed to let through only very narrow bands of light. The most common narrowband filters are Hydrogen-alpha (Ha), Oxygen III (OIII), and Sulfur II (SII).
Here’s a quick rundown of these filters:
| Filter | Wavelength | Common Targets |
|---|---|---|
| Ha | 656.3 nm | Emission nebulae |
| OIII | 500.7 nm | Planetary nebulae |
| SII | 672.4 nm | Supernova remnants |
When you attach one of these filters to your camera or telescope, it blocks out all other wavelengths of light. This means you can capture the faint glow of nebulae without interference from other sources of light pollution or the broader spectrum.
To get the best results, you often combine images taken with different narrowband filters. This process, known as image stacking, allows you to create a composite image that reveals intricate details and vibrant colors.
Benefits of Narrowband Imaging
So, why go through all this trouble? The benefits of narrowband imaging are numerous and can significantly enhance your astrophotography.
Enhanced Contrast
One of the most significant advantages is the enhanced contrast. By focusing on specific wavelengths, you can bring out the fine details in nebulae and other celestial objects. This is particularly useful if you’re shooting in areas with high light pollution.
Reduced Light Pollution
Light pollution is the bane of any astrophotographer’s existence. Narrowband imaging helps mitigate this issue by filtering out unwanted wavelengths of light. This means you can capture stunning images even from urban areas.
Greater Detail
Narrowband imaging allows you to capture greater detail in your subjects. The specific wavelengths you focus on can reveal structures and features that would be invisible in broadband images.
Choosing the Right Equipment for Narrowband Imaging
Narrowband imaging can transform your astrophotography, revealing the hidden beauty of the cosmos. However, diving into this specialized field requires the right gear. Let’s break down the essential equipment you’ll need.
Essential Gear for Narrowband Imaging
When you’re ready to capture the night sky in all its narrowband glory, having the right tools is crucial. Here’s a rundown of the must-have gear:
- Camera: A dedicated astrophotography camera, such as a cooled CCD or CMOS camera, is ideal. These cameras reduce noise and enhance image quality.
- Mount: A stable and precise mount is essential for tracking celestial objects. Equatorial mounts are preferred for their accuracy.
- Filters: Narrowband filters like H-alpha, OIII, and SII are key to isolating specific wavelengths of light.
- Telescope: A high-quality telescope with good optics will make a significant difference in your images.
- Guiding System: An autoguider helps keep your telescope locked onto its target, reducing star trails and improving image sharpness.
Here’s a quick comparison of some popular cameras for narrowband imaging:
| Camera Model | Sensor Type | Cooling | Price Range |
|---|---|---|---|
| ZWO ASI1600MM Pro | CMOS | Yes | $1,280 – $1,400 |
| QHYCCD QHY163M | CMOS | Yes | $1,300 – $1,500 |
| Atik 383L+ Mono | CCD | Yes | $2,500 – $2,700 |
Best Filters for Narrowband Imaging
Filters are the heart of narrowband imaging. They allow you to capture specific wavelengths of light, revealing details that are invisible in broadband images. Let’s delve into the best filters for this purpose:
H-alpha Filter
The H-alpha filter isolates the hydrogen-alpha line at 656.3 nm. It’s perfect for capturing emission nebulae and other hydrogen-rich regions of space. This filter is especially useful in light-polluted areas.
OIII Filter
The OIII filter targets the doubly ionized oxygen line at 500.7 nm. It’s great for highlighting planetary nebulae and supernova remnants. The OIII filter brings out the teal hues in your images.
SII Filter
The SII filter focuses on the singly ionized sulfur line at 672.4 nm. While less commonly used, it adds depth and contrast to your images by revealing sulfur-rich regions.
Here’s a table summarizing these filters:
| Filter | Wavelength (nm) | Best For | Typical Price |
|---|---|---|---|
| H-alpha | 656.3 | Emission Nebulae | $200 – $400 |
| OIII | 500.7 | Planetary Nebulae | $150 – $350 |
| SII | 672.4 | Adding Depth | $150 – $350 |
Telescope Recommendations
Your telescope is the gateway to the stars. Choosing the right one can make or break your narrowband imaging experience. Here are some top recommendations:
Refractor Telescopes
Refractors are known for their sharp, high-contrast images. They are low-maintenance and excellent for narrowband imaging.
- Sky-Watcher Esprit 100ED: This apochromatic refractor offers superb optics and build quality. It’s a favorite among astrophotographers.
- William Optics ZenithStar 73: A more budget-friendly option, this refractor still delivers excellent performance.
Reflector Telescopes
Reflectors, particularly Newtonians, provide large apertures at a lower cost. They are great for capturing faint details.
- Orion 8″ f/3.9 Newtonian Astrograph: This telescope offers a wide field of view and fast optics, perfect for deep-sky imaging.
- Sky-Watcher Quattro 200P: Another excellent Newtonian, it provides a good balance of aperture and price.

Techniques for Capturing Stunning Images
Setting Up Your Camera for Narrowband Imaging
Narrowband imaging is like painting with a fine brush. It allows you to capture the cosmos in vivid detail by isolating specific wavelengths of light. To get started, you’ll need a camera that excels in low-light conditions. If youre still on the hunt for the perfect camera, check out this Top 10 Cameras for Astrophotography in 2024.
Step 1: Choose the Right Filters
Narrowband filters are your best friends here. These filters, such as Hydrogen-alpha (Ha), Oxygen III (OIII), and Sulfur II (SII), allow you to isolate specific wavelengths. This isolation makes it easier to capture intricate details in nebulae and other celestial objects.
| Filter Type | Wavelength (nm) | Best for Capturing |
|---|---|---|
| Hydrogen-alpha (Ha) | 656.3 | Emission Nebulae |
| Oxygen III (OIII) | 500.7 | Planetary Nebulae |
| Sulfur II (SII) | 672.4 | Supernova Remnants |
Step 2: Camera Settings
Set your camera to a low ISO to reduce noise. Narrowband imaging often involves long exposures, so it’s crucial to minimize any electronic interference. If youre looking for more tips on handling high ISO settings, this Astrophotography with High ISO: Tips and Tricks guide can be invaluable.
Step 3: Mount and Tracking
Your camera needs to be rock steady. A good mount and tracking system are essential for long exposures. Consider investing in a high-quality tracking system to keep your celestial targets from drifting. For more information on selecting the right mount, Guide to Astrophotography Mounts and Tracking Systems can help you make an informed decision.
Tips for Focusing in Narrowband Imaging
Focusing in narrowband imaging can be a bit of a tightrope walk. Here are some tips to help you keep your balance.
Use a Bahtinov Mask
A Bahtinov mask is an invaluable tool for achieving precise focus. Place it over your telescopes aperture, and you’ll see a diffraction pattern on your camera’s live view. Adjust the focus until the central spike is perfectly aligned.
Live View and Zoom
Most modern cameras have a live view feature. Zoom in on a bright star and adjust the focus until the star appears as a sharp point. This method is especially effective when combined with a Bahtinov mask.
Autofocus Systems
Some advanced telescopes come with autofocus systems. These systems can automatically adjust the focus based on the temperature and other environmental factors. While they can be pricey, they offer convenience and precision.
Exposure Settings for Best Results
Getting the exposure right in narrowband imaging is like finding the sweet spot in a game of darts. Too short, and you miss the target; too long, and you overshoot.
Balancing Exposure Time and ISO
Long exposures are the bread and butter of narrowband imaging. Start with an exposure time of around 300 seconds (5 minutes) and adjust based on your results. Keep your ISO as low as possible to minimize noise. For more detailed guidance on long exposures, the Mastering Long Exposure Astrophotography guide offers comprehensive tips.
| Exposure Time | ISO | Result |
|---|---|---|
| 60 seconds | 1600 | High noise, low detail |
| 300 seconds | 800 | Balanced detail and noise |
| 600 seconds | 400 | High detail, low noise |
Stacking Images
Stacking multiple images can significantly improve the quality of your final photo. This technique involves taking several shorter exposures and combining them to create a single, high-quality image. For a deep dive into stacking, check out Combining and Stacking Images for Astrophotography.
Post-Processing Your Narrowband Images
So, you’ve captured some breathtaking narrowband images of the night sky. Now what? The magic truly begins when you start post-processing your images. It’s like developing a photograph in a darkroom, but with a digital twist. Let’s dive into the nitty-gritty of enhancing your narrowband images to make them pop.
Software Tools for Narrowband Imaging
When you’re ready to polish your astrophotography, having the right software tools is crucial. Here’s a rundown of some popular options:
| Software | Features | Best For |
|---|---|---|
| PixInsight | Specialized for astrophotography, advanced algorithms for image stacking and noise reduction | Advanced users |
| Adobe Photoshop | Versatile, great for layering and detailed adjustments | Intermediate to advanced users |
| DeepSkyStacker | Free, simple to use, excellent for stacking multiple exposures | Beginners |
| Affinity Photo | Affordable, good for layering and color adjustments | Intermediate users |
| AstroPixel Processor | User-friendly, great for mosaics and gradient removal | All levels |
Each of these tools has its strengths. For instance, PixInsight is a powerhouse for those who want to delve deep into the complexities of astrophotography. On the other hand, DeepSkyStacker is fantastic for beginners who need something straightforward.
Steps to Enhance Your Images
Post-processing might sound daunting, but breaking it down into steps can make it more manageable. Heres a step-by-step guide to get you started:
1. Stacking Your Images
- Why? Stacking multiple exposures reduces noise and enhances detail.
- How? Use software like DeepSkyStacker to align and stack your images. This process averages out the noise and brings out the faint details in your photos.
2. Calibrating Your Frames
- Why? Calibration corrects for imperfections in your camera sensor and optics.
- How? Apply dark, flat, and bias frames to your stacked image. These frames help remove sensor noise, vignetting, and other artifacts.
3. Stretching the Histogram
- Why? Stretching the histogram reveals hidden details in your image.
- How? Use the levels or curves tool in your software to adjust the brightness and contrast. Be careful not to overdo it—subtlety is key.
4. Balancing Colors
- Why? Proper color balance ensures your image looks natural and highlights the different elements.
- How? Adjust the color channels individually to bring out the distinct hues captured by your narrowband filters. Tools like PixInsight and Photoshop excel at this.
5. Reducing Noise
- Why? Noise can obscure the fine details in your image.
- How? Use noise reduction tools in your software. PixInsight has powerful algorithms for this, but even Photoshops noise reduction filters can be quite effective.
6. Sharpening Details
- Why? Sharpening brings out the fine structures in your image.
- How? Apply sharpening filters sparingly. Too much can introduce artifacts. Tools like the high-pass filter in Photoshop can help.
Combining Different Filter Data
Narrowband imaging often involves capturing data through multiple filters, such as Hydrogen-alpha (Ha), Oxygen III (OIII), and Sulfur II (SII). Combining this data can create stunning, detailed images.
Creating a Composite Image
- Why? Combining data from different filters enhances the overall image, revealing different aspects of the celestial object.
- How? Use software like PixInsight or Photoshop to layer the images. Assign each filter to a color channel (e.g., Ha to red, OIII to green, SII to blue).
Color Mapping Techniques
- Hubble Palette (SHO): Assign SII to red, Ha to green, and OIII to blue. This technique creates the iconic Hubble Space Telescope images.
- CFHT Palette (HOS): Assign Ha to red, OIII to green, and SII to blue. This palette can produce more natural-looking images.
| Technique | Red Channel | Green Channel | Blue Channel |
|---|---|---|---|
| Hubble Palette | SII | Ha | OIII |
| CFHT Palette | Ha | OIII | SII |

Overcoming Common Challenges
Dealing with Light Pollution
Light pollution is the bane of many astrophotographers. You might find yourself frustrated by the unwanted glow from city lights that washes out the stars. However, narrowband imaging can be your secret weapon. By using filters that only allow specific wavelengths of light to pass through, you can significantly reduce the impact of light pollution on your images.
Types of Narrowband Filters:
| Filter Type | Wavelength (nm) | Ideal Targets |
|---|---|---|
| H-alpha | 656.3 | Nebulae |
| OIII | 500.7 | Planetary Nebulae, Supernova Remnants |
| SII | 672.4 | Emission Nebulae |
These filters work wonders by isolating the light emitted by specific elements in celestial objects, such as hydrogen, oxygen, and sulfur. When you use these filters, you can capture stunning details in nebulae and galaxies, even from light-polluted areas.
Avoiding Star Halos in Your Images
Star halos can be another pesky issue. These bright rings around stars can detract from the beauty of your astrophotography. To mitigate this, consider using anti-reflection coatings on your lenses and filters. These coatings help to reduce the internal reflections that cause halos.
Additionally, proper calibration is key. By taking dark frames, flat frames, and bias frames, you can correct for imperfections in your imaging setup. This will help you achieve cleaner, more detailed images.
Calibration Frames:
| Frame Type | Purpose |
|---|---|
| Dark | Corrects for sensor noise |
| Flat | Corrects for vignetting and dust |
| Bias | Corrects for readout noise |
Troubleshooting Focus Issues
Achieving sharp focus in astrophotography can be tricky. You might find that your images are slightly blurry, despite your best efforts. One effective technique is to use a Bahtinov mask. This simple tool creates diffraction spikes around stars, allowing you to fine-tune your focus with precision.
Focusing Tools:
| Tool | Function |
|---|---|
| Bahtinov Mask | Creates diffraction spikes for precise focusing |
| Focusing Software | Assists in achieving sharp focus through software algorithms |
Another tip is to focus on a bright star before slewing to your target object. This can help you get a more accurate focus, especially when using narrowband filters that may dim the overall light.
Narrowband Imaging: Enhancing Your Astrophotography
Narrowband imaging is a powerful technique that can elevate your astrophotography to new heights. By capturing specific wavelengths of light, you can reveal intricate details in celestial objects that are often hidden in broadband images. This technique is particularly useful for photographing nebulae, where different elements emit light at distinct wavelengths.
Benefits of Narrowband Imaging:
| Benefit | Description |
|---|---|
| Reduced Light Pollution Impact | Filters out unwanted light from artificial sources |
| Enhanced Detail | Captures fine structures in nebulae and galaxies |
| Improved Contrast | Isolates specific elements, increasing image contrast |
When you use narrowband filters, you can create stunning images that showcase the beauty of the cosmos in vivid detail. These filters allow you to highlight specific features, such as the hydrogen-alpha regions in emission nebulae or the oxygen-III regions in planetary nebulae.
Equipment for Narrowband Imaging
To get started with narrowband imaging, you’ll need a few key pieces of equipment. First and foremost, you’ll need a camera that is capable of long exposures and has good sensitivity to the wavelengths you’re interested in. Many astrophotographers prefer using dedicated astronomy cameras for this purpose, as they offer better performance than standard DSLRs or mirrorless cameras.
Recommended Cameras:
| Camera Model | Features |
|---|---|
| ZWO ASI1600MM Pro | Monochrome sensor, high sensitivity |
| QHYCCD QHY163M | Low noise, high dynamic range |
| Atik 460EX | Excellent sensitivity, good cooling capabilities |
In addition to a suitable camera, you’ll need a set of narrowband filters. These filters are typically mounted in a filter wheel, allowing you to switch between different wavelengths without having to manually change the filter.
Recommended Filters:
| Filter Brand | Wavelengths Available |
|---|---|
| Astrodon | H-alpha, OIII, SII |
| Baader Planetarium | H-alpha, OIII, SII |
| Chroma Technology | H-alpha, OIII, SII |
Finally, you’ll need a robust mount and tracking system to keep your telescope steady during long exposures. Accurate tracking is essential for capturing sharp images, especially when using narrowband filters that require longer exposure times.
Recommended Mounts:
| Mount Model | Features |
|---|---|
| Sky-Watcher EQ6-R Pro | High payload capacity, accurate tracking |
| Celestron CGX | Advanced tracking algorithms, easy alignment |
| iOptron CEM60 | Lightweight, high precision |
Capturing and Processing Narrowband Images
Once you have your equipment set up, it’s time to start capturing images. You’ll need to take multiple exposures through each narrowband filter, typically ranging from a few minutes to several hours per exposure. The exact exposure time will depend on the brightness of your target and the sensitivity of your camera.
Exposure Guidelines:
| Filter Type | Typical Exposure Time (minutes) |
|---|---|
| H-alpha | 5-30 |
| OIII | 5-30 |
| SII | 5-30 |
After capturing your images, you’ll need to process them to bring out the details. This typically involves stacking multiple exposures to reduce noise and increase signal-to-noise ratio. You can then combine the different narrowband channels to create a color image.
Processing Steps:
| Step | Description |
|---|---|
| Stacking | Combine multiple exposures to reduce noise |
| Calibration | Apply dark, flat, and bias frames |
| Combination | Merge narrowband channels into a color image |
| Enhancement | Adjust contrast, brightness, and color balance |
There are several software tools available that can help you with this process. Popular choices include PixInsight, DeepSkyStacker, and Adobe Photoshop.
Sharing and Showcasing Your Work
Best Platforms to Share Your Astrophotography
When you’ve captured the breathtaking beauty of the cosmos through narrowband imaging, its time to share your masterpieces with the world. The right platform can make a significant difference in how your work is perceived and appreciated.
Instagram stands out as a visual-centric platform. Its user-friendly interface and extensive reach make it ideal for showcasing your astrophotography. Use relevant hashtags like #astrophotography, #narrowbandimaging, and #nightphotography to increase visibility. Instagram Stories and Reels can also provide a dynamic way to engage your audience.
Flickr is another excellent choice, especially for high-resolution images. It allows you to organize your photos into albums and join groups dedicated to astrophotography. This platform is particularly valuable for connecting with other enthusiasts and professionals.
500px offers a more curated experience. It’s a platform where quality is valued over quantity. By sharing your work here, you can gain exposure to a community that appreciates high-quality photography.
AstroBin is a niche platform specifically designed for astrophotographers. It provides advanced tools for image analysis and a community that understands the technical aspects of your work. This is a great place to get feedback from peers who share your passion.
Reddit has several communities, such as r/astrophotography, where you can share your images and get constructive feedback. Reddits upvote system can help your work gain visibility quickly if it resonates with the community.
Building an Online Portfolio
Creating an online portfolio is essential for establishing your presence as an astrophotographer. A well-structured portfolio not only showcases your best work but also tells your story and demonstrates your growth over time.
Selecting a Platform
Several platforms can help you build a professional portfolio:
| Platform | Features |
|---|---|
| WordPress | Highly customizable, numerous themes, plugins for SEO and social media integration. |
| Squarespace | User-friendly, aesthetically pleasing templates, built-in analytics. |
| Wix | Drag-and-drop interface, customizable templates, free and premium plans. |
| SmugMug | Specifically designed for photographers, e-commerce integration, unlimited storage. |
| Zenfolio | Professional templates, marketing tools, client proofing, and sales options. |
Structuring Your Portfolio
- Homepage: Start with a captivating image that represents your best work. Include a brief introduction about yourself and your passion for astrophotography.
- Gallery: Organize your images into categories such as nebulae, galaxies, and star clusters. This makes it easier for visitors to navigate and find what interests them.
- About Me: Share your journey into astrophotography. Highlight any awards, publications, or exhibitions.
- Blog: Regularly update your blog with behind-the-scenes stories, tips, and tutorials. This can drive traffic to your site and keep your audience engaged.
- Contact: Provide a straightforward way for people to reach you. Include links to your social media profiles.
Engaging with the Astrophotography Community
Engagement is crucial for growth and learning. Building connections with other astrophotographers can provide inspiration, feedback, and opportunities for collaboration.
Forums and Online Communities
Participate in forums like Cloudy Nights and Stargazers Lounge. These platforms are treasure troves of information and provide a space to ask questions, share experiences, and get advice.
Social Media Groups
Join Facebook groups dedicated to astrophotography. These groups are often very active and can be a great place to share your work, ask for feedback, and learn from others.
Workshops and Webinars
Attend workshops and webinars hosted by experienced astrophotographers. These events can provide valuable insights into techniques like narrowband imaging and post-processing.
Collaborations
Collaborate with other photographers on projects. This can be a great way to learn new techniques and gain exposure to a broader audience.
Competitions
Enter your work in astrophotography competitions. Winning or even being shortlisted can significantly boost your visibility and credibility.
Narrowband Imaging: Enhancing Your Astrophotography
Narrowband imaging is a technique that involves capturing images through specific filters that isolate certain wavelengths of light. This method allows you to highlight the intricate details of celestial objects that are often lost in broadband imaging.
Why Narrowband Imaging?
Narrowband imaging can enhance your astrophotography by reducing the effects of light pollution and increasing the contrast of specific features. This technique is particularly effective for capturing emission nebulae, as it isolates the light emitted by ionized gases.
| Filter Type | Wavelength (nm) | Target Emission |
|---|---|---|
| Hydrogen Alpha | 656.3 | H II regions |
| Oxygen III | 500.7 | Planetary nebulae, supernova remnants |
| Sulfur II | 672.4 | H II regions |
Equipment for Narrowband Imaging
To get started with narrowband imaging, youll need a few essential pieces of equipment:
- Monochrome Camera: A monochrome camera is essential for narrowband imaging as it allows you to capture the full range of light through each filter.
- Filters: Invest in high-quality narrowband filters. The most common filters are Hydrogen Alpha (Ha), Oxygen III (OIII), and Sulfur II (SII).
- Filter Wheel: A motorized filter wheel makes it easy to switch between filters during your imaging session.
- Telescope: A telescope with a large aperture and good optical quality is crucial for capturing detailed images. Learn more about choosing the best telescope for astrophotography.
- Mount: A stable and accurate mount is essential for long exposure imaging. Discover more about the best mounts and tracking systems.
Capturing Narrowband Images
The process of capturing narrowband images involves several steps:
- Planning: Research the celestial objects you want to capture and determine the best time for imaging.
- Setup: Set up your telescope, mount, and camera. Ensure that your equipment is properly aligned and balanced.
- Focus: Achieve precise focus using a Bahtinov mask or an electronic focuser.
- Filter Selection: Select the appropriate filter for the target object. Start with the Hydrogen Alpha filter to capture the most prominent details.
- Exposure: Take multiple long exposures through each filter. The exposure time will depend on the brightness of the object and the sensitivity of your camera.
- Dithering: Use dithering techniques to reduce noise and improve image quality. Dithering involves slightly shifting the position of the telescope between exposures.
Processing Narrowband Images
Processing narrowband images involves several steps to combine and enhance the data captured through different filters:
- Calibration: Calibrate your images using dark frames, flat frames, and bias frames. This helps to remove sensor noise and optical imperfections.
- Alignment and Stacking: Align and stack your images to increase the signal-to-noise ratio. Software like DeepSkyStacker or PixInsight can be used for this purpose.
- Channel Combination: Combine the images captured through different filters into a single color image. The most common method is the Hubble Palette, where Ha is mapped to green, OIII to blue, and SII to red.
- Color Balance: Adjust the color balance to achieve a natural look. This may involve tweaking the levels and curves in each color channel.
- Noise Reduction: Apply noise reduction techniques to smooth out the image while preserving details. Learn more about how to reduce noise in astrophotography photos.
- Sharpening: Use sharpening techniques to enhance the fine details of your image. Be careful not to over-sharpen, as this can introduce artifacts.
- Final Adjustments: Make final adjustments to contrast, brightness, and saturation to achieve the desired look.
Frequently Asked Questions
What is narrowband imaging in astrophotography?
Narrowband imaging uses specialized filters to isolate specific wavelengths of light. This technique reveals incredible details of celestial objects, enhancing your astrophotography.
How can narrowband imaging enhance my astrophotography results?
Narrowband imaging reduces the interference of light pollution and increases contrast by filtering out unwanted wavelengths. Your astrophotography results become clearer and more detailed.
Do I need special equipment for narrowband imaging?
Yes, you’ll need narrowband filters and a compatible camera. These tools are essential for capturing the unique wavelengths that narrowband imaging focuses on.
Can beginners in astrophotography use narrowband imaging?
Absolutely! With a bit of practice and the right equipment, beginners can also achieve stunning results using narrowband imaging for their astrophotography projects.
What celestial objects benefit the most from narrowband imaging?
Narrowband imaging works best with nebulae and other emission objects. The filters help capture the vibrant colors and intricate details of these stunning space phenomena.
